3)AP Advanced Setting:
Press “System Config“![]() button to enter the system setting page.
button to enter the system setting page.
Network
The network configuration allows the DVR to connect to an Ethernet or
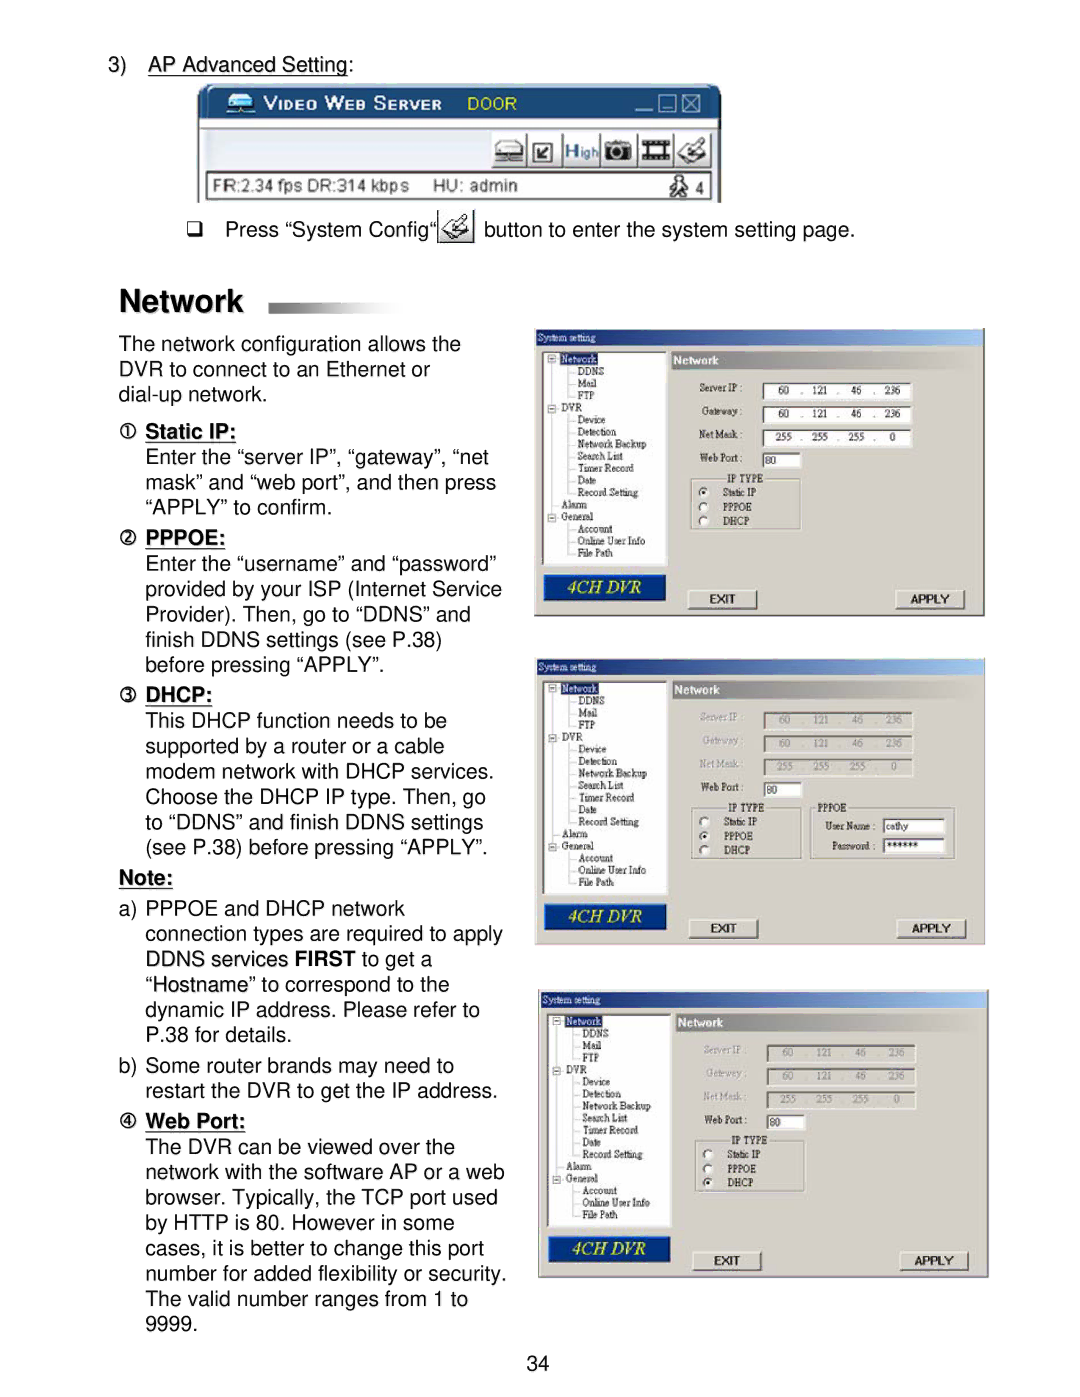
cStatic IP:
Enter the “server IP”, “gateway”, “net mask” and “web port”, and then press “APPLY” to confirm.
dPPPOE:
Enter the “username” and “password” provided by your ISP (Internet Service Provider). Then, go to “DDNS” and finish DDNS settings (see P.38) before pressing “APPLY”.
eDHCP:
This DHCP function needs to be supported by a router or a cable modem network with DHCP services. Choose the DHCP IP type. Then, go to “DDNS” and finish DDNS settings (see P.38) before pressing “APPLY”.
Note:
a)PPPOE and DHCP network connection types are required to apply DDNS services FIRST to get a “Hostname” to correspond to the dynamic IP address. Please refer to P.38 for details.
b)Some router brands may need to restart the DVR to get the IP address.
fWeb Port:
The DVR can be viewed over the network with the software AP or a web browser. Typically, the TCP port used by HTTP is 80. However in some cases, it is better to change this port number for added flexibility or security. The valid number ranges from 1 to 9999.
34