5. Motion Detect Setup
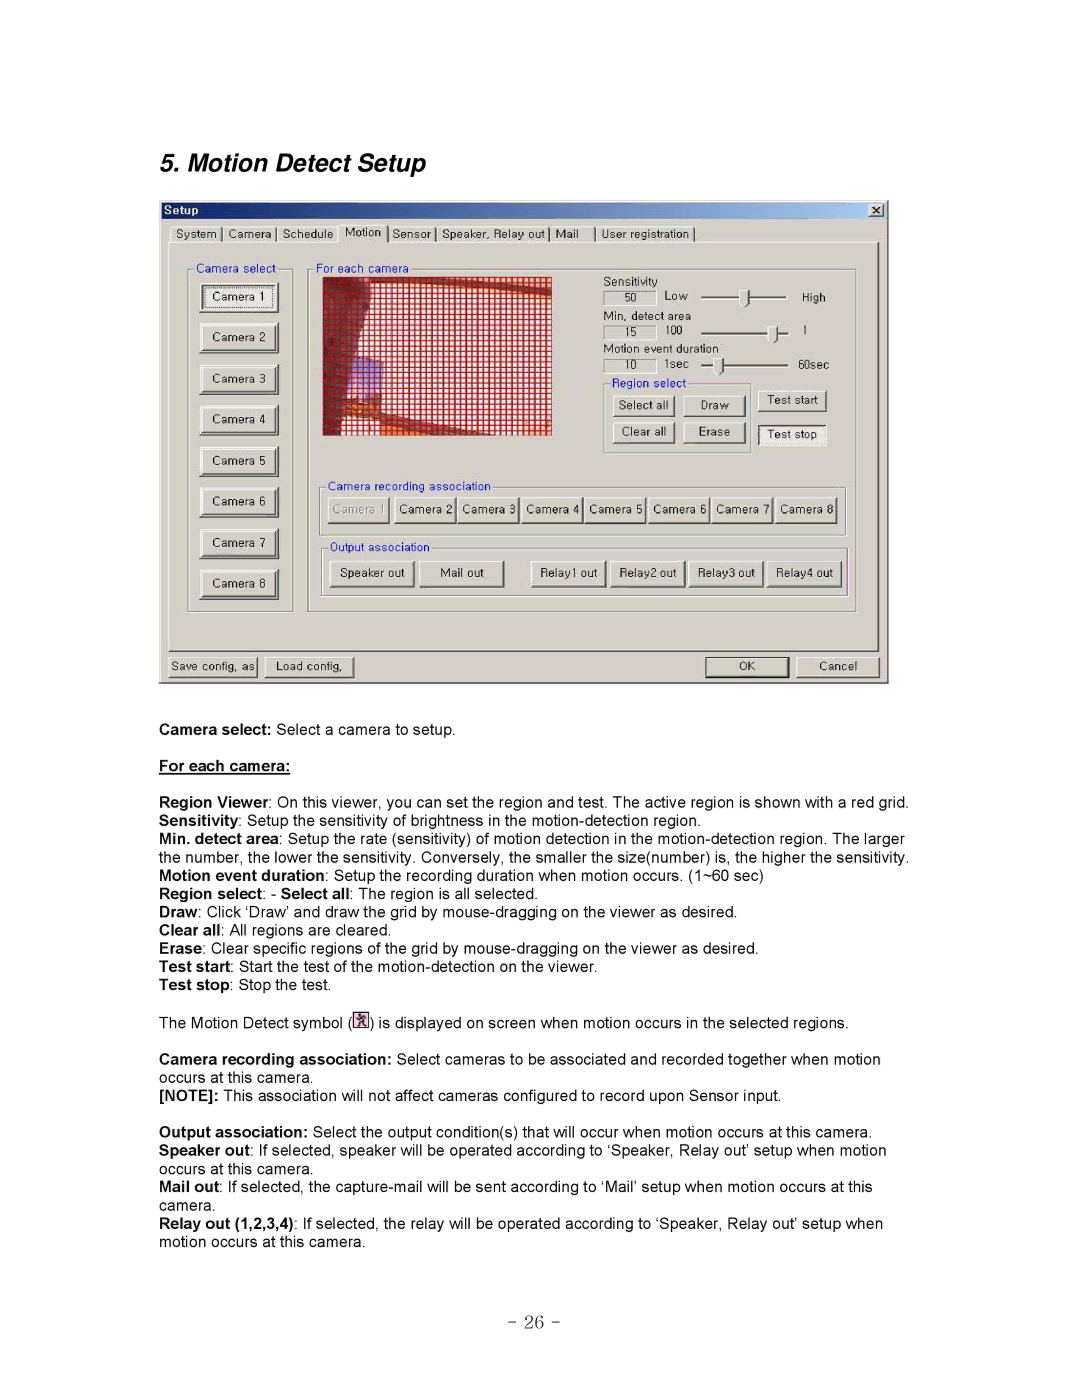
Camera select: Select a camera to setup.
For each camera:
Region Viewer: On this viewer, you can set the region and test. The active region is shown with a red grid.
Sensitivity: Setup the sensitivity of brightness in the
Min. detect area: Setup the rate (sensitivity) of motion detection in the
Region select: - Select all: The region is all selected.
Draw: Click ‘Draw’ and draw the grid by
Clear all: All regions are cleared.
Erase: Clear specific regions of the grid by
Test start: Start the test of the
Test stop: Stop the test.
The Motion Detect symbol (![]() ) is displayed on screen when motion occurs in the selected regions.
) is displayed on screen when motion occurs in the selected regions.
Camera recording association: Select cameras to be associated and recorded together when motion occurs at this camera.
[NOTE]: This association will not affect cameras configured to record upon Sensor input.
Output association: Select the output condition(s) that will occur when motion occurs at this camera.
Speaker out: If selected, speaker will be operated according to ‘Speaker, Relay out’ setup when motion occurs at this camera.
Mail out: If selected, the
Relay out (1,2,3,4): If selected, the relay will be operated according to ‘Speaker, Relay out’ setup when motion occurs at this camera.
- 26 -
