4. Remote Search Mode
*During a Remote Search session, the Setup (![]() ), Bookmark (
), Bookmark (![]() ), Panorama (
), Panorama (![]() ), and Store to AVI
), and Store to AVI
(![]() ) buttons are disabled, while the Local Search & Download buttons are enabled.
) buttons are disabled, while the Local Search & Download buttons are enabled.
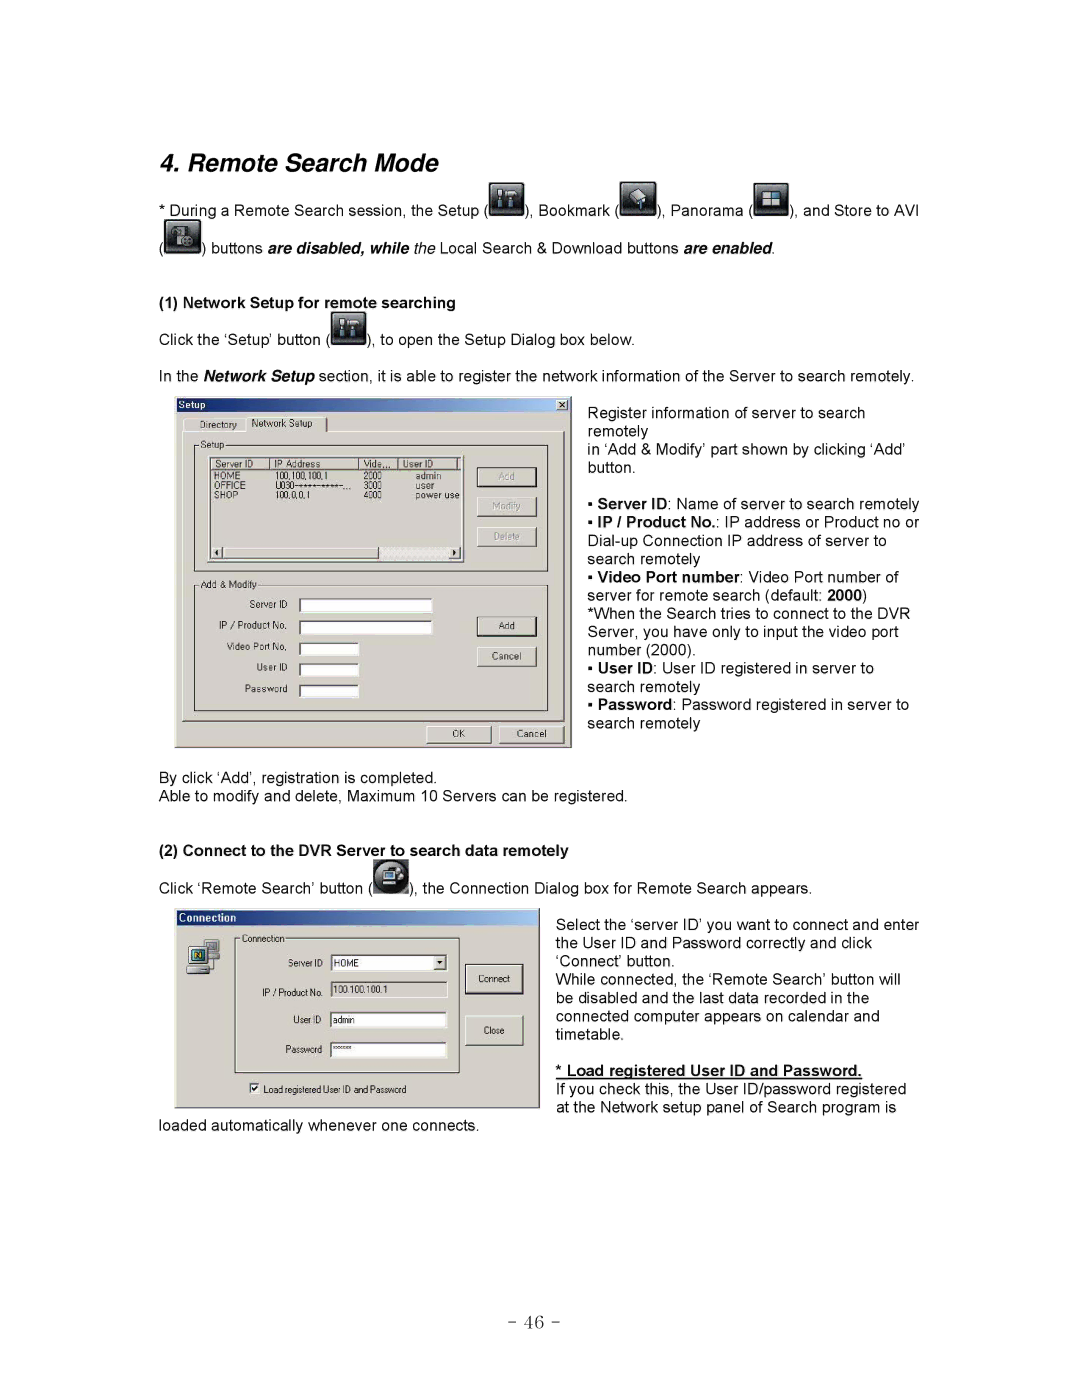
(1) Network Setup for remote searching
Click the ‘Setup’ button (![]() ), to open the Setup Dialog box below.
), to open the Setup Dialog box below.
In the Network Setup section, it is able to register the network information of the Server to search remotely.
Register information of server to search remotely
in ‘Add & Modify’ part shown by clicking ‘Add’ button.
▪ Server ID: Name of server to search remotely
▪ IP / Product No.: IP address or Product no or
▪ Video Port number: Video Port number of
server for remote search (default: 2000) *When the Search tries to connect to the DVR Server, you have only to input the video port number (2000).
▪ User ID: User ID registered in server to search remotely
▪ Password: Password registered in server to search remotely
By click ‘Add’, registration is completed.
Able to modify and delete, Maximum 10 Servers can be registered.
(2) Connect to the DVR Server to search data remotely
Click ‘Remote Search’ button (![]() ), the Connection Dialog box for Remote Search appears.
), the Connection Dialog box for Remote Search appears.
Select the ‘server ID’ you want to connect and enter the User ID and Password correctly and click ‘Connect’ button.
While connected, the ‘Remote Search’ button will be disabled and the last data recorded in the connected computer appears on calendar and timetable.
* Load registered User ID and Password.
If you check this, the User ID/password registered at the Network setup panel of Search program is
loaded automatically whenever one connects.
- 46 -