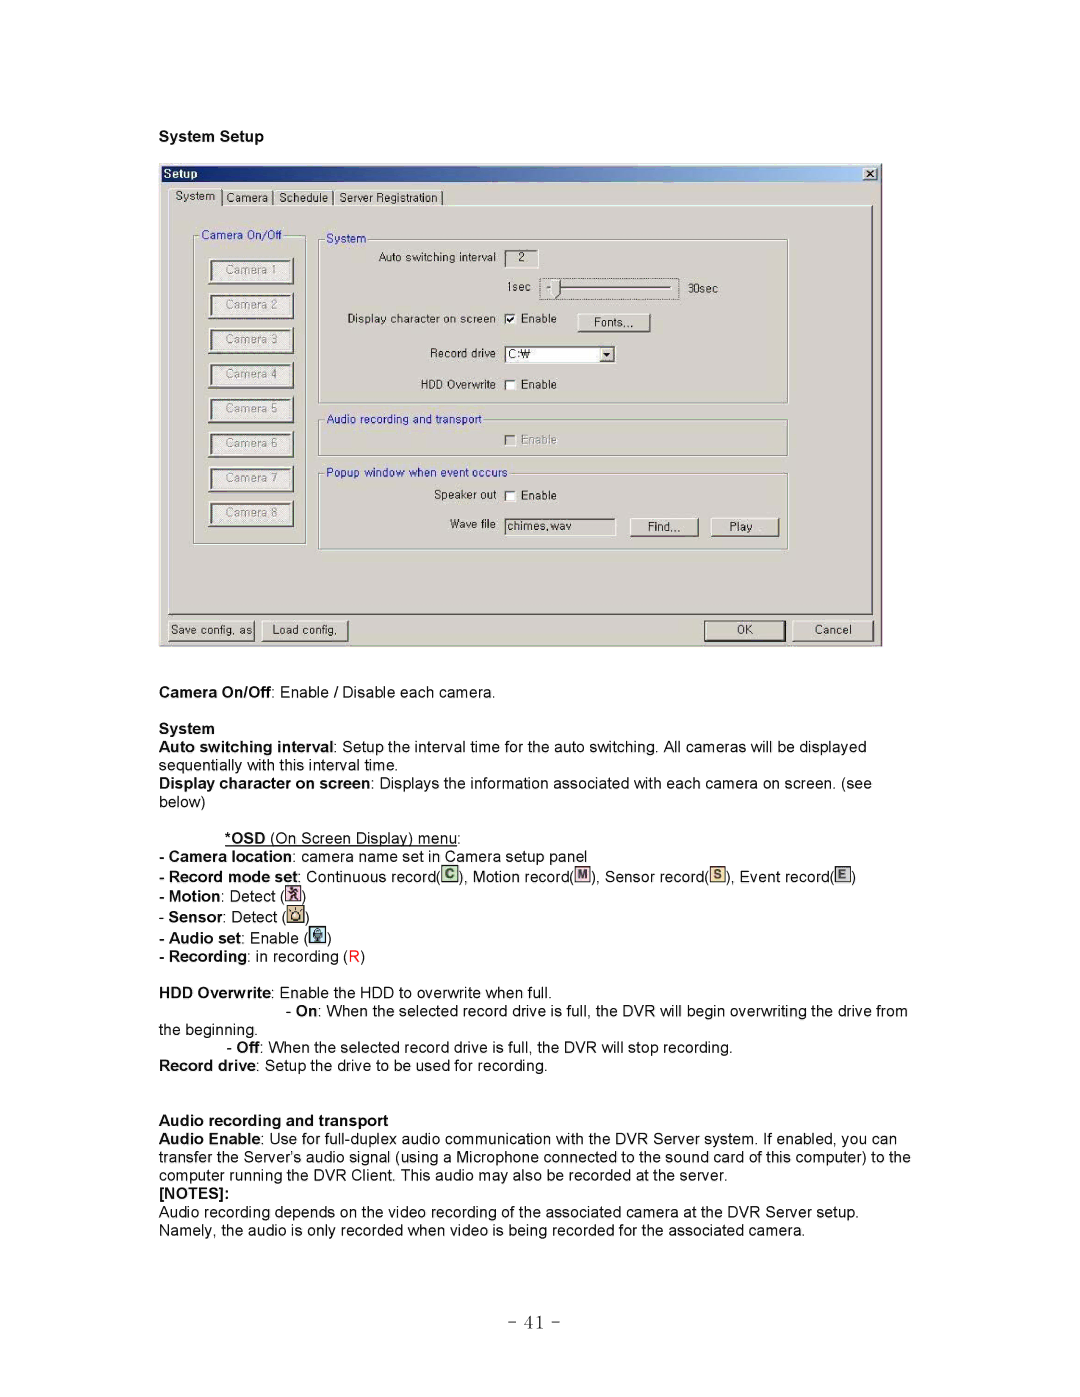
System Setup
Camera On/Off: Enable / Disable each camera.
System
Auto switching interval: Setup the interval time for the auto switching. All cameras will be displayed sequentially with this interval time.
Display character on screen: Displays the information associated with each camera on screen. (see below)
*OSD (On Screen Display) menu:
-Camera location: camera name set in Camera setup panel
-Record mode set: Continuous record(![]() ), Motion record(
), Motion record(![]() ), Sensor record(
), Sensor record(![]() ), Event record(
), Event record(![]() )
)
-Motion: Detect (![]() )
)
-Sensor: Detect (![]() )
)
-Audio set: Enable (![]() )
)
-Recording: in recording (R)
HDD Overwrite: Enable the HDD to overwrite when full.
- On: When the selected record drive is full, the DVR will begin overwriting the drive from
the beginning.
-Off: When the selected record drive is full, the DVR will stop recording. Record drive: Setup the drive to be used for recording.
Audio recording and transport
Audio Enable: Use for
[NOTES]:
Audio recording depends on the video recording of the associated camera at the DVR Server setup. Namely, the audio is only recorded when video is being recorded for the associated camera.
- 41 -
