Step 3 Mount Controller
■Mount Controller on Wall
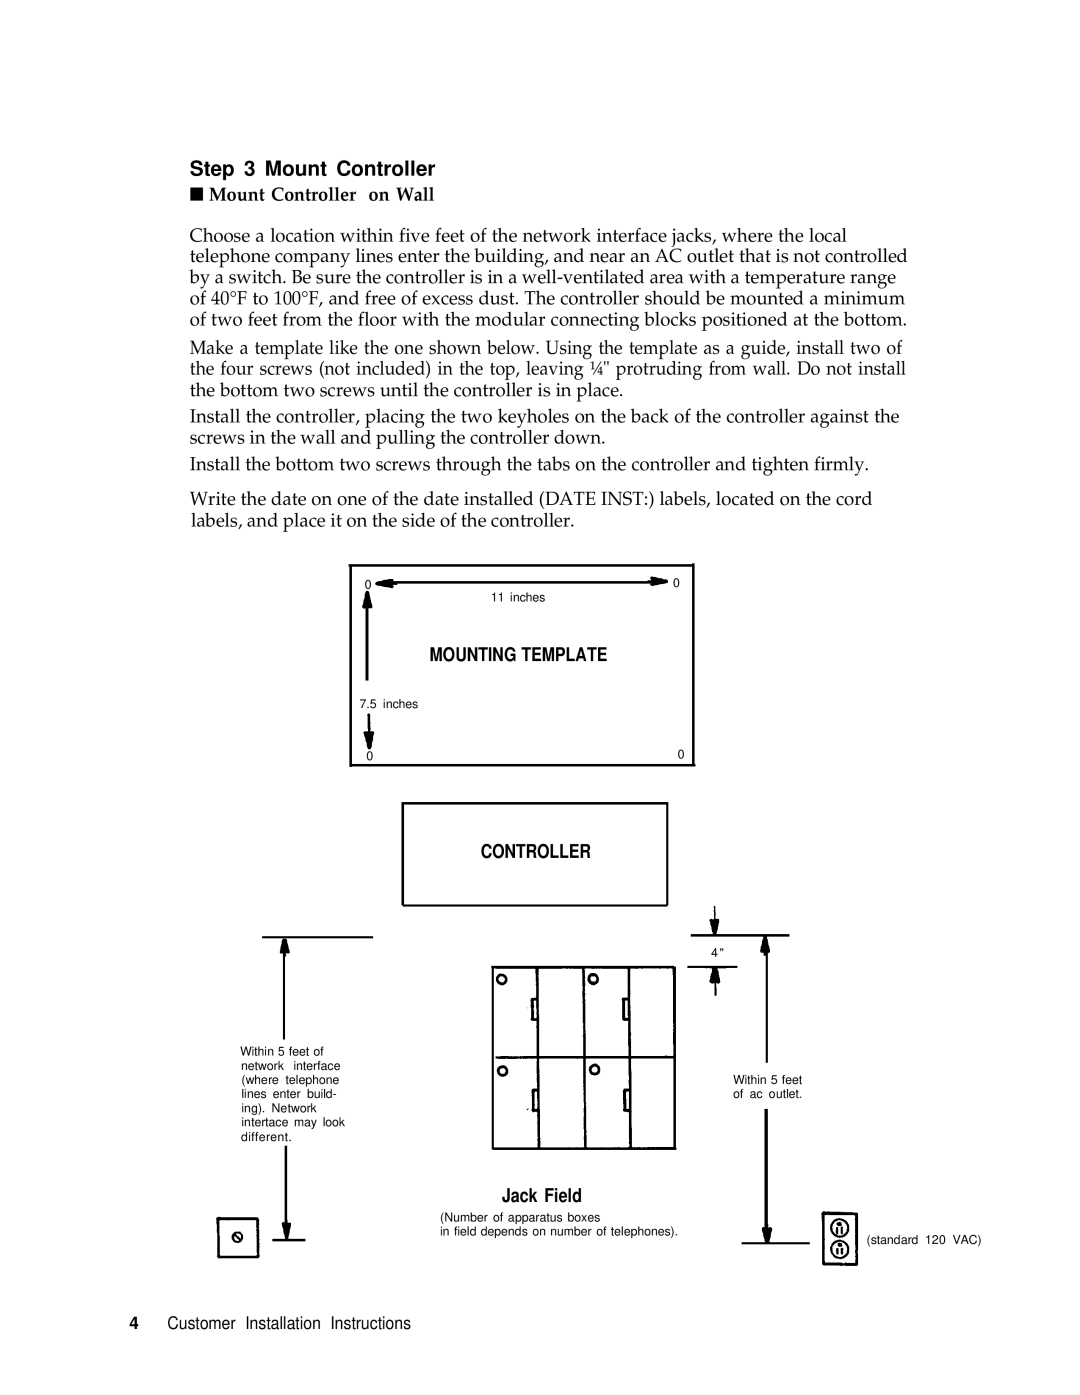
Choose a location within five feet of the network interface jacks, where the local telephone company lines enter the building, and near an AC outlet that is not controlled by a switch. Be sure the controller is in a
Make a template like the one shown below. Using the template as a guide, install two of the four screws (not included) in the top, leaving ¼" protruding from wall. Do not install the bottom two screws until the controller is in place.
Install the controller, placing the two keyholes on the back of the controller against the screws in the wall and pulling the controller down.
Install the bottom two screws through the tabs on the controller and tighten firmly.
Write the date on one of the date installed (DATE INST:) labels, located on the cord labels, and place it on the side of the controller.
0 |
| 0 |
| ||
| 11 inches | |
MOUNTING TEMPLATE
7.5 inches
0 | 0 |
CONTROLLER
4 "
Within 5 feet of network interface (where telephone lines enter build- ing). Network intertace may look different.
Within 5 feet of ac outlet.
Jack Field
(Number of apparatus boxes
in field depends on number of telephones).
(standard 120 VAC)
4 Customer Installation Instructions