Torq MixLab User Guide » Chapter 13 | 58 |
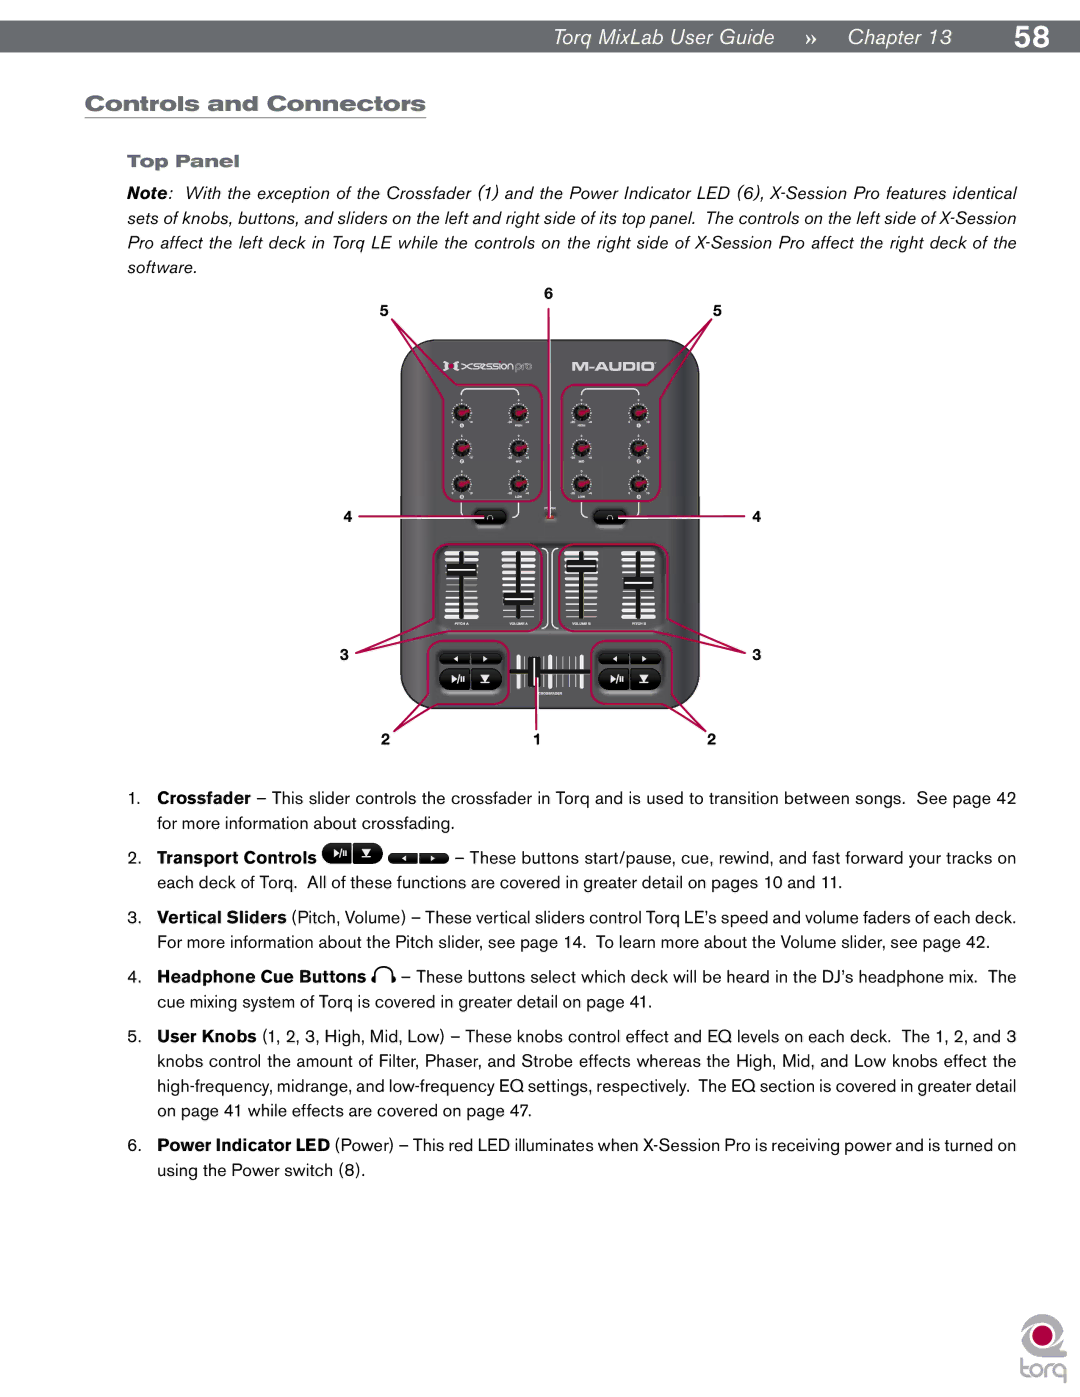
Controls and Connectors
Top Panel
Note: With the exception of the Crossfader (1) and the Power Indicator LED (6),
1.Crossfader – This slider controls the crossfader in Torq and is used to transition between songs. See page 42 for more information about crossfading.
2.Transport Controls ![]()
![]()
![]()
![]() – These buttons start/pause, cue, rewind, and fast forward your tracks on each deck of Torq. All of these functions are covered in greater detail on pages 10 and 11.
– These buttons start/pause, cue, rewind, and fast forward your tracks on each deck of Torq. All of these functions are covered in greater detail on pages 10 and 11.
3.Vertical Sliders (Pitch, Volume) – These vertical sliders control Torq LE’s speed and volume faders of each deck. For more information about the Pitch slider, see page 14. To learn more about the Volume slider, see page 42.
4.Headphone Cue Buttons ![]() – These buttons select which deck will be heard in the DJ’s headphone mix. The cue mixing system of Torq is covered in greater detail on page 41.
– These buttons select which deck will be heard in the DJ’s headphone mix. The cue mixing system of Torq is covered in greater detail on page 41.
5.User Knobs (1, 2, 3, High, Mid, Low) – These knobs control effect and EQ levels on each deck. The 1, 2, and 3 knobs control the amount of Filter, Phaser, and Strobe effects whereas the High, Mid, and Low knobs effect the
6.Power Indicator LED (Power) – This red LED illuminates when