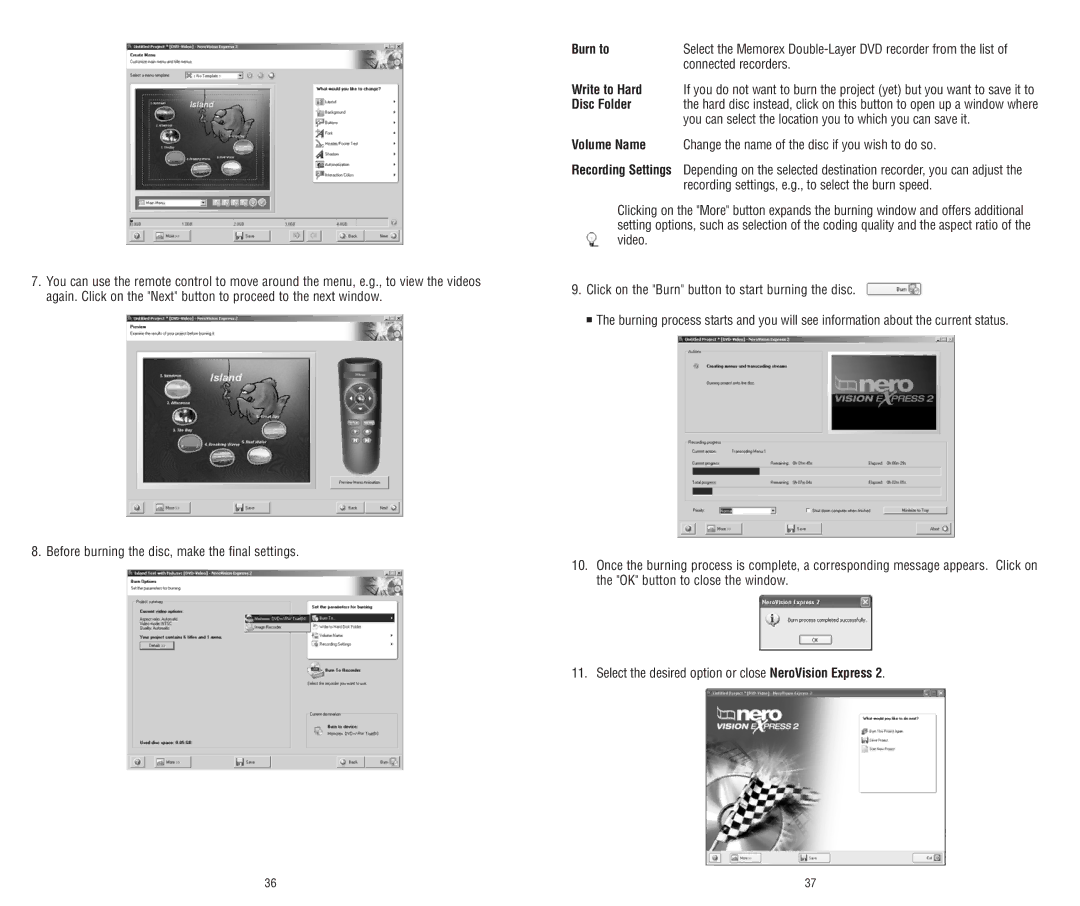
7.You can use the remote control to move around the menu, e.g., to view the videos again. Click on the "Next" button to proceed to the next window.
8. Before burning the disc, make the final settings.
Burn to | Select the Memorex |
| connected recorders. |
Write to Hard | If you do not want to burn the project (yet) but you want to save it to |
Disc Folder | the hard disc instead, click on this button to open up a window where |
| you can select the location you to which you can save it. |
Volume Name | Change the name of the disc if you wish to do so. |
Recording Settings | Depending on the selected destination recorder, you can adjust the |
| recording settings, e.g., to select the burn speed. |
Clicking on the "More" button expands the burning window and offers additional setting options, such as selection of the coding quality and the aspect ratio of the video.
9.Click on the "Burn" button to start burning the disc. ![]()
■ The burning process starts and you will see information about the current status.
10.Once the burning process is complete, a corresponding message appears. Click on the "OK" button to close the window.
11.Select the desired option or close NeroVision Express 2.
36 | 37 |