SETTING THE TIMER RECORDING
TO CORRECT THE SETTINGS
While setting, press the ENTER button to flash the item to correct, then
When finished, press the ENTER button.
NOTES: •The VCR cannot be used while the T.REC indicator is lit.
•After a power failure or disconnection of the power plug, all programmed recording settings must be reset upon resumption of power. In this case, reset the clock (see page 15) and reprogram any timer recordings.
•Press the CANCEL button to move cursor backward for correction.
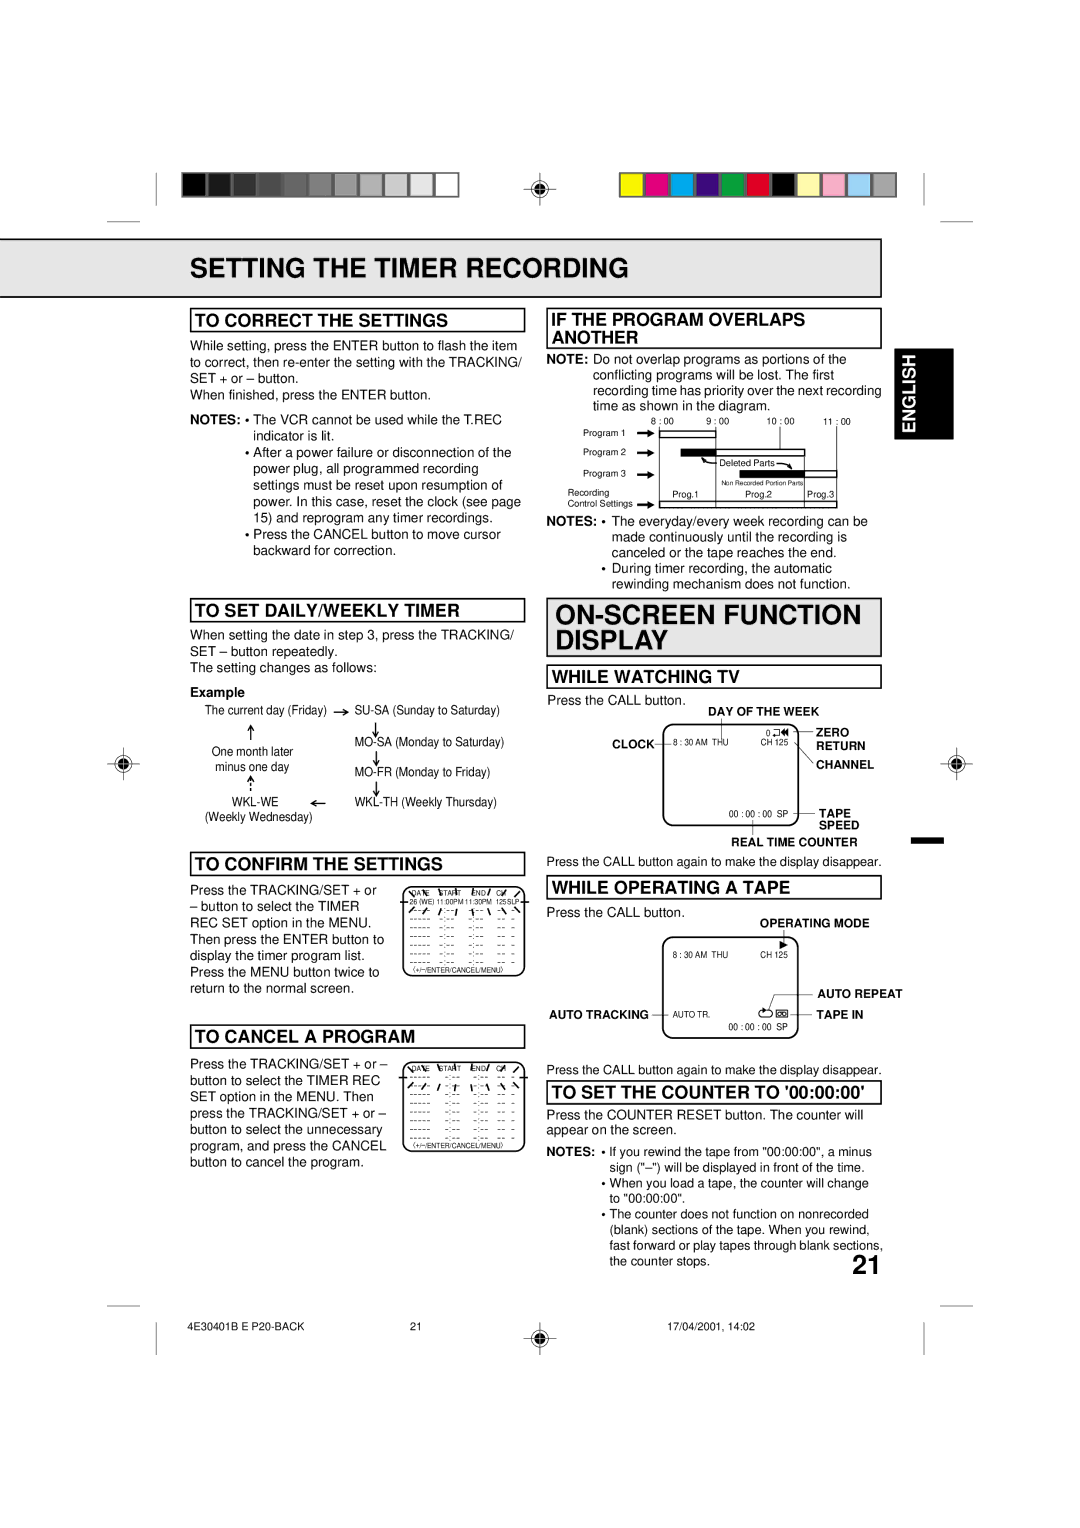
IF THE PROGRAM OVERLAPS ANOTHER
NOTE: Do not overlap programs as portions of the conflicting programs will be lost. The first recording time has priority over the next recording time as shown in the diagram.
| 8 : 00 | 9 : 00 | 10 : 00 | 11 : 00 |
Program 1 |
|
|
|
|
Program 2 |
|
|
|
|
|
| Deleted Parts |
| |
Program 3 |
|
|
|
|
|
| Non Recorded Portion Parts |
| |
Recording | Prog.1 |
| Prog.2 | Prog.3 |
Control Settings |
|
|
|
|
NOTES: • The everyday/every week recording can be made continuously until the recording is canceled or the tape reaches the end.
•During timer recording, the automatic rewinding mechanism does not function.
ENGLISH
TO SET DAILY/WEEKLY TIMER
When setting the date in step 3, press the TRACKING/ SET – button repeatedly.
The setting changes as follows:
Example
The current day (Friday) ![]()
One month later | |
| |
minus one day | |
| |
(Weekly Wednesday) |
|
TO CONFIRM THE SETTINGS
ON-SCREEN FUNCTION DISPLAY
WHILE WATCHING TV
Press the CALL button.
| DAY OF THE WEEK | |||||||||
|
|
| 0 |
|
|
|
|
| ZERO | |
CLOCK | 8 : 30 AM THU |
| CH 125 |
| RETURN | |||||
|
|
|
|
|
|
|
|
| ||
|
|
|
|
|
|
|
|
|
| CHANNEL |
|
|
| 00 : 00 : 00 SP |
| TAPE | |||||
|
|
|
| |||||||
|
|
|
|
|
|
|
|
|
| SPEED |
REAL TIME COUNTER
Press the CALL button again to make the display disappear.
Press the TRACKING/SET + or
–button to select the TIMER REC SET option in the MENU. Then press the ENTER button to display the timer program list. Press the MENU button twice to return to the normal screen.
DATE START END CH
26 (WE) 11:00PM 11:30PM 125SLP
– – – – – | – – – | ||
– – – – – | – – – | ||
– – – – – | – – – | ||
– – – – – | – – – | ||
– – – – – | – – – | ||
– – – – – | – – – | ||
– – – – – | – – – |
WHILE OPERATING A TAPE
Press the CALL button.
|
|
| OPERATING MODE | |||||
|
|
|
|
|
|
|
|
|
|
| 8 : 30 AM THU | CH 125 | |||||
|
|
|
|
|
|
|
| AUTO REPEAT |
|
|
|
|
|
|
|
| |
AUTO TRACKING |
| AUTO TR. |
|
|
|
|
| TAPE IN |
|
|
|
|
| ||||
|
|
| 00 : 00 : 00 SP | |||||
TO CANCEL A PROGRAM
Press the TRACKING/SET + or – button to select the TIMER REC SET option in the MENU. Then press the TRACKING/SET + or – button to select the unnecessary program, and press the CANCEL button to cancel the program.
DATE | START | END | CH |
– – – – – | – – – | ||
– – – – – | – – – | ||
– – – – – | – – – | ||
– – – – – | – – – | ||
– – – – – | – – – | ||
– – – – – | – – – | ||
– – – – – | – – – | ||
– – – – – | – – – |
Press the CALL button again to make the display disappear.
TO SET THE COUNTER TO '00:00:00'
Press the COUNTER RESET button. The counter will appear on the screen.
NOTES: •If you rewind the tape from "00:00:00", a minus sign
•When you load a tape, the counter will change to "00:00:00".
•The counter does not function on nonrecorded (blank) sections of the tape. When you rewind,
fast forward or play tapes through blank sections,
the counter stops.
21
4E30401B E | 21 | 17/04/2001, 14:02 |