BOUNCE FLASH
Adjusting Bounce Angle
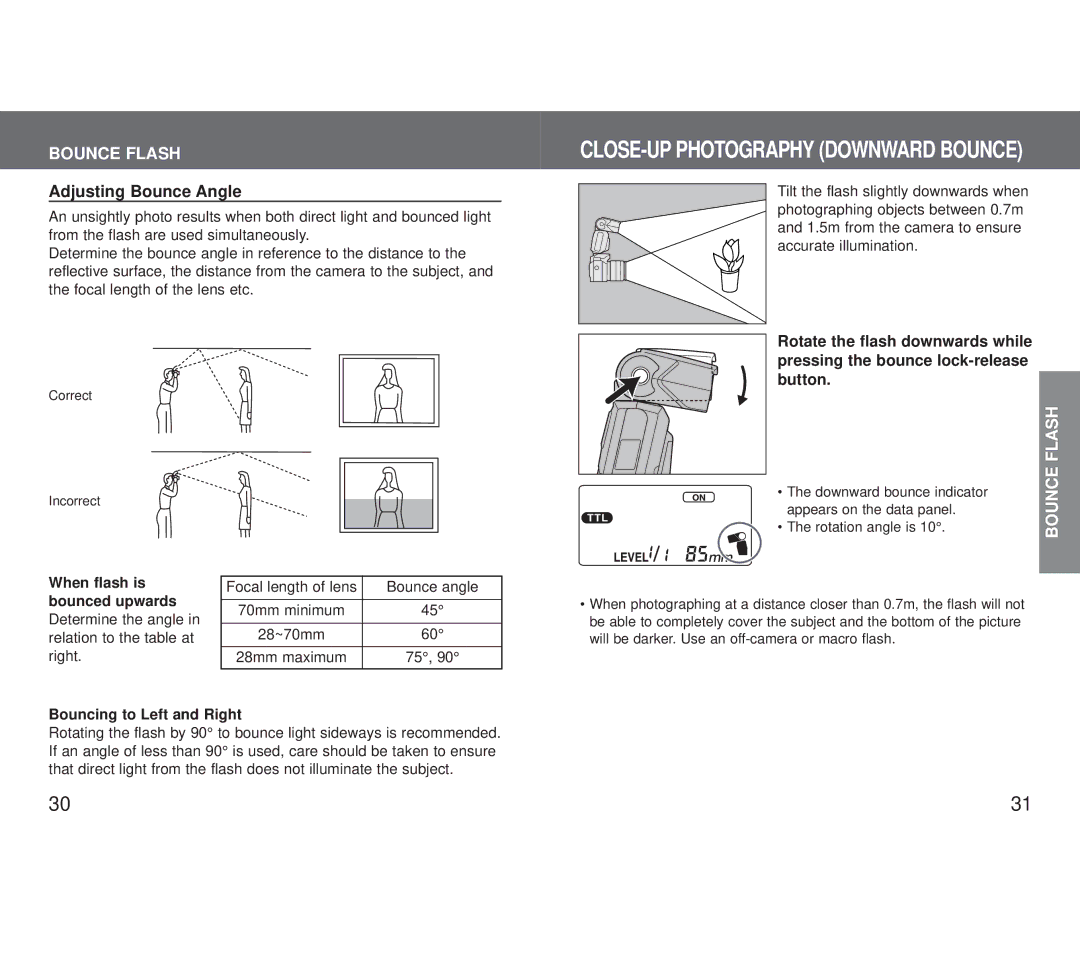
An unsightly photo results when both direct light and bounced light from the flash are used simultaneously.
Determine the bounce angle in reference to the distance to the reflective surface, the distance from the camera to the subject, and the focal length of the lens etc.
Correct
Incorrect
CLOSE-UP PHOTOGRAPHY (DOWNWARD BOUNCE)
Tilt the flash slightly downwards when photographing objects between 0.7m and 1.5m from the camera to ensure accurate illumination.
Rotate the flash downwards while pressing the bounce
| FLASH |
• The downward bounce indicator | BOUNCE |
|
appears on the data panel.
• The rotation angle is 10°.
When flash is bounced upwards
Determine the angle in relation to the table at right.
Focal length of lens | Bounce angle |
|
|
70mm minimum | 45° |
|
|
28~70mm | 60° |
|
|
28mm maximum | 75°, 90° |
|
|
•When photographing at a distance closer than 0.7m, the flash will not be able to completely cover the subject and the bottom of the picture will be darker. Use an
Bouncing to Left and Right
Rotating the flash by 90° to bounce light sideways is recommended. If an angle of less than 90° is used, care should be taken to ensure that direct light from the flash does not illuminate the subject.
30 | 31 |
