4.7 ADVANCE MENU ___DETECTION
Move the cursor to the “DETECTION”, and press ”ENTER”, then the screen will show the following options.
DETECTION
DETECTION SETUP
DETECTION TIMER
1)DETECTION SETUP:
|
|
|
|
|
|
|
|
|
|
| Take 16CH as an example |
|
| DETECTION |
|
|
| ||
|
|
|
|
|
|
|
|
|
|
| TITLE | DET | AREA | LS | SS | TS | RE | ALARM | |
01 | ON | SETUP | 07 | 03 | 02 | 10 | OFF | ||
02 | ON | SETUP | 07 | 03 | 02 | 10 | LOW | ||
03 | ON | SETUP | 07 | 03 | 02 | 10 | HIGH | ||
04 | ON | SETUP | 07 | 03 | 02 | 10 | OFF | ||
05 | ON | SETUP | 07 | 03 | 02 | 10 | OFF | ||
06 | ON | SETUP | 07 | 03 | 02 | 10 | OFF | ||
07 | ON | SETUP | 07 | 03 | 02 | 10 | OFF | ||
08 | ON | SETUP | 07 | 03 | 02 | 10 | OFF | ||
| PREV | NEXT |
|
|
|
|
|
|
|
|
|
|
|
|
|
|
|
|
|
|
|
|
|
|
|
|
|
|
|
a)TITLE:
Show the title of each channel of the camera.
b)DET:
Select “ON” to activate the motion detect function of each channel. Select “OFF” to inactivate the motion detect function of each channel.
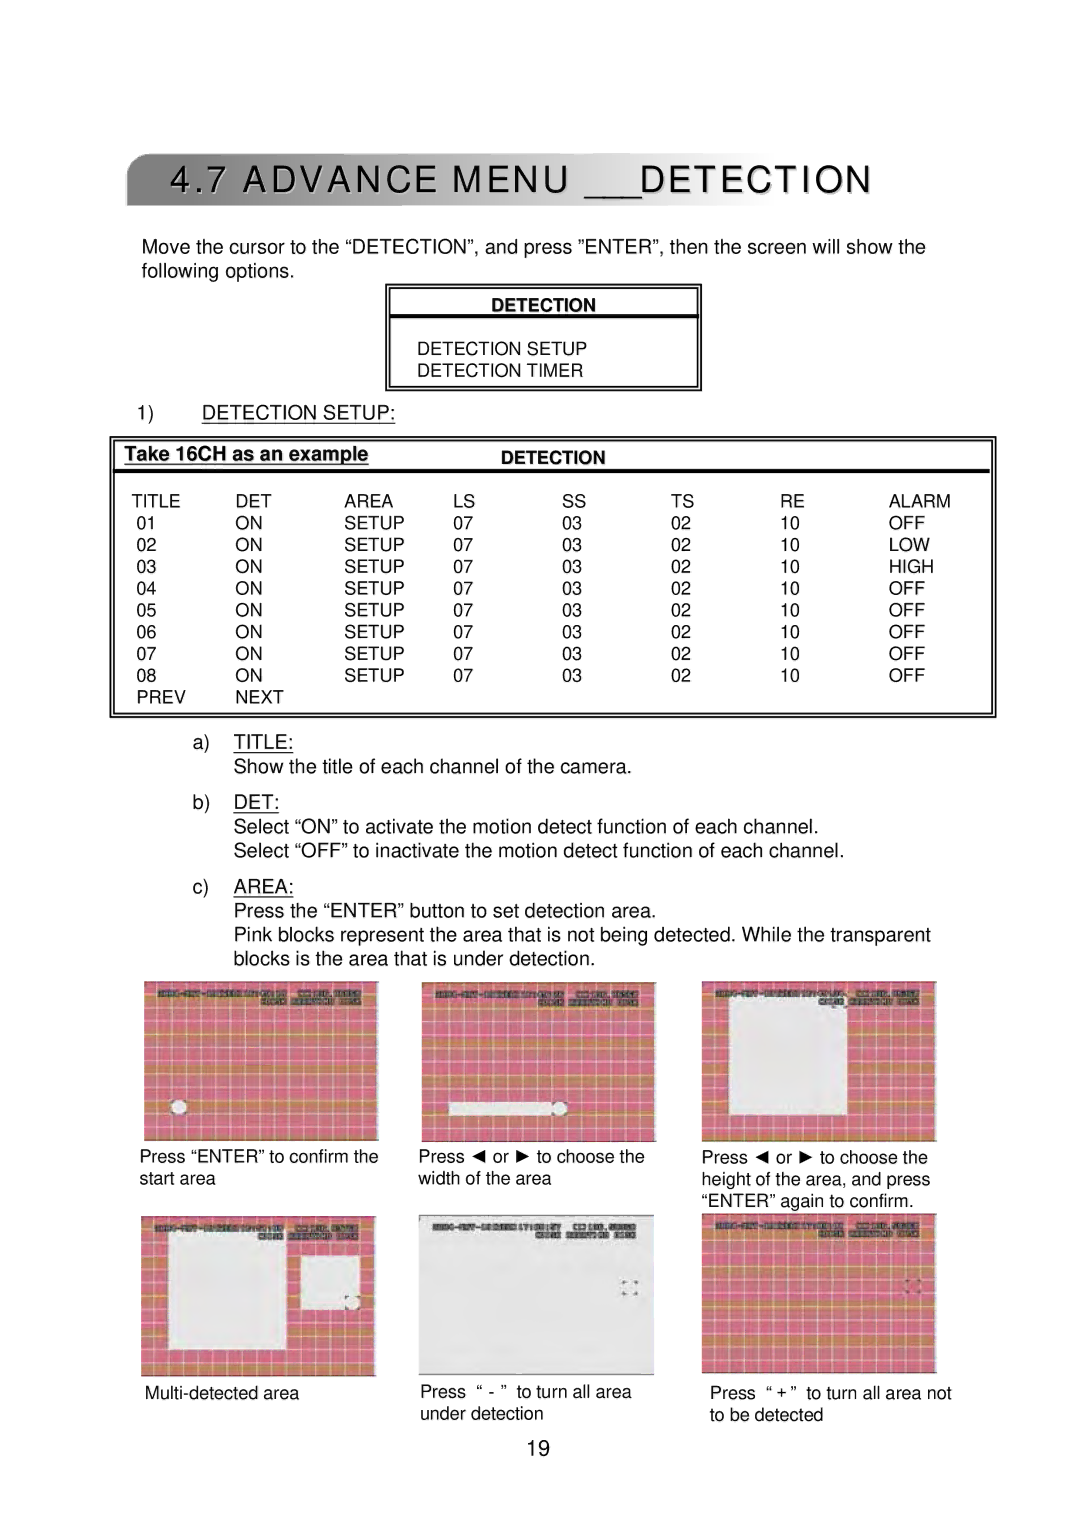
c)AREA:
Press the “ENTER” button to set detection area.
Pink blocks represent the area that is not being detected. While the transparent blocks is the area that is under detection.
Press “ENTER” to confirm the start area
Press ◄ or ► to choose the width of the area
Press ◄ or ► to choose the height of the area, and press “ENTER” again to confirm.
Press “-” to turn all area | |
| under detection |
Press “+” to turn all area not to be detected
19