Step 1: Connecting your computer to the NB1300
Note: This unit should only be connected to the Telecommunications Network through a line cord which meets the requirements of ACA TS008.
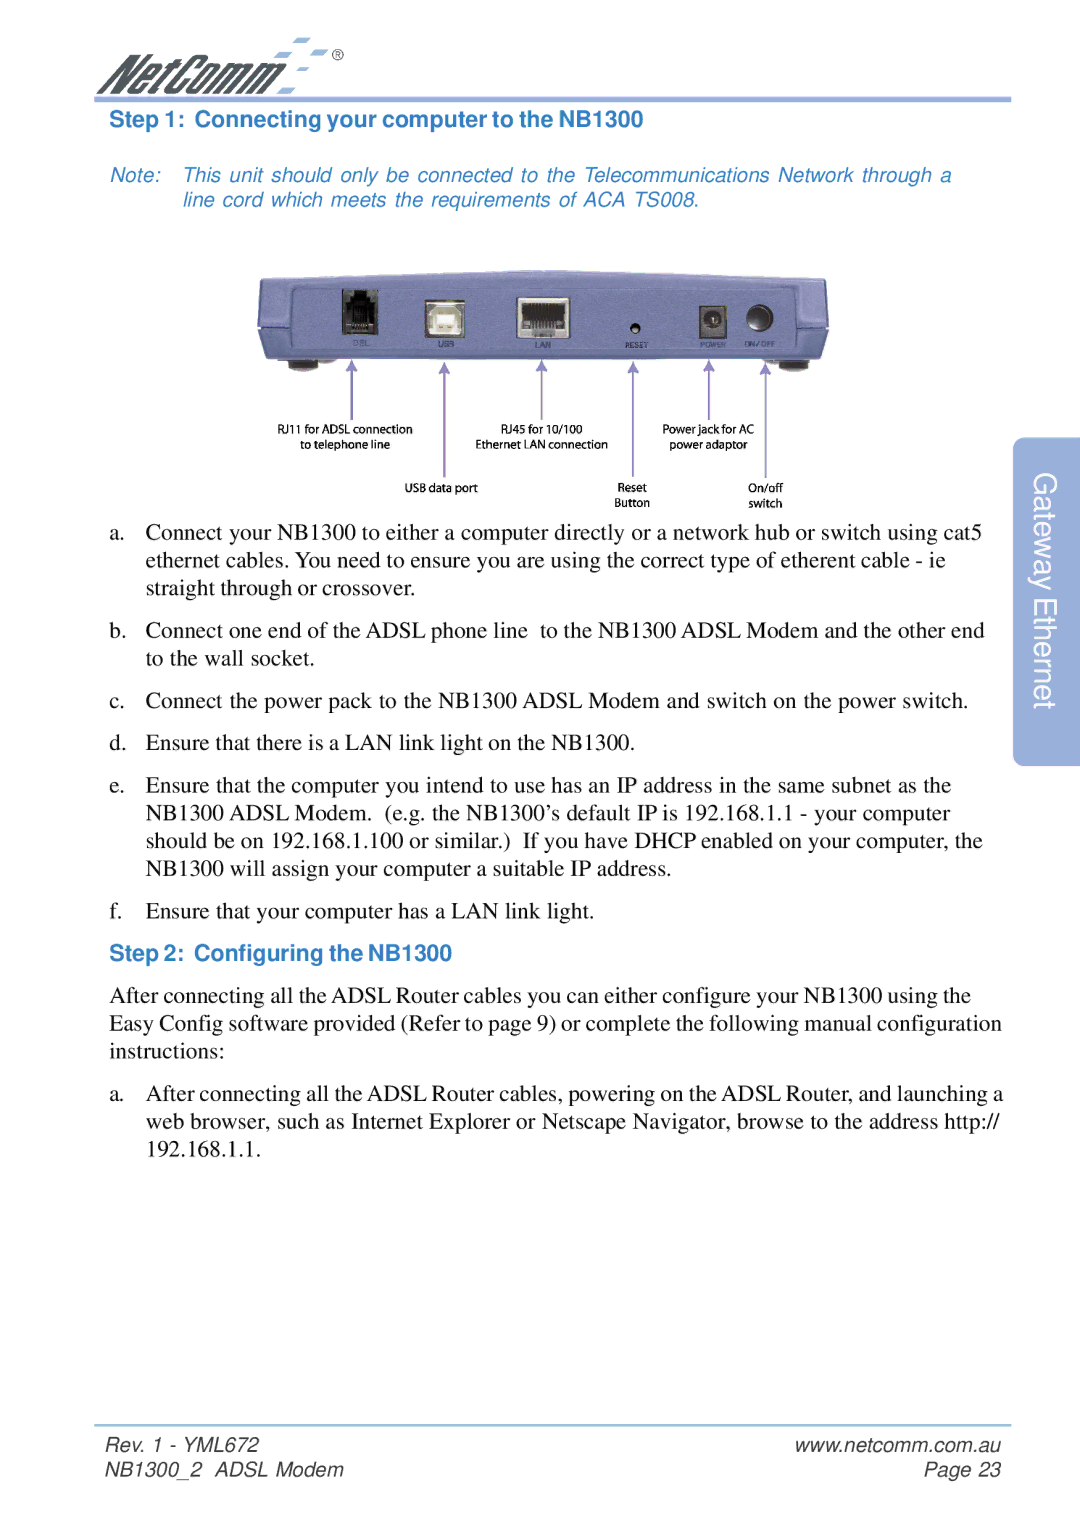
a.Connect your NB1300 to either a computer directly or a network hub or switch using cat5 ethernet cables. You need to ensure you are using the correct type of etherent cable - ie straight through or crossover.
b.Connect one end of the ADSL phone line to the NB1300 ADSL Modem and the other end to the wall socket.
c.Connect the power pack to the NB1300 ADSL Modem and switch on the power switch.
d.Ensure that there is a LAN link light on the NB1300.
e.Ensure that the computer you intend to use has an IP address in the same subnet as the NB1300 ADSL Modem. (e.g. the NB1300’s default IP is 192.168.1.1 - your computer should be on 192.168.1.100 or similar.) If you have DHCP enabled on your computer, the NB1300 will assign your computer a suitable IP address.
f.Ensure that your computer has a LAN link light.
Step 2: Configuring the NB1300
After connecting all the ADSL Router cables you can either configure your NB1300 using the Easy Config software provided (Refer to page 9) or complete the following manual configuration instructions:
a.After connecting all the ADSL Router cables, powering on the ADSL Router, and launching a web browser, such as Internet Explorer or Netscape Navigator, browse to the address http:// 192.168.1.1.
Gateway Ethernet
Rev. 1 - YML672 | www.netcomm.com.au |
NB1300_2 ADSL Modem | Page 23 |