ADSL Modem - Ethernet
Before continuing, ensure you have the following items and information ready:
■A computer with a Network Interface Card installed or a router (such as the NetComm NB3100 Compact).
■An Ethernet network cable.
■A telephone line with ADSL service enabled.
■User Name, Password, VPI, VCI, encapsulation and DNS server settings for your ADSL account (ask your ISP if unsure). These are not needed for the NB1300Plus4, but are required for the computer or router that it will be connected to.
Note: The following procedure presumes your NB1300Plus4 is set to a factory default IP address 192.168.1.1.
Step 1: Connecting your computer to the NB1300Plus4
Note: This unit should only be connected to the Telecommunications Network through a line cord which meets the requirements of ACA TS008.
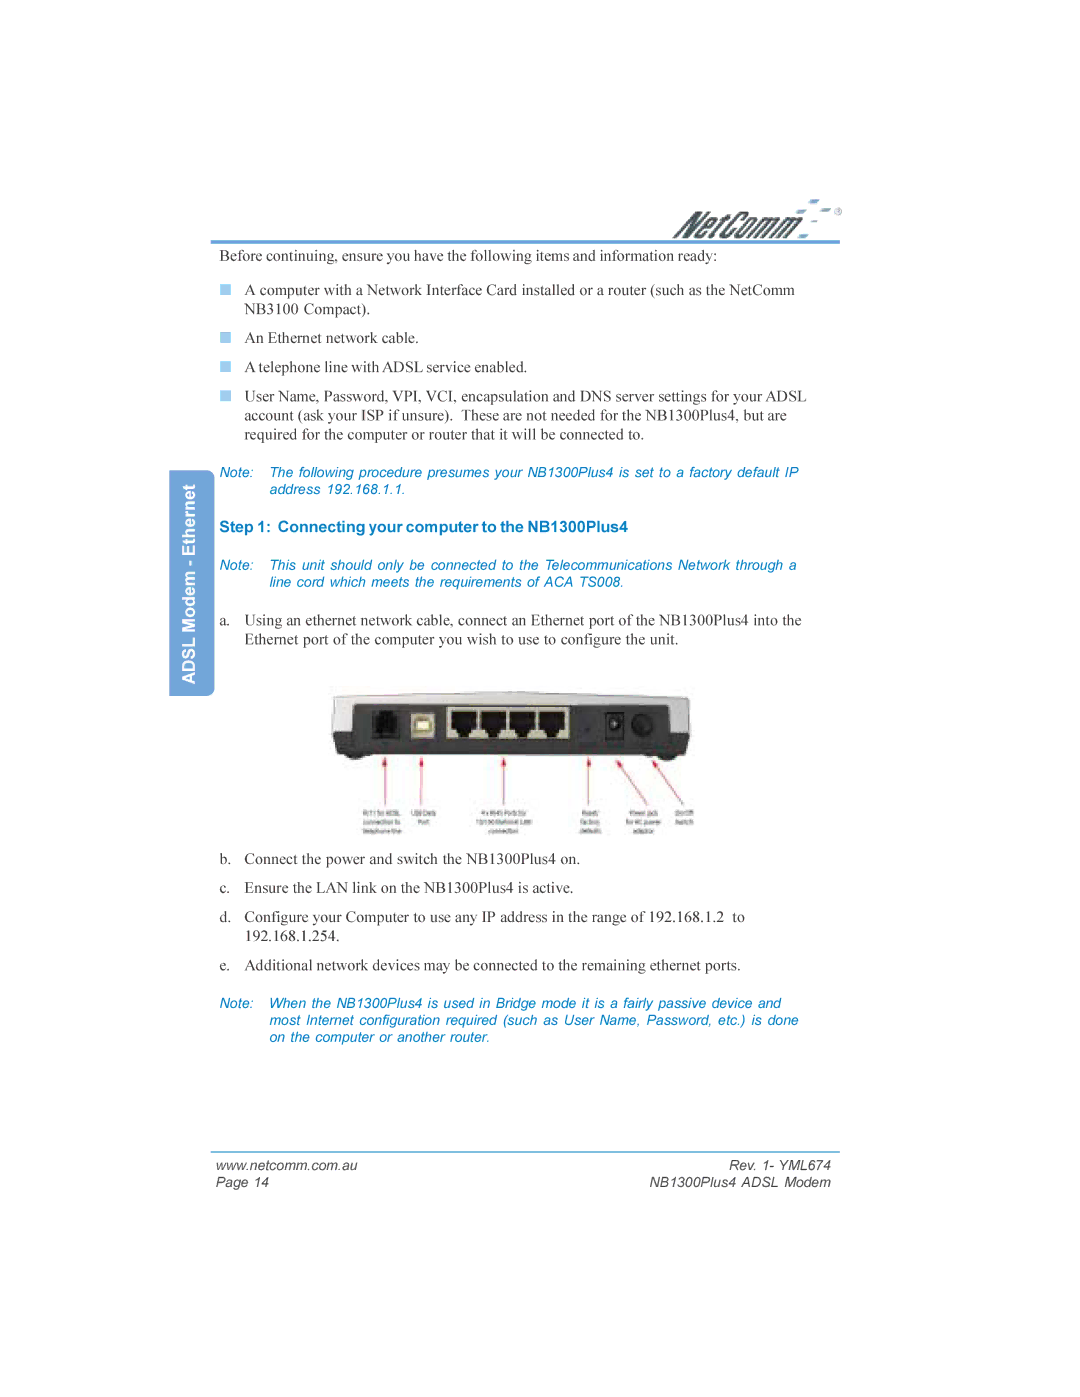
a.Using an ethernet network cable, connect an Ethernet port of the NB1300Plus4 into the Ethernet port of the computer you wish to use to configure the unit.
b.Connect the power and switch the NB1300Plus4 on.
c.Ensure the LAN link on the NB1300Plus4 is active.
d.Configure your Computer to use any IP address in the range of 192.168.1.2 to 192.168.1.254.
e.Additional network devices may be connected to the remaining ethernet ports.
Note: When the NB1300Plus4 is used in Bridge mode it is a fairly passive device and most Internet configuration required (such as User Name, Password, etc.) is done on the computer or another router.
www.netcomm.com.au | Rev. 1- YML674 |
Page 14 | NB1300Plus4 ADSL Modem |