User’s Manual for the NETGEAR Double 108 Mbps Wireless PC Card
Configure your WG511U and save the
Profile.
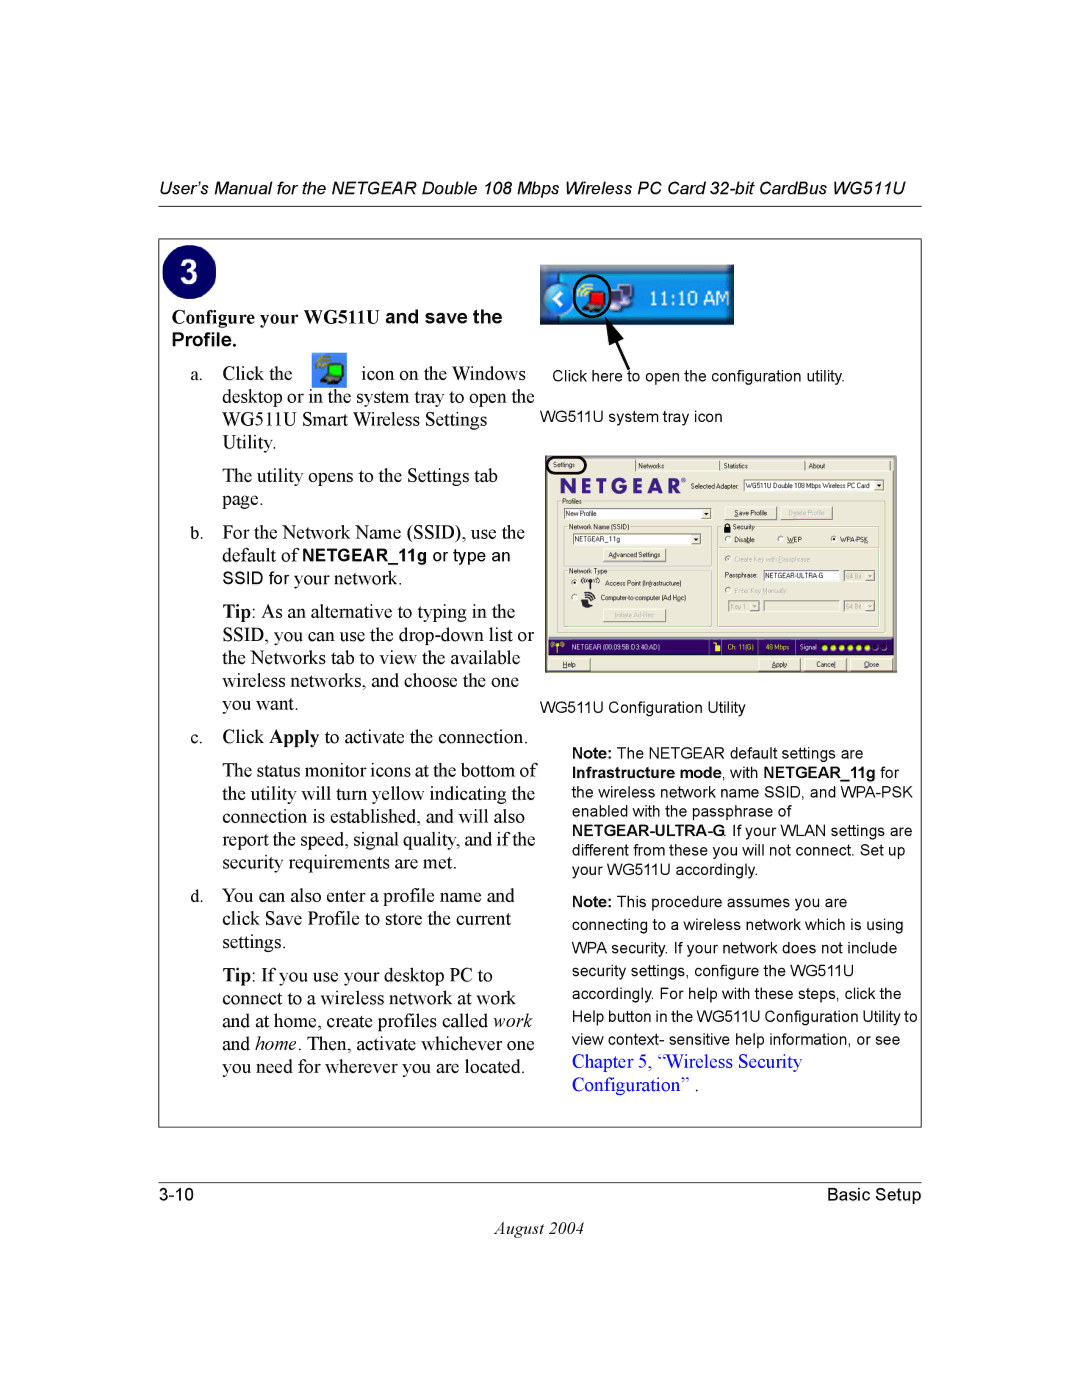
a. Click the icon on the Windows desktop or in the system tray to open the WG511U Smart Wireless Settings Utility.
The utility opens to the Settings tab page.
b.For the Network Name (SSID), use the default of NETGEAR_11g or type an SSID for your network.
Tip: As an alternative to typing in the SSID, you can use the
c.Click Apply to activate the connection.
The status monitor icons at the bottom of the utility will turn yellow indicating the connection is established, and will also report the speed, signal quality, and if the security requirements are met.
d.You can also enter a profile name and click Save Profile to store the current settings.
Tip: If you use your desktop PC to connect to a wireless network at work and at home, create profiles called work and home. Then, activate whichever one you need for wherever you are located.
Click here to open the configuration utility.
WG511U system tray icon
WG511U Configuration Utility
Note: The NETGEAR default settings are Infrastructure mode, with NETGEAR_11g for the wireless network name SSID, and
Note: This procedure assumes you are connecting to a wireless network which is using WPA security. If your network does not include security settings, configure the WG511U accordingly. For help with these steps, click the Help button in the WG511U Configuration Utility to view context- sensitive help information, or see
Chapter 5, “Wireless Security
Configuration” .
Basic Setup |
August 2004