INSTALLATION PROCEDURE (Use a Listed Direct or Positive Connect)
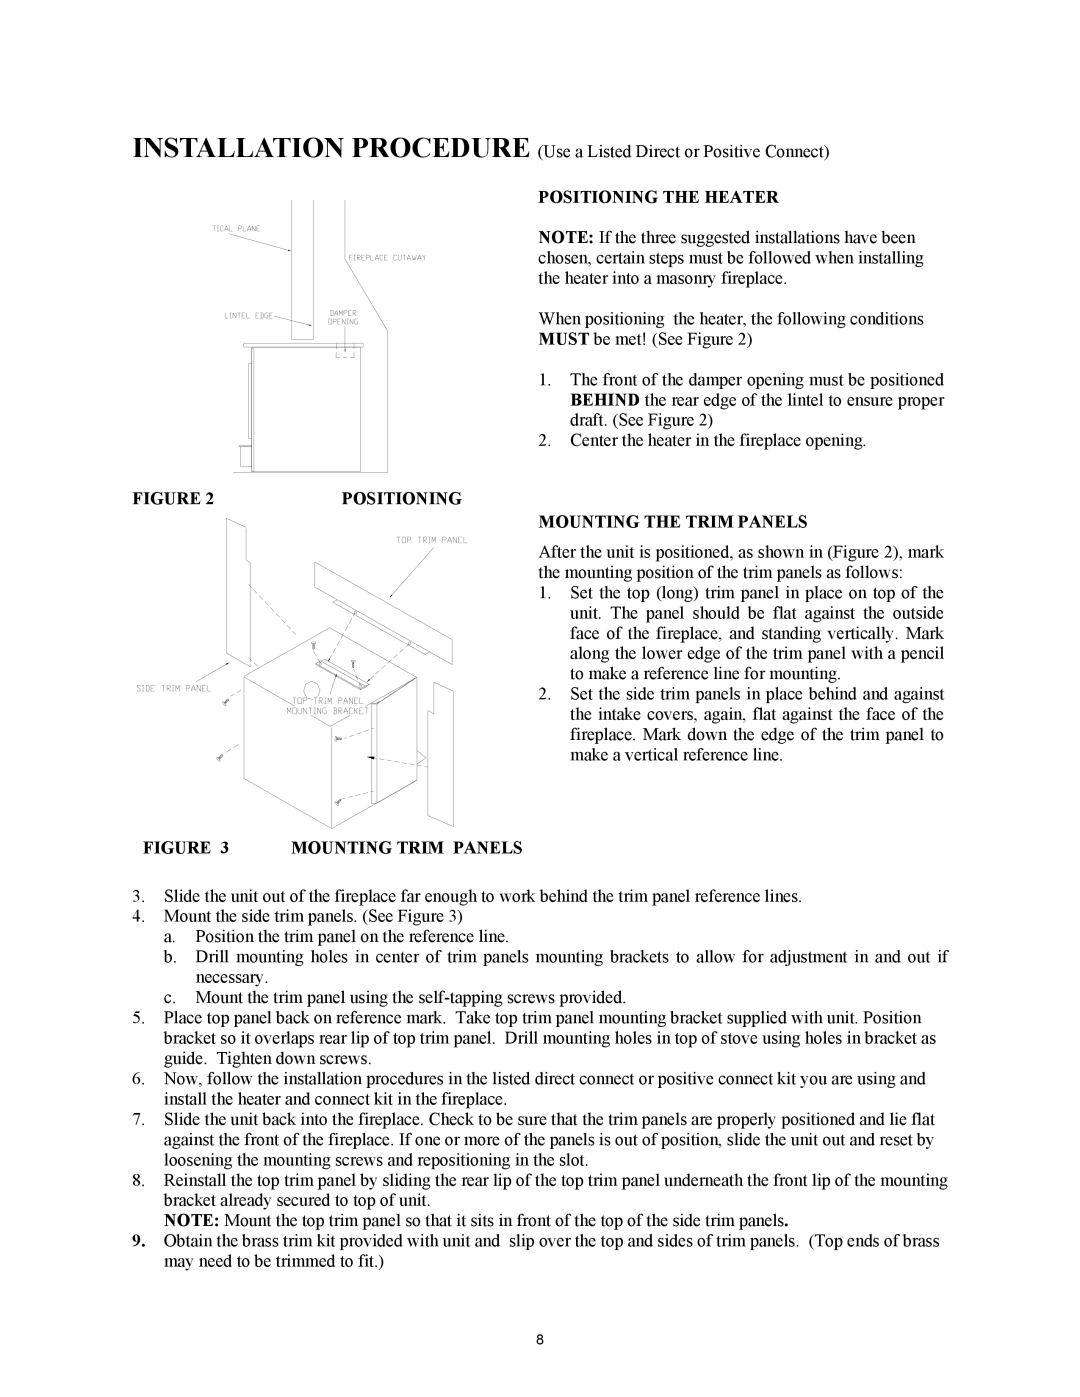
POSITIONING THE HEATER
NOTE: If the three suggested installations have been chosen, certain steps must be followed when installing the heater into a masonry fireplace.
When positioning the heater, the following conditions
MUST be met! (See Figure 2)
1. The front of the damper opening must be positioned BEHIND the rear edge of the lintel to ensure proper draft. (See Figure 2)
2. Center the heater in the fireplace opening.
FIGURE 2 | POSITIONING |
MOUNTING THE TRIM PANELS
After the unit is positioned, as shown in (Figure 2), mark the mounting position of the trim panels as follows:
1. Set the top (long) trim panel in place on top of the unit. The panel should be flat against the outside face of the fireplace, and standing vertically. Mark along the lower edge of the trim panel with a pencil to make a reference line for mounting.
2. Set the side trim panels in place behind and against the intake covers, again, flat against the face of the fireplace. Mark down the edge of the trim panel to make a vertical reference line.
FIGURE 3 MOUNTING TRIM PANELS
3.Slide the unit out of the fireplace far enough to work behind the trim panel reference lines.
4.Mount the side trim panels. (See Figure 3)
a.Position the trim panel on the reference line.
b.Drill mounting holes in center of trim panels mounting brackets to allow for adjustment in and out if necessary.
c.Mount the trim panel using the
5.Place top panel back on reference mark. Take top trim panel mounting bracket supplied with unit. Position bracket so it overlaps rear lip of top trim panel. Drill mounting holes in top of stove using holes in bracket as guide. Tighten down screws.
6.Now, follow the installation procedures in the listed direct connect or positive connect kit you are using and install the heater and connect kit in the fireplace.
7.Slide the unit back into the fireplace. Check to be sure that the trim panels are properly positioned and lie flat against the front of the fireplace. If one or more of the panels is out of position, slide the unit out and reset by loosening the mounting screws and repositioning in the slot.
8.Reinstall the top trim panel by sliding the rear lip of the top trim panel underneath the front lip of the mounting bracket already secured to top of unit.
NOTE: Mount the top trim panel so that it sits in front of the top of the side trim panels.
9.Obtain the brass trim kit provided with unit and slip over the top and sides of trim panels. (Top ends of brass may need to be trimmed to fit.)
8