Preparations
Character Entry
To enter an
Keys Used for Entering Characters
1 2
Address Entry:
h_pttr@ |
| ABC | |
Cancel | |||
Text | |||
3 4
|
|
|
| 7 |
| 9 |
|
| 12 | 13 |
|
|
|
|
|
|
| ||||
|
|
|
|
| 11 | |||||
5 |
|
| ||||||||
6 |
|
| 10 |
|
|
| ||||
|
|
|
|
| 8 |
|
|
| ||
|
|
|
|
|
|
|
|
| ||
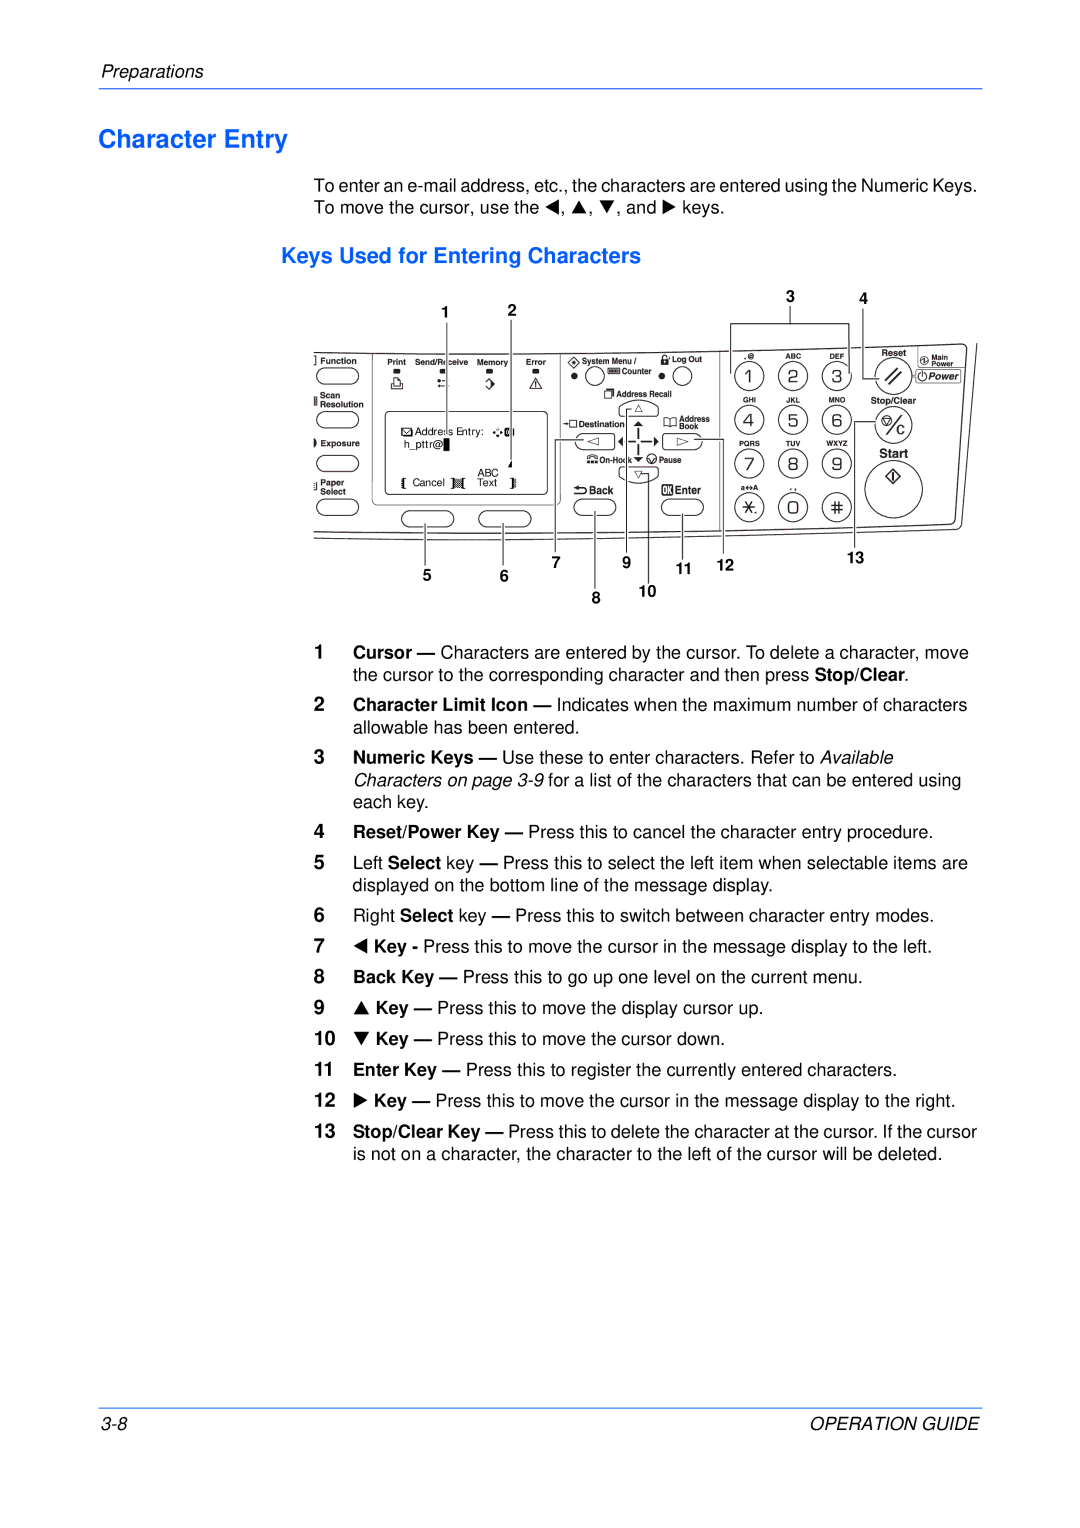
1Cursor — Characters are entered by the cursor. To delete a character, move the cursor to the corresponding character and then press Stop/Clear.
2Character Limit Icon — Indicates when the maximum number of characters allowable has been entered.
3Numeric Keys — Use these to enter characters. Refer to Available Characters on page
4Reset/Power Key — Press this to cancel the character entry procedure.
5Left Select key — Press this to select the left item when selectable items are displayed on the bottom line of the message display.
6Right Select key — Press this to switch between character entry modes.
7W Key - Press this to move the cursor in the message display to the left.
8Back Key — Press this to go up one level on the current menu.
9S Key — Press this to move the display cursor up.
10T Key — Press this to move the cursor down.
11Enter Key — Press this to register the currently entered characters.
12X Key — Press this to move the cursor in the message display to the right.
13Stop/Clear Key — Press this to delete the character at the cursor. If the cursor is not on a character, the character to the left of the cursor will be deleted.
OPERATION GUIDE |
