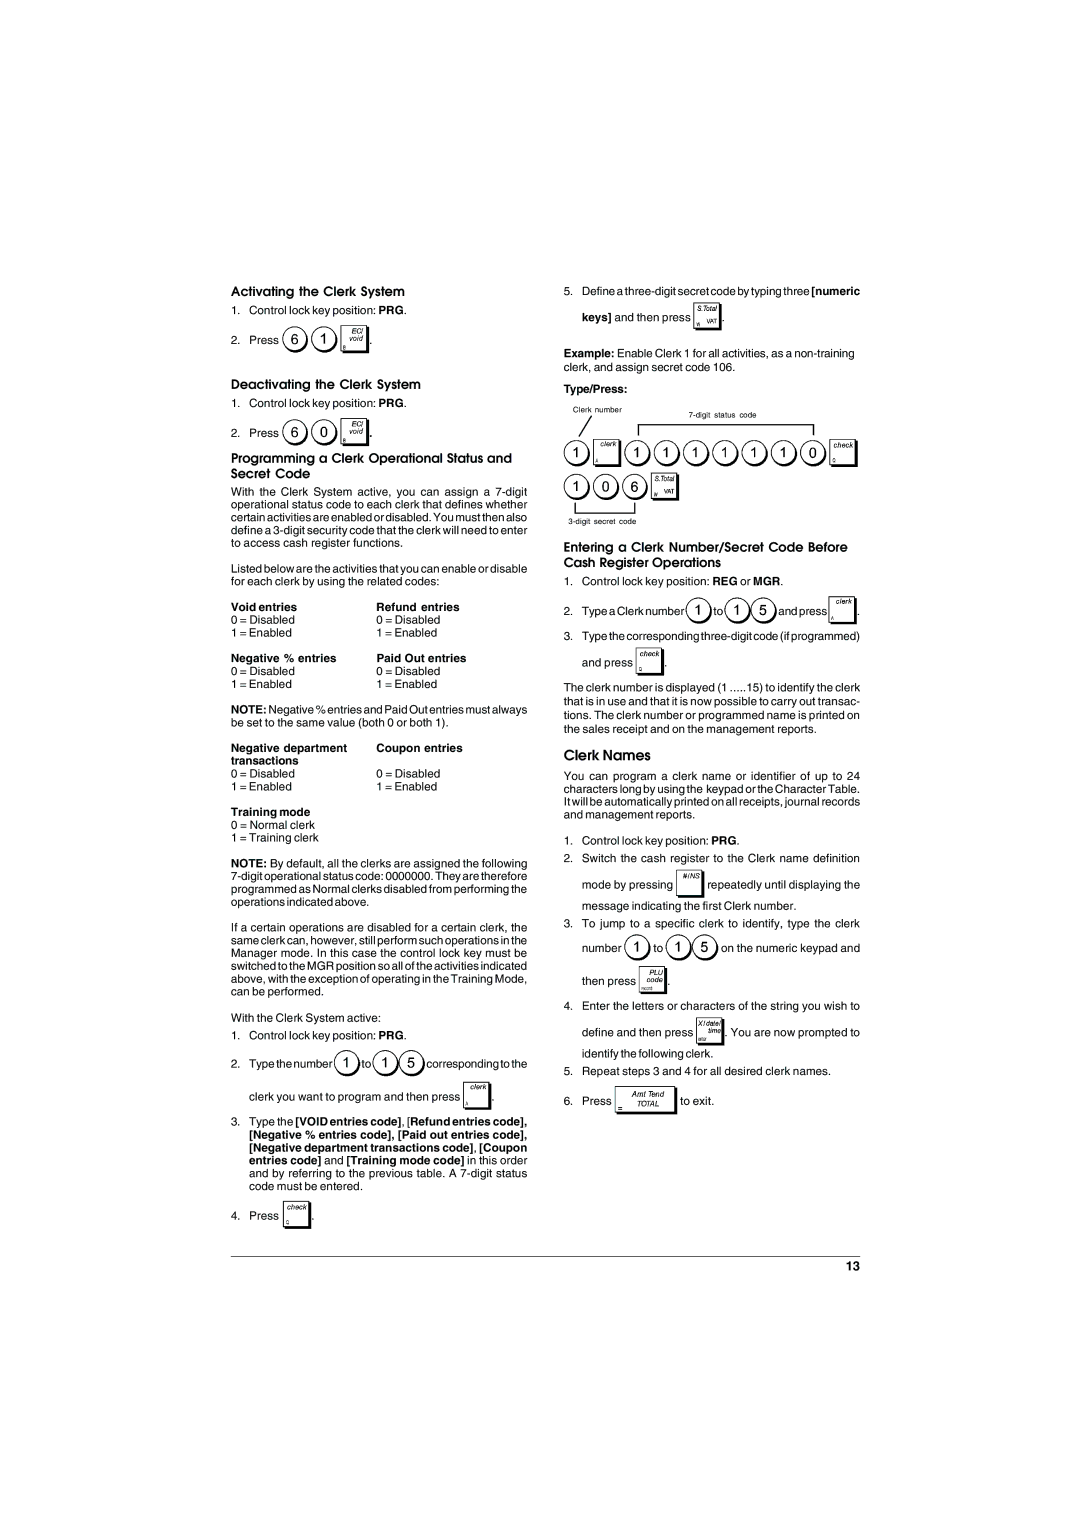
Activating the Clerk System

1. Control lock key position: PRG.

2. Press

.

Deactivating the Clerk System

1. Control lock key position: PRG.

2. Press

.

Programming a Clerk Operational Status and Secret Code

With the Clerk System active, you can assign a 7-digit operational status code to each clerk that defines whether certain activities are enabled or disabled. You must then also define a 3-digit security code that the clerk will need to enter to access cash register functions.

Listed below are the activities that you can enable or disable for each clerk by using the related codes:

Void entries

Refund entries

0 = Disabled

0 = Disabled

1 = Enabled

1 = Enabled

Negative % entries

Paid Out entries

0 = Disabled

0 = Disabled

1 = Enabled

1 = Enabled

NOTE: Negative % entries and Paid Out entries must always be set to the same value (both 0 or both 1).

Negative department

Coupon entries

transactions


0 = Disabled

0 = Disabled

1 = Enabled

1 = Enabled

Training mode


0 = Normal clerk


1 = Training clerk


NOTE: By default, all the clerks are assigned the following

7-digit operational status code: 0000000. They are therefore programmed as Normal clerks disabled from performing the operations indicated above.

If a certain operations are disabled for a certain clerk, the same clerk can, however, still perform such operations in the Manager mode. In this case the control lock key must be switched to the MGR position so all of the activities indicated above, with the exception of operating in the Training Mode, can be performed.

With the Clerk System active:

1.Control lock key position: PRG.

2.Type the number to corresponding to the

clerk you want to program and then press

.

3.Type the [VOID entries code], [Refund entries code], [Negative % entries code], [Paid out entries code], [Negative department transactions code], [Coupon entries code] and [Training mode code] in this order and by referring to the previous table. A 7-digit status code must be entered.

4.Press .

5. Define a three-digit secret code by typing three [numeric

keys] and then press

.

Example: Enable Clerk 1 for all activities, as a non-training clerk, and assign secret code 106.

Type/Press:

Clerk number

7-digit status code

3-digit secret code

Entering a Clerk Number/Secret Code Before Cash Register Operations

1. Control lock key position: REG or MGR.

2.

Type a Clerk number

to

and press

.

3.

Type the corresponding three-digit code (if programmed)


and press

.


The clerk number is displayed (1 .....15) to identify the clerk

that is in use and that it is now possible to carry out transac- tions. The clerk number or programmed name is printed on the sales receipt and on the management reports.

Clerk Names

You can program a clerk name or identifier of up to 24 characters long by using the keypad or the Character Table. It will be automatically printed on all receipts, journal records and management reports.

1.Control lock key position: PRG.

2.Switch the cash register to the Clerk name definition

mode by pressing

repeatedly until displaying the

message indicating the first Clerk number.

3.To jump to a specific clerk to identify, type the clerk

number to on the numeric keypad and

then press .

4. Enter the letters or characters of the string you wish to

define and then press

. You are now prompted to

identify the following clerk.

5. Repeat steps 3 and 4 for all desired clerk names.

6. Press

to exit.

13

Page 21
Image 21
Olivetti ECR 5900 manual Clerk Names, Activating the Clerk System, Deactivating the Clerk System

ECR 5900 specifications

The Olivetti ECR 5900 is a versatile electronic cash register that stands out for its robust design, array of features, and user-friendly interface, making it an ideal choice for retail environments, restaurants, and various service sectors. This model is designed to enhance operational efficiency and improve customer service, catering to the needs of small to medium-sized businesses.

One of the main features of the ECR 5900 is its advanced thermal printer, which offers quick and quiet printing, reducing waiting times for customers. The printer can generate clear receipts and has a high-speed printing capability that ensures smooth transactions even during peak hours. This efficiency is complemented by an intuitive keypad layout, allowing cashiers to complete sales rapidly while minimizing errors.

The Olivetti ECR 5900 includes a sizable LCD display, which provides clear visibility for both the cashier and the customer. This display shows essential transaction details, enhancing transparency and improving customer trust. Furthermore, the cash register supports multiple currency and tax rate configurations, making it adaptable for businesses operating in different regions or dealing with various tax requirements.

Designed with data storage in mind, the ECR 5900 features a comprehensive memory capacity that can store up to 4,000 PLUs (Price Lookups), accommodating a wide range of products or services. This allows businesses to manage inventory more efficiently and streamline their sales process. The cash register also includes various reporting functionalities, such as daily sales reports, inventory reports, and even void or return transaction tracking to aid in financial oversight.

In terms of connectivity, the ECR 5900 can be integrated with external devices such as barcode scanners, electronic scales, and credit card terminals, enhancing its functionality and versatility in a fast-paced retail environment. The register's durability is evident in its robust casing and design, making it a reliable choice for long-term use.

Overall, the Olivetti ECR 5900 combines modern technology with practical features, making it a valuable asset for businesses looking to improve their point-of-sale systems. With its reliable performance, user-friendly design, and extensive functionalities, it’s a smart investment for those seeking to optimize their sales operations while providing excellent customer service.