Powering Up and Setting the
Setting the Clock Manually
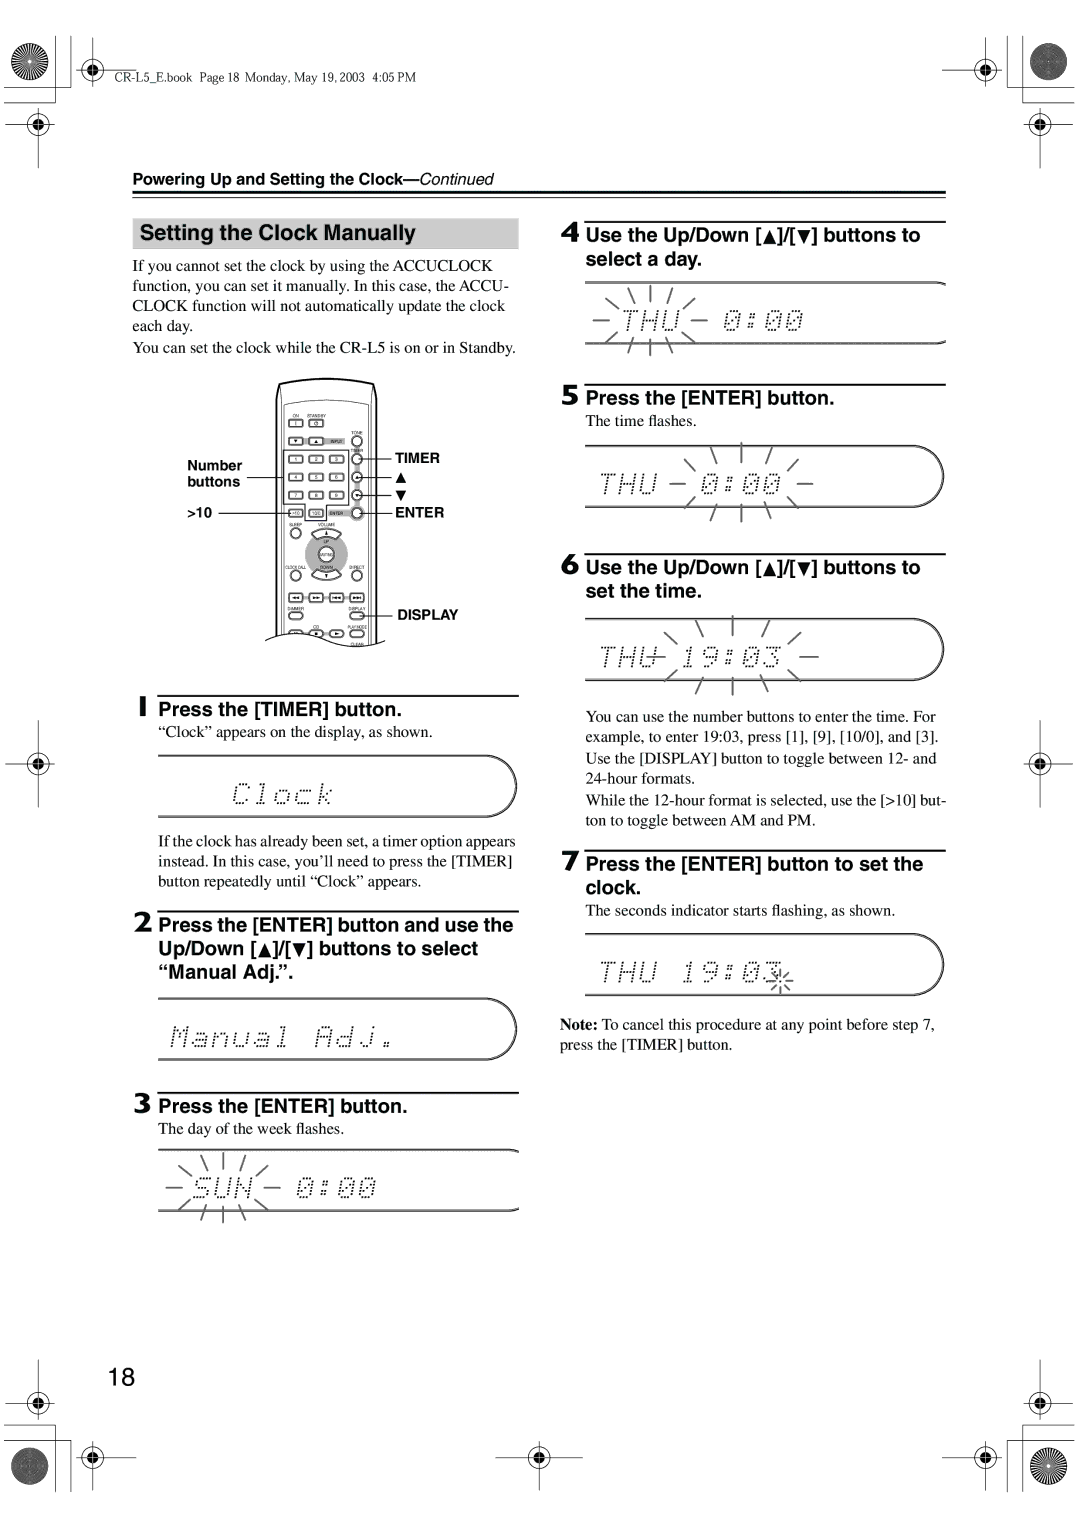
If you cannot set the clock by using the ACCUCLOCK function, you can set it manually. In this case, the ACCU- CLOCK function will not automatically update the clock each day.
You can set the clock while the
4 Use the Up/Down [ ]/[
]/[  ] buttons to select a day.
ON STANDBY
5 Press the [ENTER] button.
The time flashes.
Number buttons
>10
▼▲INPUT
1 | 2 | 3 |
4 | 5 | 6 |
7 | 8 | 9 |
>10 | 10/0 | ENTER |
SLEEP | VOLUME | |
|
| UP |
| MUTING | |
CLOCK CALL | DOWN | |
TONE
TIMER
TIMER
▲
▼
ENTER
DIRECT
6 Use the Up/Down [ ]/[
]/[  ] buttons to set the time.
DIMMERDISPLAY
DISPLAY
CD | PLAY MODE |
|
|
CDRCLEAR
TAPEREPEAT
1 Press the [TIMER] button.
“Clock” appears on the display, as shown.
If the clock has already been set, a timer option appears instead. In this case, you’ll need to press the [TIMER] button repeatedly until “Clock” appears.
2 Press the [ENTER] button and use the Up/Down [![]() ]/[ ] buttons to select “Manual Adj.”.
]/[ ] buttons to select “Manual Adj.”.
You can use the number buttons to enter the time. For example, to enter 19:03, press [1], [9], [10/0], and [3]. Use the [DISPLAY] button to toggle between 12- and
While the
7 Press the [ENTER] button to set the clock.
The seconds indicator starts flashing, as shown.
Note: To cancel this procedure at any point before step 7, press the [TIMER] button.
3 Press the [ENTER] button.
The day of the week flashes.
18
