Advanced (Playback)
[DATE STAMP]
Imprinting information such as the date on the recorded pictures
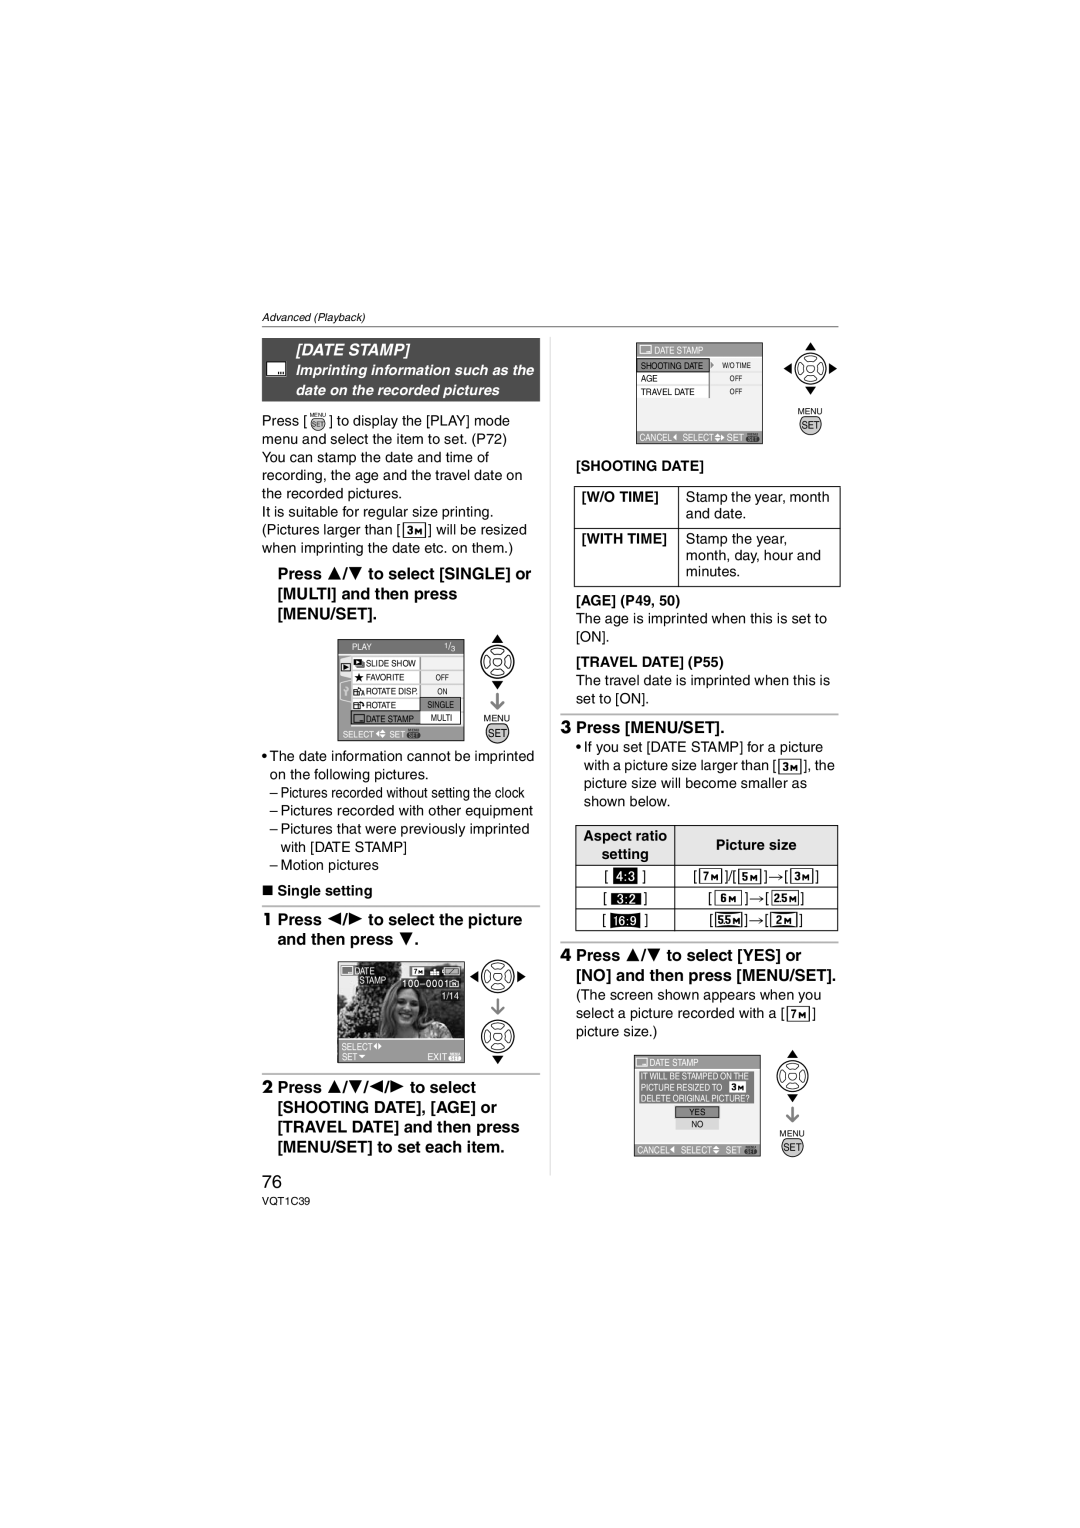
Press [ MENUSET ] to display the [PLAY] mode menu and select the item to set. (P72) You can stamp the date and time of recording, the age and the travel date on the recorded pictures.
It is suitable for regular size printing. (Pictures larger than [ ![]() ] will be resized when imprinting the date etc. on them.)
] will be resized when imprinting the date etc. on them.)
Press 3/4 to select [SINGLE] or [MULTI] and then press [MENU/SET].
PLAY1/3
SLIDE SHOW |
|
FAVORITE | OFF |
ROTATE DISP. | ON |
ROTATE | SINGLE |
|
DATE STAMP | MULTI | MENU |
SELECT SET MENU | SET |
•The date information cannot be imprinted on the following pictures.
–Pictures recorded without setting the clock
–Pictures recorded with other equipment
–Pictures that were previously imprinted with [DATE STAMP]
–Motion pictures
∫Single setting
1 Press 2/1 to select the picture and then press 4.
![]() DATE
DATE
STAMP
1/14
SELECT![]()
SET | EXIT MENU |
2Press 3/4/2/1 to select [SHOOTING DATE], [AGE] or [TRAVEL DATE] and then press [MENU/SET] to set each item.
76
DATE STAMP |
| |
SHOOTING DATE | W/O TIME | |
AGE |
| OFF |
TRAVEL DATE | OFF | |
|
| MENU |
|
| SET |
CANCEL | SELECT | SET MENU |
[SHOOTING DATE] |
| |
[W/O TIME] | Stamp the year, month | |
| and date. | |
[WITH TIME] | Stamp the year, | |
| month, day, hour and | |
| minutes. | |
[AGE] (P49, 50)
The age is imprinted when this is set to [ON].
[TRAVEL DATE] (P55)
The travel date is imprinted when this is set to [ON].
3 Press [MENU/SET].
• If you set [DATE STAMP] for a picture with a picture size larger than [ ![]() ], the picture size will become smaller as shown below.
], the picture size will become smaller as shown below.
| Aspect ratio |
|
| Picture size |
|
| ||||||||||||
| setting |
|
|
|
| |||||||||||||
|
|
|
|
|
|
|
|
|
|
|
|
|
| |||||
| [ |
|
| ] | [ |
|
| ]/[ |
|
|
| ]>[ |
|
|
| ] | ||
|
|
|
|
|
|
|
|
|
| |||||||||
|
|
|
|
|
|
|
|
|
|
|
|
|
|
|
|
|
|
|
| [ |
|
| ] | [ |
|
|
| ]>[ |
|
|
| ] |
| ||||
|
|
|
|
|
|
|
|
|
| |||||||||
|
|
|
|
|
|
|
|
|
|
|
|
|
|
|
|
|
|
|
| [ |
| ] | [ |
|
|
| ]>[ |
|
|
| ] |
| |||||
|
|
|
|
|
|
|
|
|
|
|
|
|
|
|
|
|
|
|
|
|
|
|
|
|
|
|
|
|
|
|
|
|
|
|
|
|
|
4 Press 3/4 to select [YES] or [NO] and then press [MENU/SET].
(The screen shown appears when you select a picture recorded with a [ ![]() ] picture size.)
] picture size.)
![]() DATE STAMP
DATE STAMP
IT WILL BE STAMPED ON THE
PICTURE RESIZED TO
DELETE ORIGINAL PICTURE?
YES |
NO |
MENU
CANCEL SELECT SET MENU | SET |
VQT1C39
