4 Place an original on the glass to specify the area. - Set the original face up with the bottom toward you, fit its top left corner against the top left corner of the glass, and align
it with the original scale.
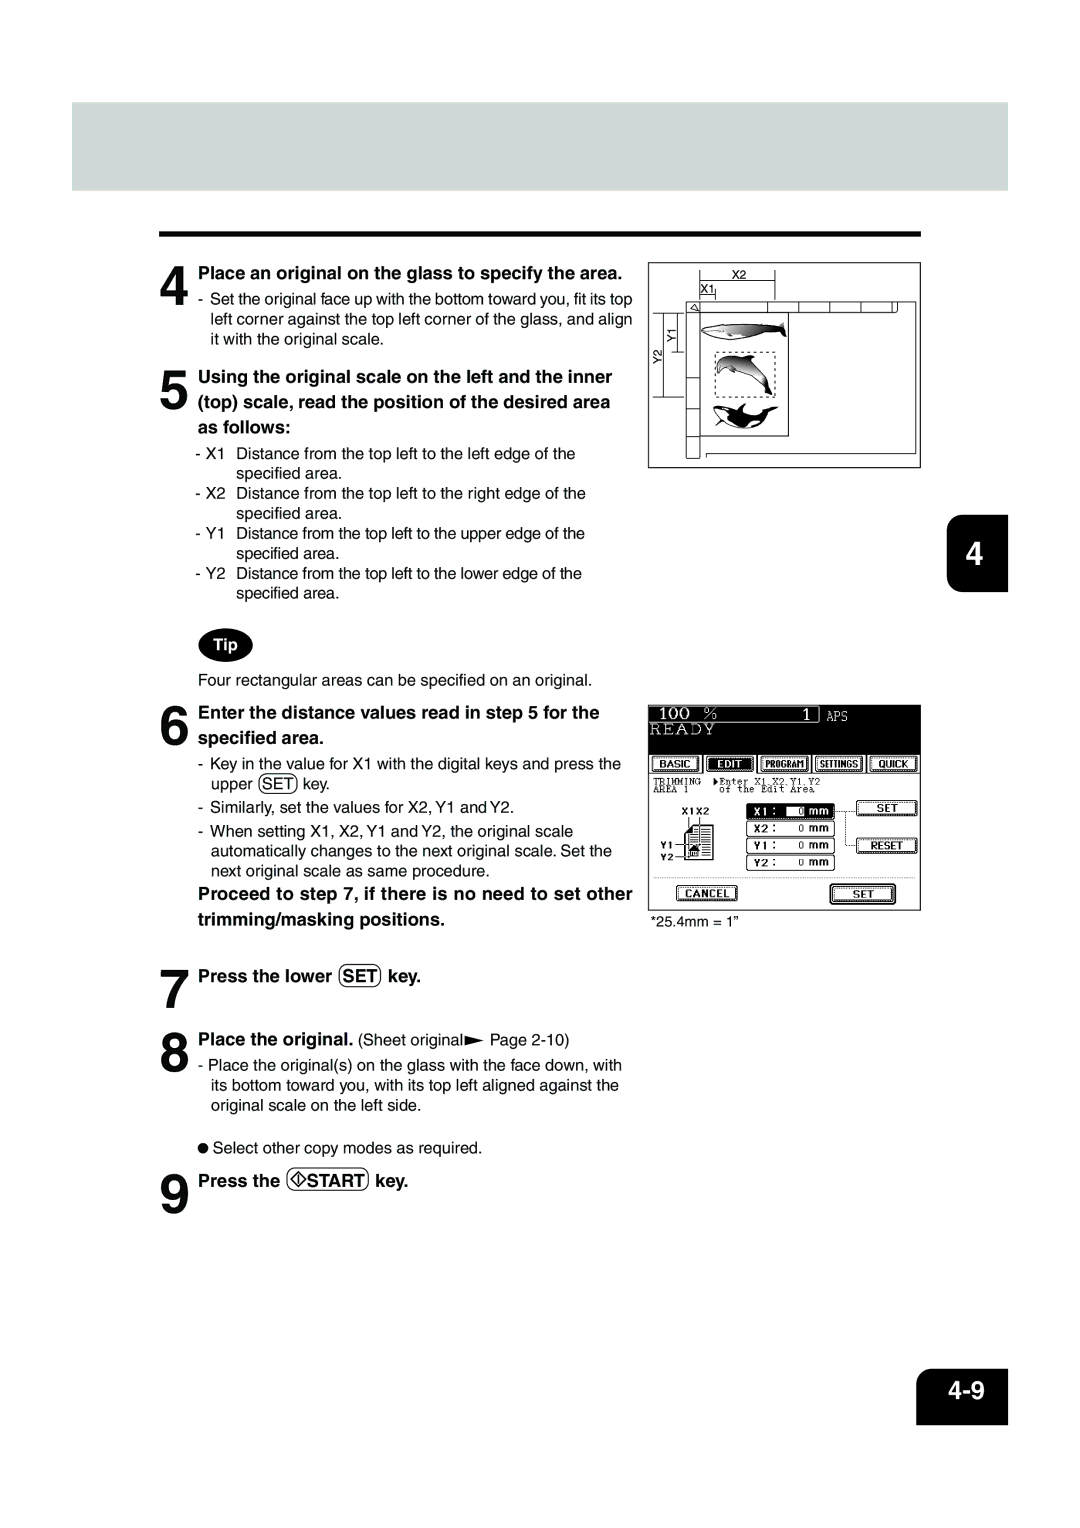
5 Using the original scale on the left and the inner (top) scale, read the position of the desired area as follows:
- X1 Distance from the top left to the left edge of the specified area.
-X2 Distance from the top left to the right edge of the specified area.
-Y1 Distance from the top left to the upper edge of the
specified area. | 4 |
|
-Y2 Distance from the top left to the lower edge of the specified area.
Four rectangular areas can be specified on an original.
6 Enter the distance values read in step 5 for the specified area.
-Key in the value for X1 with the digital keys and press the upper SET key.
-Similarly, set the values for X2, Y1 and Y2.
-When setting X1, X2, Y1 and Y2, the original scale automatically changes to the next original scale. Set the next original scale as same procedure.
Proceed to step 7, if there is no need to set other
trimming/masking positions. | *25.4mm = 1” |
7 Press the lower SET key. |
|
8 Place the original. (Sheet original | Page |
-Place the original(s) on the glass with the face down, with its bottom toward you, with its top left aligned against the original scale on the left side.
![]() Select other copy modes as required.
Select other copy modes as required.