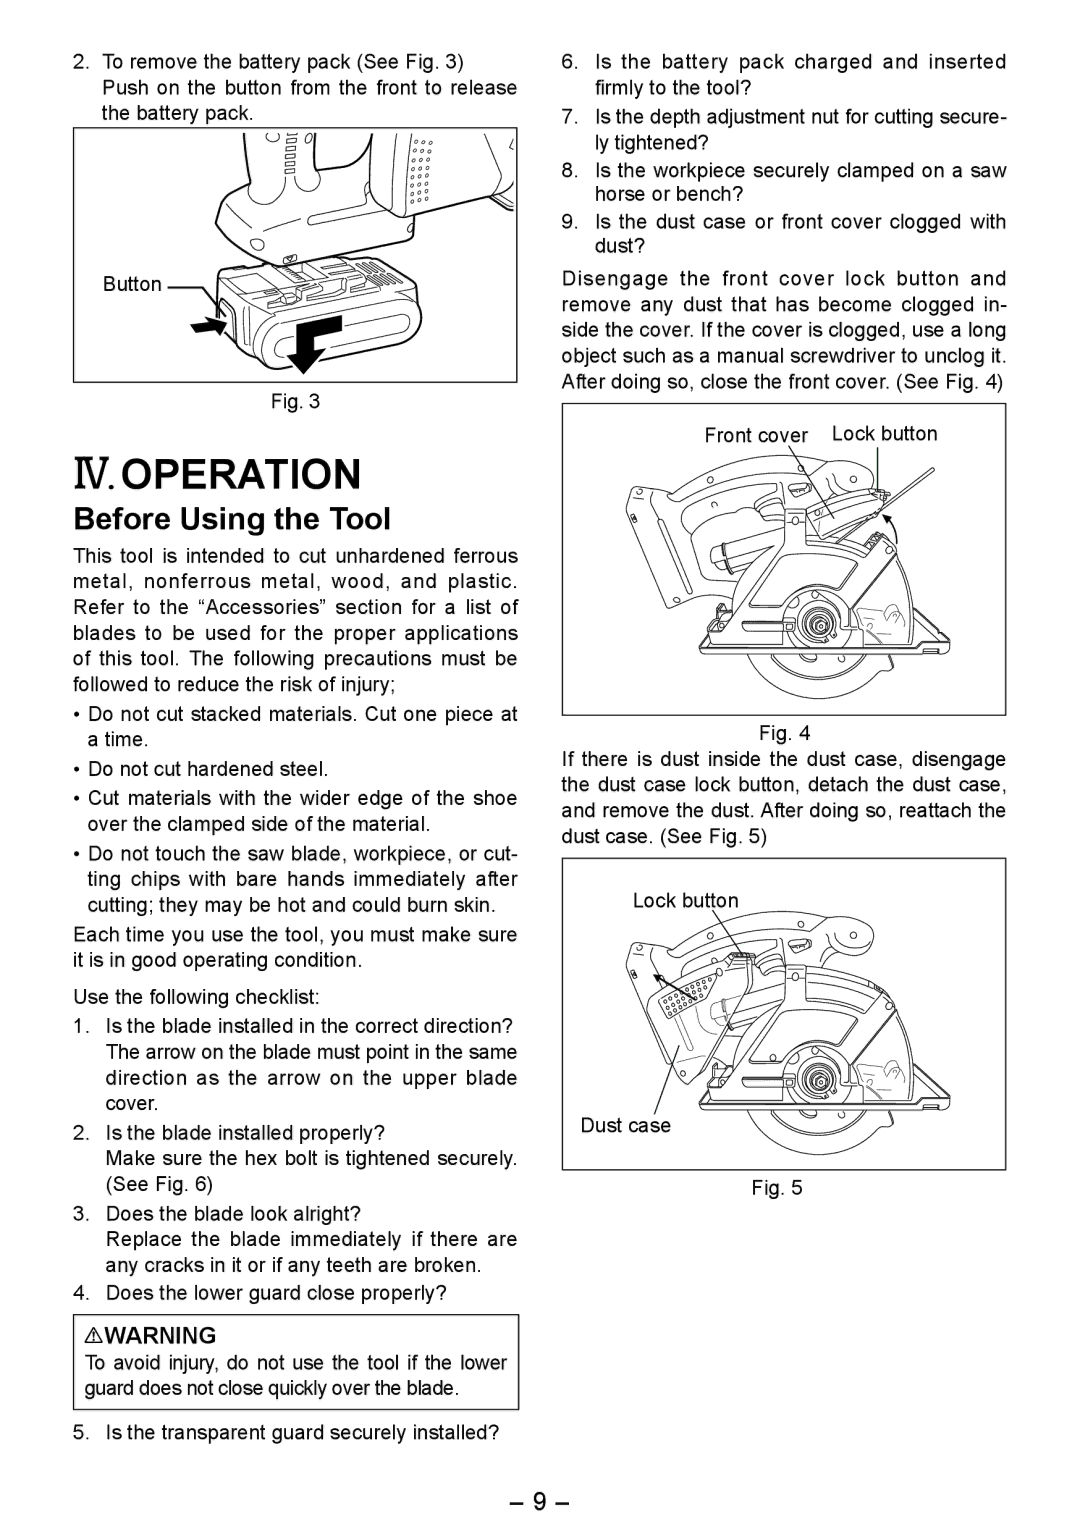
2.To remove the battery pack (See Fig. 3) Push on the button from the front to release the battery pack.
Button
Fig. 3
IV. OPERATION
Before Using the Tool
This tool is intended to cut unhardened ferrous metal, nonferrous metal, wood, and plastic. Refer to the “Accessories” section for a list of blades to be used for the proper applications of this tool. The following precautions must be followed to reduce the risk of injury;
•Do not cut stacked materials. Cut one piece at a time.
•Do not cut hardened steel.
•Cut materials with the wider edge of the shoe over the clamped side of the material.
•Do not touch the saw blade, workpiece, or cut- ting chips with bare hands immediately after cutting; they may be hot and could burn skin.
Each time you use the tool, you must make sure it is in good operating condition.
Use the following checklist:
1.Is the blade installed in the correct direction? The arrow on the blade must point in the same direction as the arrow on the upper blade cover.
2.Is the blade installed properly?
Make sure the hex bolt is tightened securely. (See Fig. 6)
3.Does the blade look alright?
Replace the blade immediately if there are any cracks in it or if any teeth are broken.
4.Does the lower guard close properly?
![]() WARNING
WARNING
To avoid injury, do not use the tool if the lower guard does not close quickly over the blade.
5. Is the transparent guard securely installed?
6.Is the battery pack charged and inserted firmly to the tool?
7.Is the depth adjustment nut for cutting secure- ly tightened?
8.Is the workpiece securely clamped on a saw horse or bench?
9.Is the dust case or front cover clogged with dust?
Disengage the front cover lock button and remove any dust that has become clogged in- side the cover. If the cover is clogged, use a long object such as a manual screwdriver to unclog it. After doing so, close the front cover. (See Fig. 4)
Front cover Lock button
Fig. 4
If there is dust inside the dust case, disengage the dust case lock button, detach the dust case, and remove the dust. After doing so, reattach the dust case. (See Fig. 5)
Lock button
Dust case
Fig. 5
- -