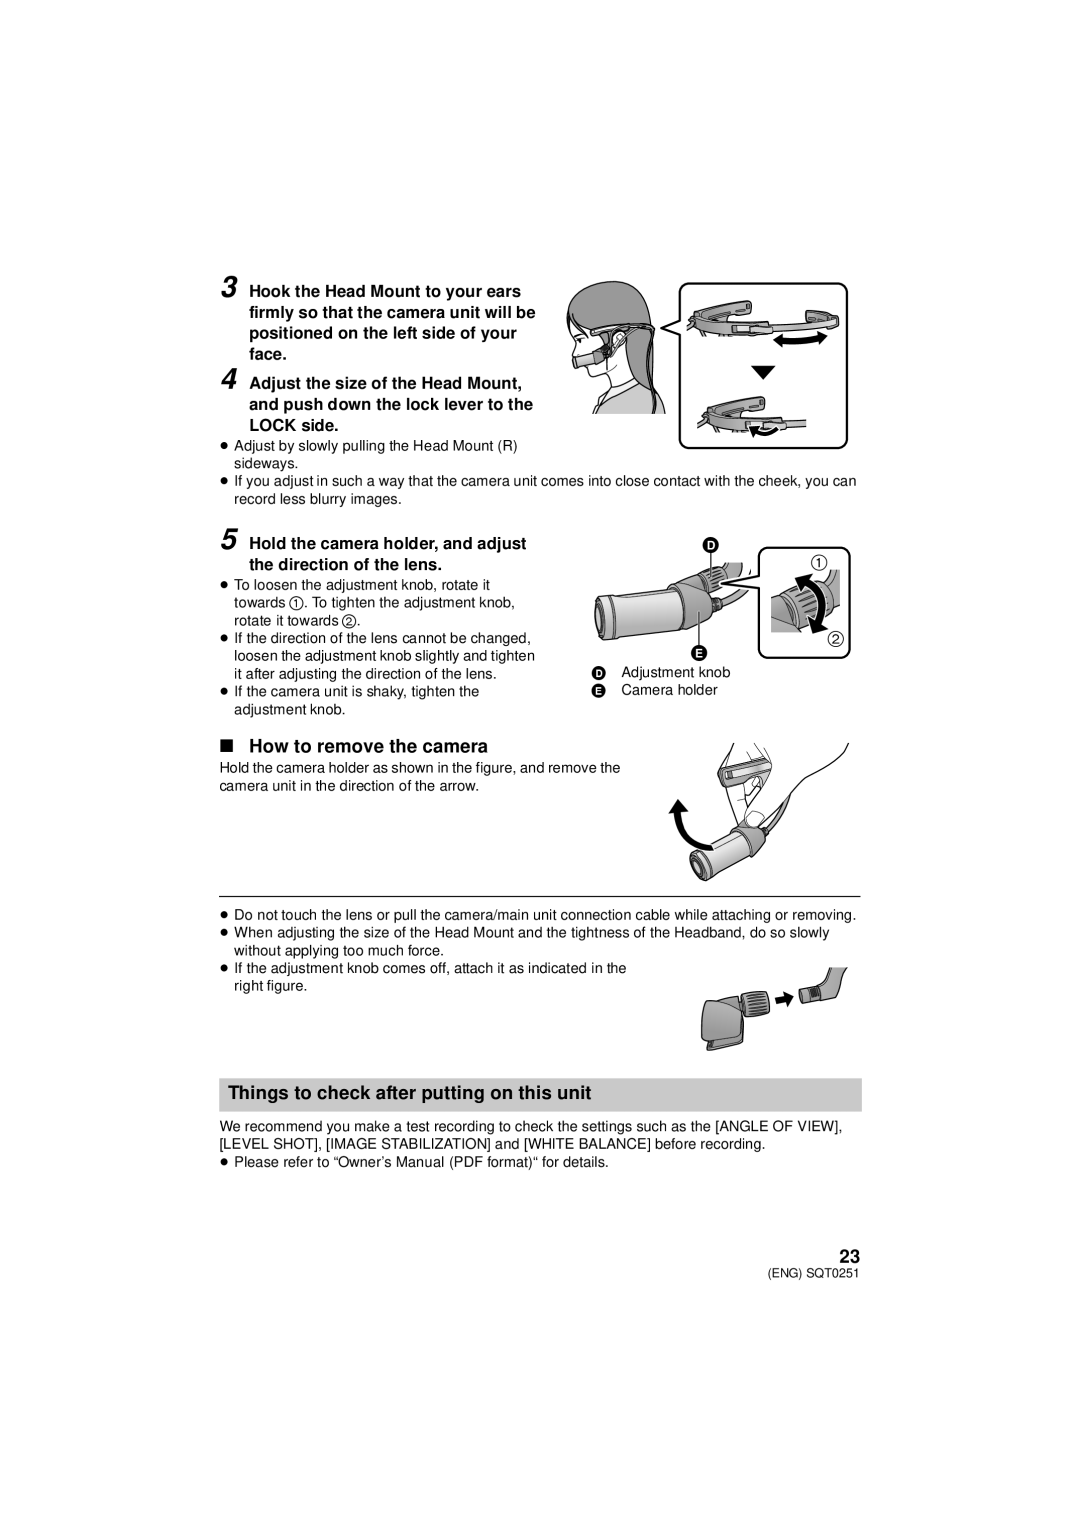
3 Hook the Head Mount to your ears firmly so that the camera unit will be positioned on the left side of your face.
4 Adjust the size of the Head Mount, and push down the lock lever to the LOCK side.
≥Adjust by slowly pulling the Head Mount (R) sideways.
≥If you adjust in such a way that the camera unit comes into close contact with the cheek, you can record less blurry images.
5 Hold the camera holder, and adjust the direction of the lens.
≥To loosen the adjustment knob, rotate it towards 1. To tighten the adjustment knob, rotate it towards 2.
≥If the direction of the lens cannot be changed, loosen the adjustment knob slightly and tighten it after adjusting the direction of the lens.
≥If the camera unit is shaky, tighten the adjustment knob.
DAdjustment knob E Camera holder
∫ How to remove the camera
Hold the camera holder as shown in the figure, and remove the camera unit in the direction of the arrow.
≥Do not touch the lens or pull the camera/main unit connection cable while attaching or removing.
≥When adjusting the size of the Head Mount and the tightness of the Headband, do so slowly without applying too much force.
≥If the adjustment knob comes off, attach it as indicated in the
right figure.
Things to check after putting on this unit
We recommend you make a test recording to check the settings such as the [ANGLE OF VIEW], [LEVEL SHOT], [IMAGE STABILIZATION] and [WHITE BALANCE] before recording.
≥ Please refer to “Owner’s Manual (PDF format)“ for details.
23
(ENG) SQT0251
