Replacement
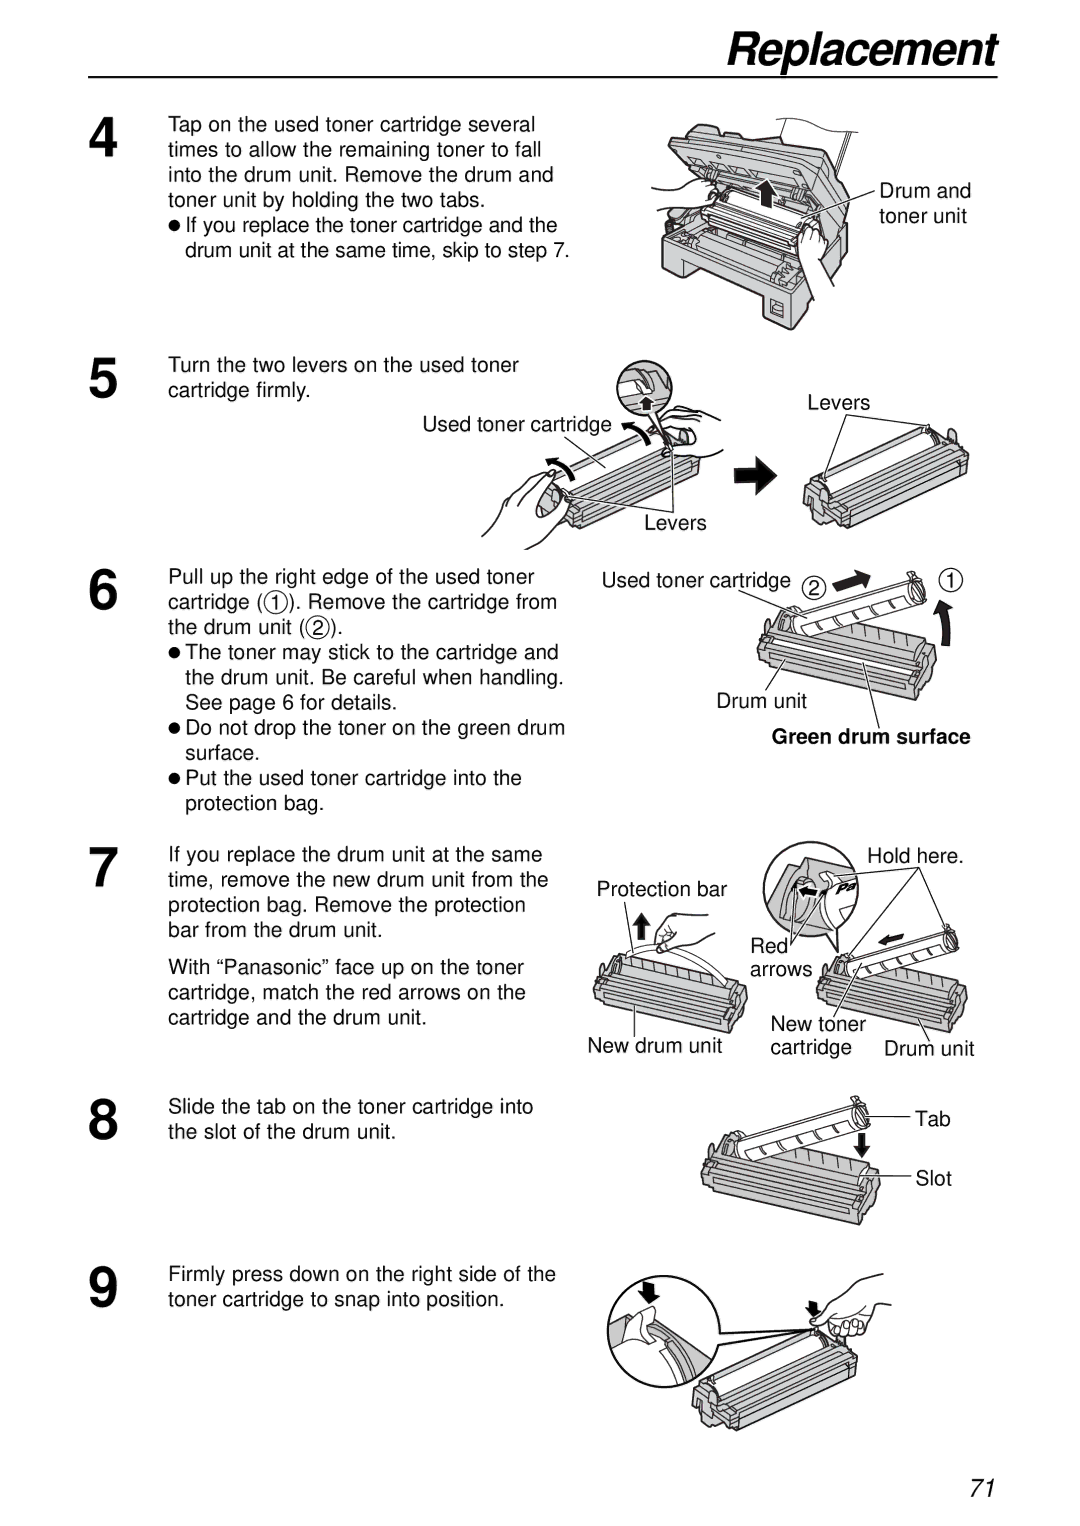
4 | Tap on the used toner cartridge several |
|
times to allow the remaining toner to fall |
| |
| into the drum unit. Remove the drum and | Drum and |
| toner unit by holding the two tabs. | |
| toner unit | |
| ● If you replace the toner cartridge and the | |
|
| |
| drum unit at the same time, skip to step 7. |
|
5 | Turn the two levers on the used toner |
|
|
cartridge firmly. | Levers |
| |
| Used toner cartridge |
| |
|
| Levers |
|
6 | Pull up the right edge of the used toner | Used toner cartridge 2 | 1 |
cartridge (#). Remove the cartridge from |
|
| |
| the drum unit ($). |
|
|
| ● The toner may stick to the cartridge and |
|
|
| the drum unit. Be careful when handling. | Drum unit |
|
| See page 6 for details. |
| |
| ● Do not drop the toner on the green drum | Green drum surface | |
|
| ||
surface.
●Put the used toner cartridge into the protection bag.
7 | If you replace the drum unit at the same |
time, remove the new drum unit from the | |
| protection bag. Remove the protection |
| bar from the drum unit. |
| With “Panasonic” face up on the toner |
| cartridge, match the red arrows on the |
| cartridge and the drum unit. |
8 | Slide the tab on the toner cartridge into |
the slot of the drum unit. |
Hold here.
Protection bar
Red arrows ![]()
![]()
![]()
![]()
![]()
![]()
![]()
![]()
New drum unit | New toner |
cartridge Drum unit |
![]()
![]()
![]()
![]() Tab
Tab
![]()
![]()
![]()
![]()
![]()
![]() Slot
Slot
9 | Firmly press down on the right side of the |
toner cartridge to snap into position. |
71