Using the serial terminals
 Procedure of setting communication conditions
MAIN MENU
PICTURE
POSITION
LANGUAGE
![]() OPTION
OPTION
![]() TEST PATTERN
TEST PATTERN
![]() RESISTERED SIGNAL LIST
RESISTERED SIGNAL LIST
![]() :MENU SELECT
:MENU SELECT
ENTER:SUB MENU
OPTION
| ID | 2 |
|
| SETTING |
| |
| LAMP1 RUNTIME | 57h |
|
| LAMP2 RUNTIME | 60h |
|
| LAMP SELECT | DUAL |
|
| LAMP POWER | HIGH |
|
| LAMP COOLING TIME | SHORT |
|
| RS232C SETTING |
|
|
| RGB2 SELECT | RGB1 OUT |
|
| OSD POSITION | 1 |
|
| :MENU SELECT |
|
|
ENTER:SUB MENU |
|
| |
|
|
|
|
|
|
|
|
RS232C SETTING |
|
| |
| (IN) BAUDRATE | 38400 |
|
| (IN) PARITY | EVEN |
|
| (OUT) BAUDRATE | 38400 |
|
| (OUT) PARITY | EVEN |
|
| VPS SYSTEM | MASTER |
|
| GROUP | A |
|
|
| MASTER |
|
| :MENU SELECT |
|
|
| :CHANGE |
|
|
|
|
|
|
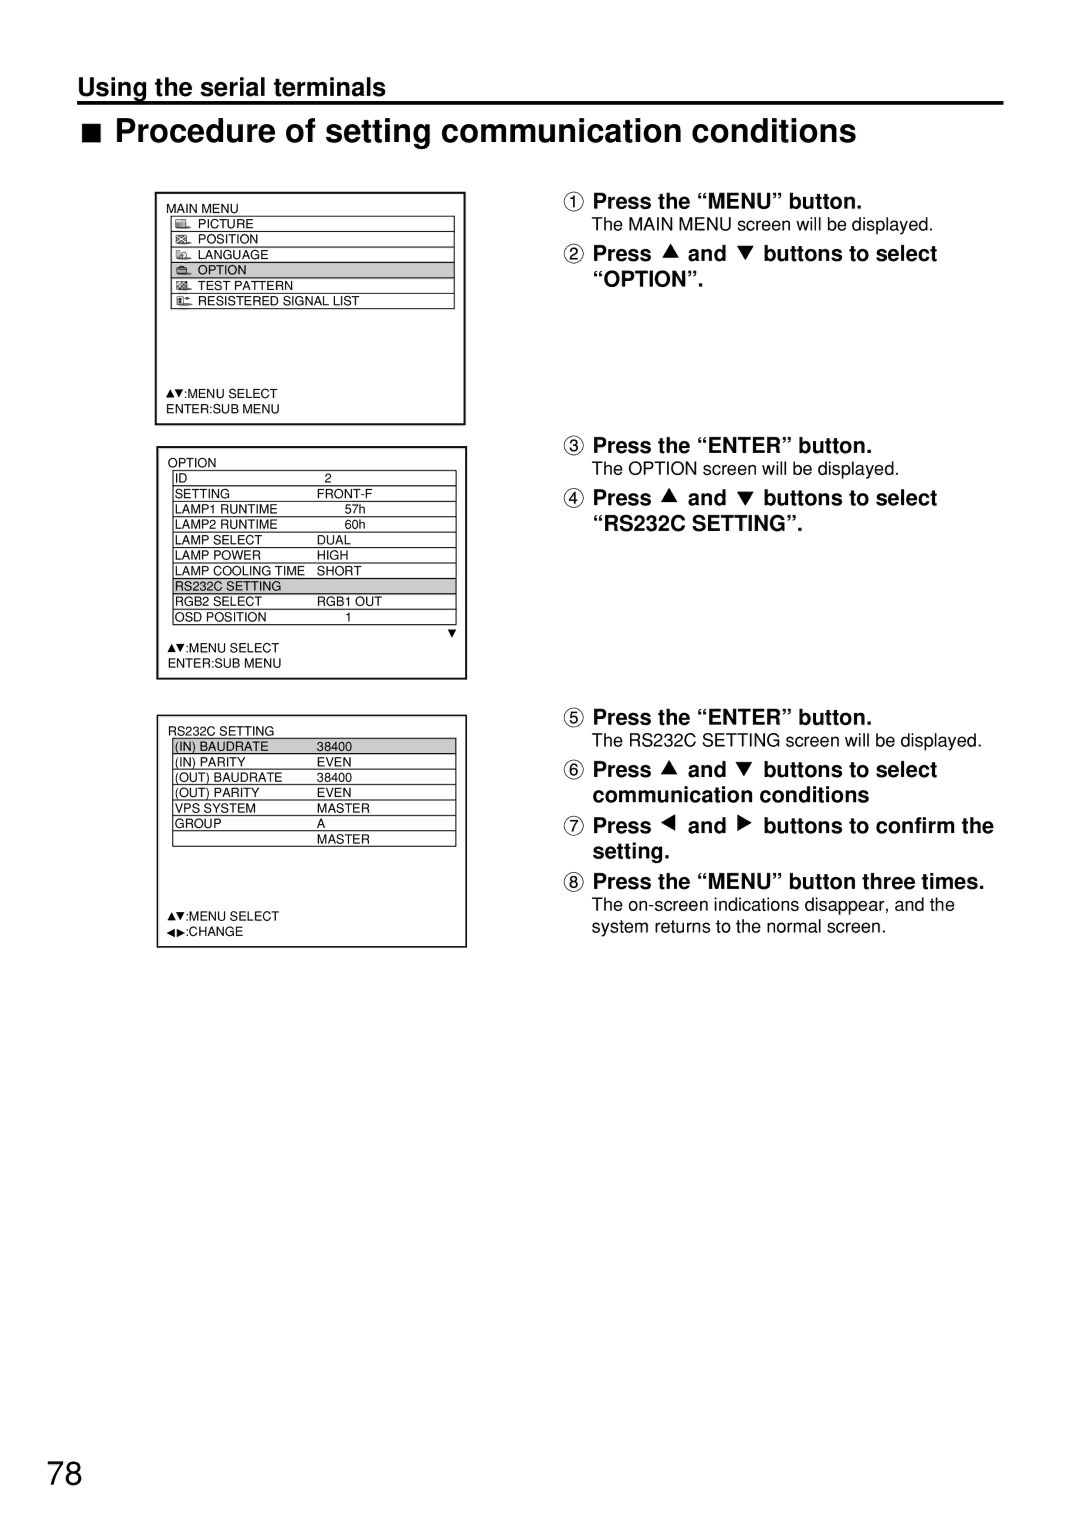
 Press the “MENU” button.
The MAIN MENU screen will be displayed.
 Press
Press  and
and  buttons to select “OPTION”.
 Press the “ENTER” button.
The OPTION screen will be displayed.
![]() Press
Press ![]() and
and ![]() buttons to select “RS232C SETTING”.
buttons to select “RS232C SETTING”.
 Press the “ENTER” button.
The RS232C SETTING screen will be displayed.
![]() Press
Press ![]() and
and ![]() buttons to select communication conditions
buttons to select communication conditions
![]() Press
Press ![]() and
and ![]() buttons to confirm the setting.
buttons to confirm the setting.
![]() Press the “MENU” button three times.
Press the “MENU” button three times.
The
78