1.Preparations
(1)Procure a ceiling mount bracket.
(2)Installation Surface
CAUTION: Consult an expert on the load bear- ing capacity of the installation surface and structure. If the surface is not strong enough, the camera may fall down. Refer to the prod- uct specifications for weights.
Prepare appropriate hardware (e.g. wall nuts, anchor bolts, etc.) for fixing on the installation surface.
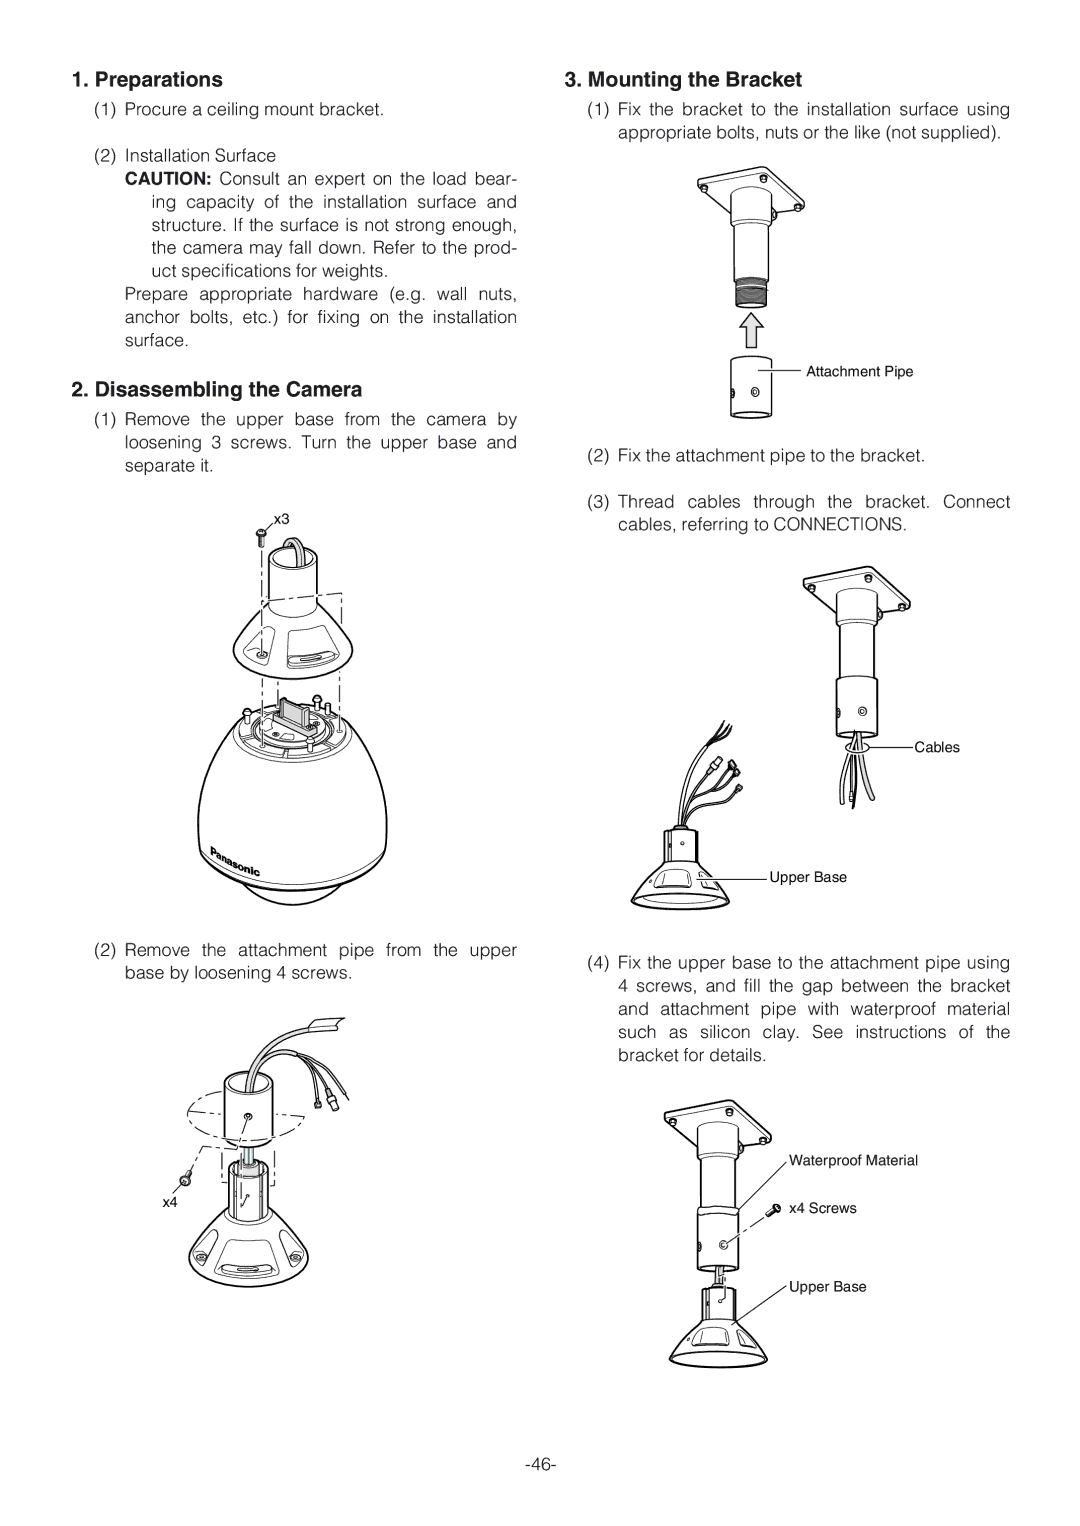
2.Disassembling the Camera
(1)Remove the upper base from the camera by loosening 3 screws. Turn the upper base and separate it.
x3
(2)Remove the attachment pipe from the upper base by loosening 4 screws.
x4
3.Mounting the Bracket
(1)Fix the bracket to the installation surface using appropriate bolts, nuts or the like (not supplied).
![]() Attachment Pipe
Attachment Pipe
(2)Fix the attachment pipe to the bracket.
(3)Thread cables through the bracket. Connect cables, referring to CONNECTIONS.
![]() Cables
Cables
Upper Base
(4)Fix the upper base to the attachment pipe using 4 screws, and fill the gap between the bracket and attachment pipe with waterproof material such as silicon clay. See instructions of the bracket for details.
Waterproof Material
x4 Screws
Upper Base