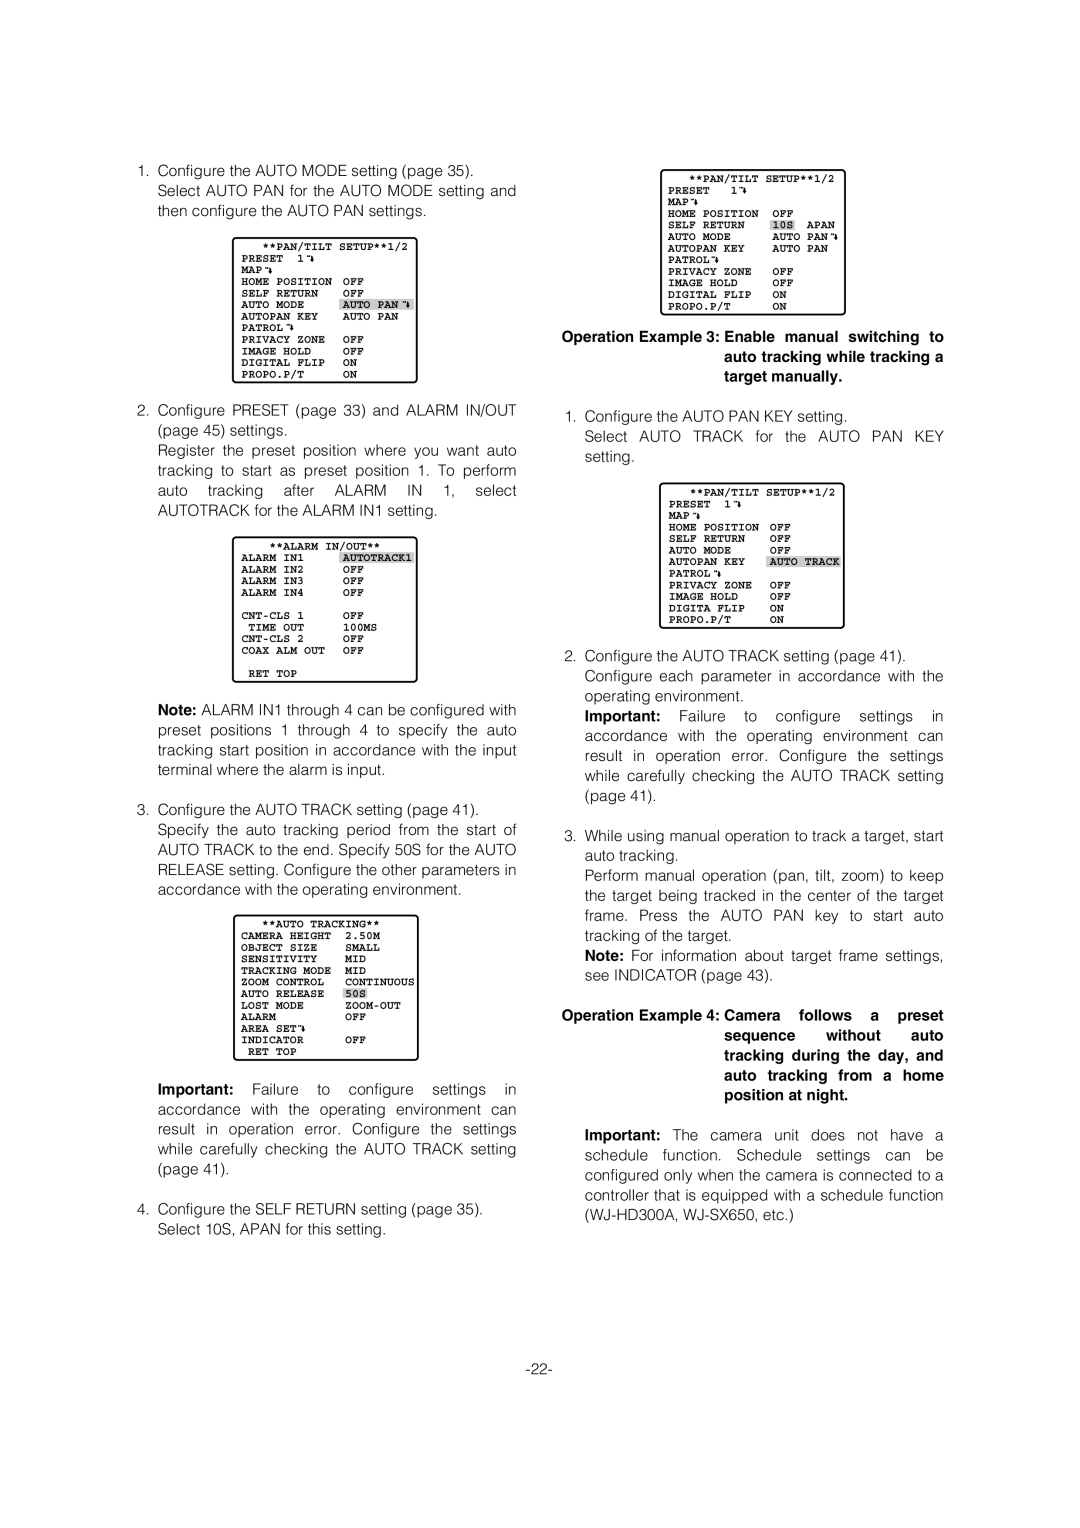
1.Configure the AUTO MODE setting (page 35). Select AUTO PAN for the AUTO MODE setting and then configure the AUTO PAN settings.
**PAN/TILT SETUP**1/2
PRESET | 1 |
|
MAP |
|
|
HOME POSITION | OFF | |
SELF RETURN | OFF | |
AUTO MODE | AUTO PAN | |
AUTOPAN | KEY | AUTO PAN |
PATROL |
|
|
PRIVACY | ZONE | OFF |
IMAGE HOLD | OFF | |
DIGITAL | FLIP | ON |
PROPO.P/T | ON | |
2.Configure PRESET (page 33) and ALARM IN/OUT (page 45) settings.
Register the preset position where you want auto tracking to start as preset position 1. To perform auto tracking after ALARM IN 1, select AUTOTRACK for the ALARM IN1 setting.
**ALARM IN/OUT**
ALARM IN1 | AUTOTRACK1 |
ALARM IN2 | OFF |
ALARM IN3 | OFF |
ALARM IN4 | OFF |
OFF | |
TIME OUT | 100MS |
OFF | |
COAX ALM OUT | OFF |
RET TOP |
|
Note: ALARM IN1 through 4 can be configured with preset positions 1 through 4 to specify the auto tracking start position in accordance with the input terminal where the alarm is input.
3.Configure the AUTO TRACK setting (page 41). Specify the auto tracking period from the start of AUTO TRACK to the end. Specify 50S for the AUTO RELEASE setting. Configure the other parameters in accordance with the operating environment.
**AUTO TRACKING**
CAMERA HEIGHT | 2.50M | ||
OBJECT SIZE | SMALL | ||
SENSITIVITY | MID | ||
TRACKING MODE | MID | ||
ZOOM | CONTROL | CONTINUOUS | |
AUTO | RELEASE | 50S |
|
LOST | MODE | ||
ALARM |
| OFF | |
AREA | SET | OFF | |
INDICATOR | |||
RET | TOP |
|
|
Important: Failure to configure settings in accordance with the operating environment can result in operation error. Configure the settings while carefully checking the AUTO TRACK setting (page 41).
4.Configure the SELF RETURN setting (page 35). Select 10S, APAN for this setting.
**PAN/TILT SETUP**1/2
PRESET 1 |
|
|
MAP | OFF |
|
HOME POSITION | APAN | |
SELF RETURN | 10S | |
AUTO MODE | AUTO PAN | |
AUTOPAN KEY | AUTO PAN | |
PATROL | OFF |
|
PRIVACY ZONE |
| |
IMAGE HOLD | OFF |
|
DIGITAL FLIP | ON |
|
PROPO.P/T | ON |
|
Operation Example 3: Enable manual switching to auto tracking while tracking a target manually.
1.Configure the AUTO PAN KEY setting.
Select AUTO TRACK for the AUTO PAN KEY setting.
**PAN/TILT SETUP**1/2
PRESET 1 |
|
MAP |
|
HOME POSITION | OFF |
SELF RETURN | OFF |
AUTO MODE | OFF |
AUTOPAN KEY | AUTO TRACK |
PATROL |
|
PRIVACY ZONE | OFF |
IMAGE HOLD | OFF |
DIGITA FLIP | ON |
PROPO.P/T | ON |
2.Configure the AUTO TRACK setting (page 41). Configure each parameter in accordance with the operating environment.
Important: Failure to configure settings in accordance with the operating environment can result in operation error. Configure the settings while carefully checking the AUTO TRACK setting (page 41).
3.While using manual operation to track a target, start auto tracking.
Perform manual operation (pan, tilt, zoom) to keep the target being tracked in the center of the target frame. Press the AUTO PAN key to start auto tracking of the target.
Note: For information about target frame settings, see INDICATOR (page 43).
Operation Example 4: Camera | follows a | preset |
sequence | without | auto |
tracking during the day, and auto tracking from a home position at night.
Important: The camera unit does not have a schedule function. Schedule settings can be configured only when the camera is connected to a controller that is equipped with a schedule function