SECTION 1: Using the SETUP Menu
Step 1: Turning the Printer On:
Locate the POWER Key, represented by the ![]() symbol, found in the upper left hand corner of the keypad. Press and hold the POWER Key until the print head cycles. The LS3E will display the last label code in use.
symbol, found in the upper left hand corner of the keypad. Press and hold the POWER Key until the print head cycles. The LS3E will display the last label code in use.
Step 2: Loading/Removing the Labels:
1.Load labels on mandrel (label roll holder), as shown on the decal inside the printer door.
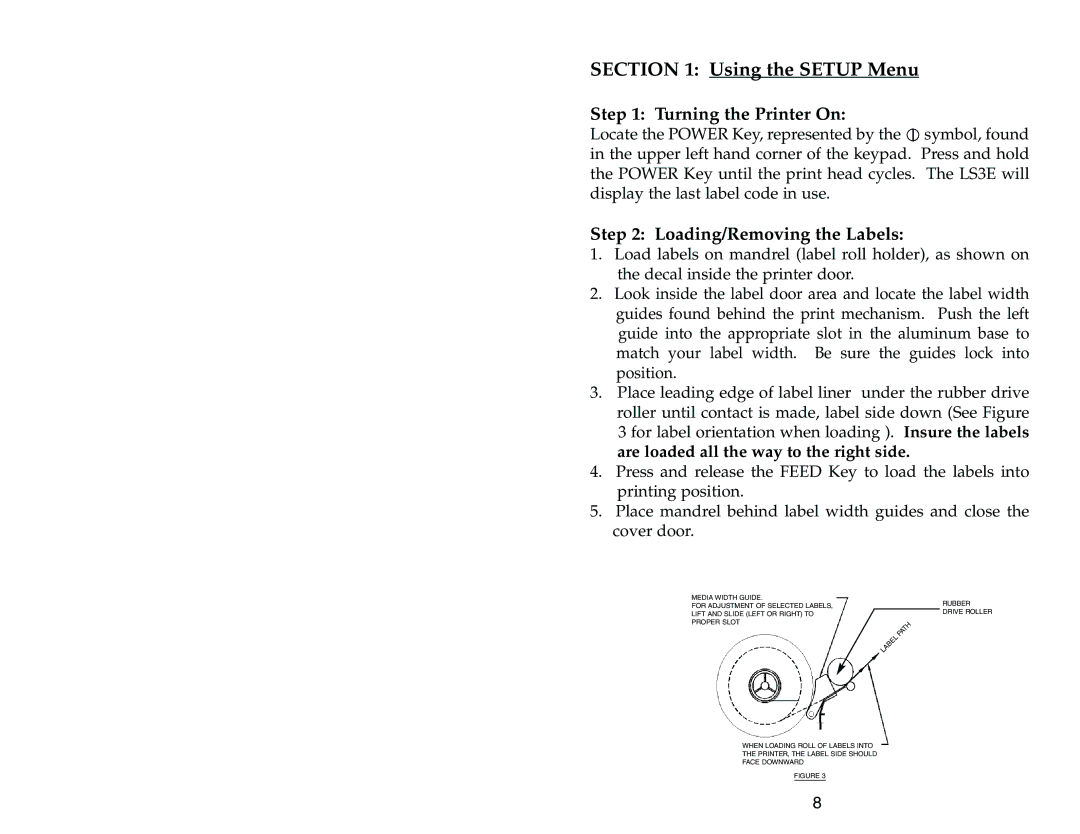
2.Look inside the label door area and locate the label width guides found behind the print mechanism. Push the left guide into the appropriate slot in the aluminum base to match your label width. Be sure the guides lock into position.
3.Place leading edge of label liner under the rubber drive roller until contact is made, label side down (See Figure 3 for label orientation when loading ). Insure the labels are loaded all the way to the right side.
4.Press and release the FEED Key to load the labels into printing position.
5.Place mandrel behind label width guides and close the cover door.
MEDIA WIDTH GUIDE.
FOR ADJUSTMENT OF SELECTED LABELS, LIFT AND SLIDE (LEFT OR RIGHT) TO PROPER SLOT
RUBBER DRIVE ROLLER
WHEN LOADING ROLL OF LABELS INTO THE PRINTER, THE LABEL SIDE SHOULD FACE DOWNWARD
FIGURE 3
8
