SERVICE CABLE
The camera includes a service connector that outputs camera video. Use it at the installation site to set up the field of view and to focus the camera.
Pelco offers an optional service cable
NOTE: The
To assemble a service cable for the camera, purchase the following items from a local electronics supply store:
Qty Description
1 2.5 mm stereo plug (male)
1CPM 88 miniature coaxial connector
1RG174/U coaxial cable
1
To assemble the cable:
1.Attach the CPM 88 miniature coaxial connector to one end of the cable. Follow the directions supplied with the miniature coaxial connector.
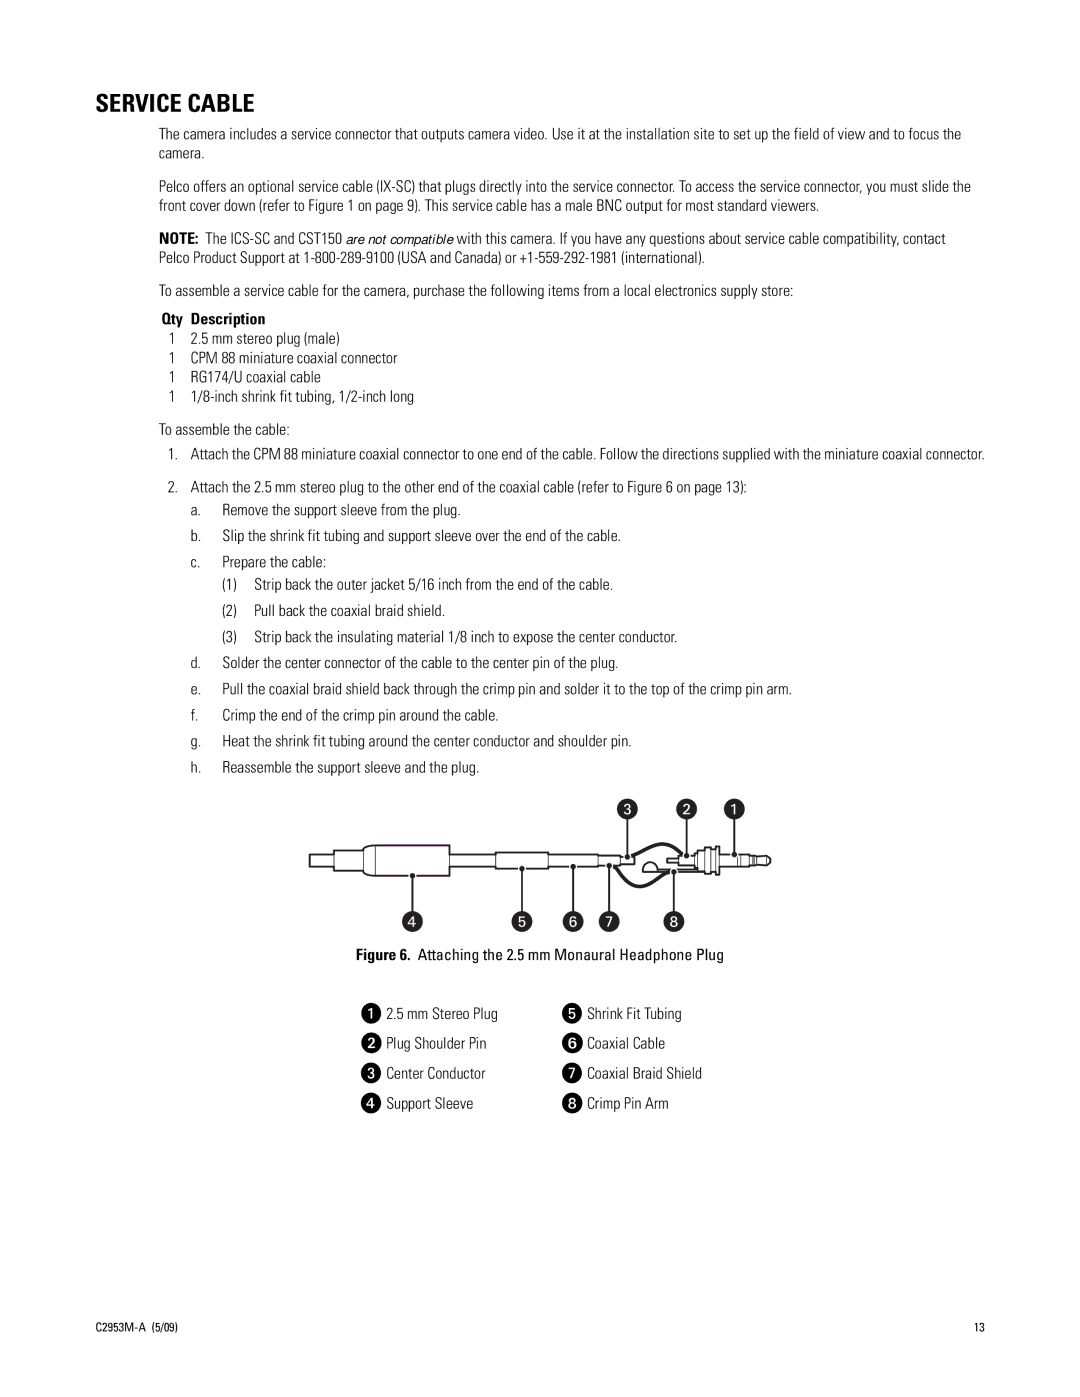
2.Attach the 2.5 mm stereo plug to the other end of the coaxial cable (refer to Figure 6 on page 13):
a.Remove the support sleeve from the plug.
b.Slip the shrink fit tubing and support sleeve over the end of the cable.
c.Prepare the cable:
(1)Strip back the outer jacket 5/16 inch from the end of the cable.
(2)Pull back the coaxial braid shield.
(3)Strip back the insulating material 1/8 inch to expose the center conductor.
d.Solder the center connector of the cable to the center pin of the plug.
e.Pull the coaxial braid shield back through the crimp pin and solder it to the top of the crimp pin arm.
f.Crimp the end of the crimp pin around the cable.
g.Heat the shrink fit tubing around the center conductor and shoulder pin.
h.Reassemble the support sleeve and the plug.
Figure 6. Attaching the 2.5 mm Monaural Headphone Plug
ì
î
ï
ñ
2.5mm Stereo Plug Plug Shoulder Pin Center Conductor Support Sleeve
ó
r s t
Shrink Fit Tubing
Coaxial Cable
Coaxial Braid Shield
Crimp Pin Arm
13 |
