MAIN MENU |
| |
| SPECIAL SETTINGS |
|
 | TV SYSTEM | Ä AUTO Å |
É | CHILD LOCK | OFF |
| OSD MODE | AUTO |
| CLOCK DISPLAY | ON |
| VCR 1 OR 2 | VCR 1 |
| REPEAT PLAY | OFF |
| AUTO STANDBY | ON |
| DEMO | OFF |
TO EXIT
PRESS MENU
MAIN MENU
SPECIAL SETTINGS
VCR ONLY RESPONDS TO VCR 2 COMMANDS
PRESS SELECT AND
2 SIMULTANEOUSLY THEN PRESS OK
TO STORE
PRESS OK
Adapting remote control
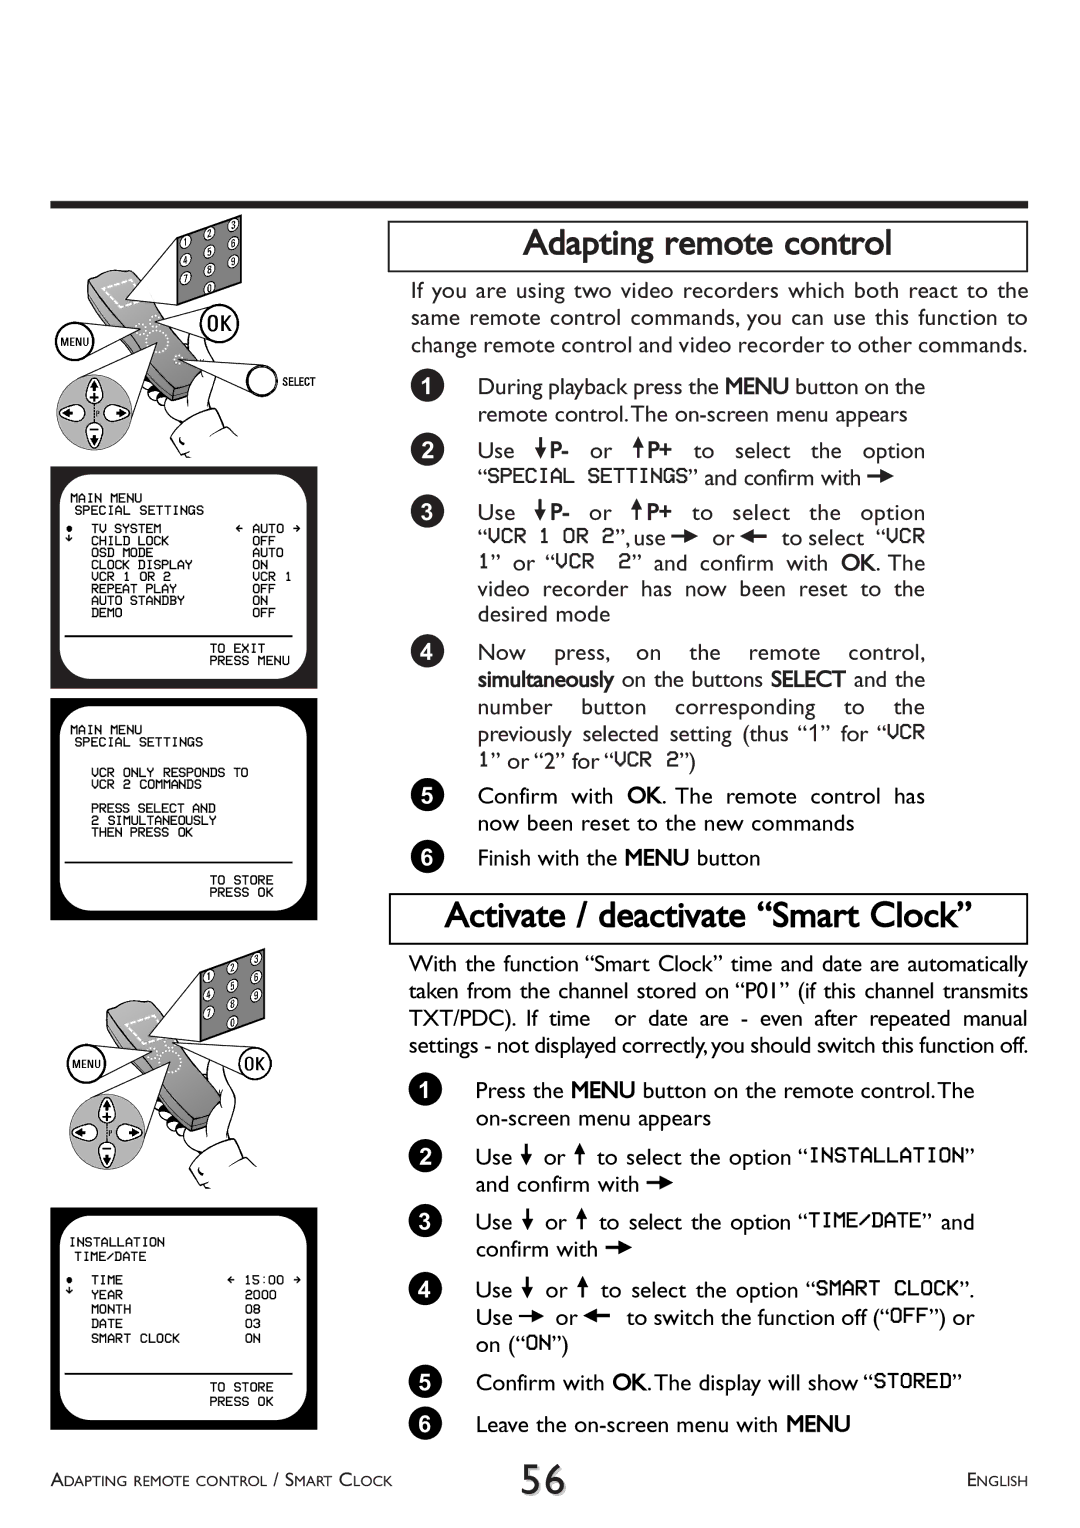
If you are using two video recorders which both react to the same remote control commands, you can use this function to change remote control and video recorder to other commands.
1During playback press the MENU button on the remote control.The
2Use =P- or ;P+ to select the option “SPECIAL SETTINGS” and confirm with P
3Use =P- or ;P+ to select the option “VCR 1 OR 2”, use P or Q to select “VCR
1” or “VCR 2” and confirm with OK. The video recorder has now been reset to the desired mode
4 Now press, on the remote control, simultaneously on the buttons SELECT and the number button corresponding to the previously selected setting (thus “1” for “VCR 1” or “2” for “VCR 2”)
5Confirm with OK. The remote control has now been reset to the new commands
6Finish with the MENU button
Activate / deactivate “Smart Clock”
INSTALLATION
| TIME/DATE |
|
 TIME | Ä 15:00 Å | |
É | YEAR | 2000 |
| ||
| MONTH | 08 |
| DATE | 03 |
| SMART CLOCK | ON |
TO STORE
PRESS OK
ADAPTING REMOTE CONTROL / SMART CLOCK
With the function “Smart Clock” time and date are automatically taken from the channel stored on “P01” (if this channel transmits TXT/PDC). If time or date are - even after repeated manual settings - not displayed correctly,you should switch this function off.
1Press the MENU button on the remote control.The
2Use = or ; to select the option “INSTALLATION” and confirm with P
3Use = or ; to select the option “TIME/DATE” and confirm with P
4Use = or ; to select the option “SMART CLOCK”. Use P or Q to switch the function off (“OFF”) or on (“ON”)
5Confirm with OK.The display will show “STORED”
6 Leave the
56 | ENGLISH |
|
