CONGRATULATIONS YOU NOW OWN A NEW PHILIPS VIDEORECORDER
TO CONTINUE PRESS OK
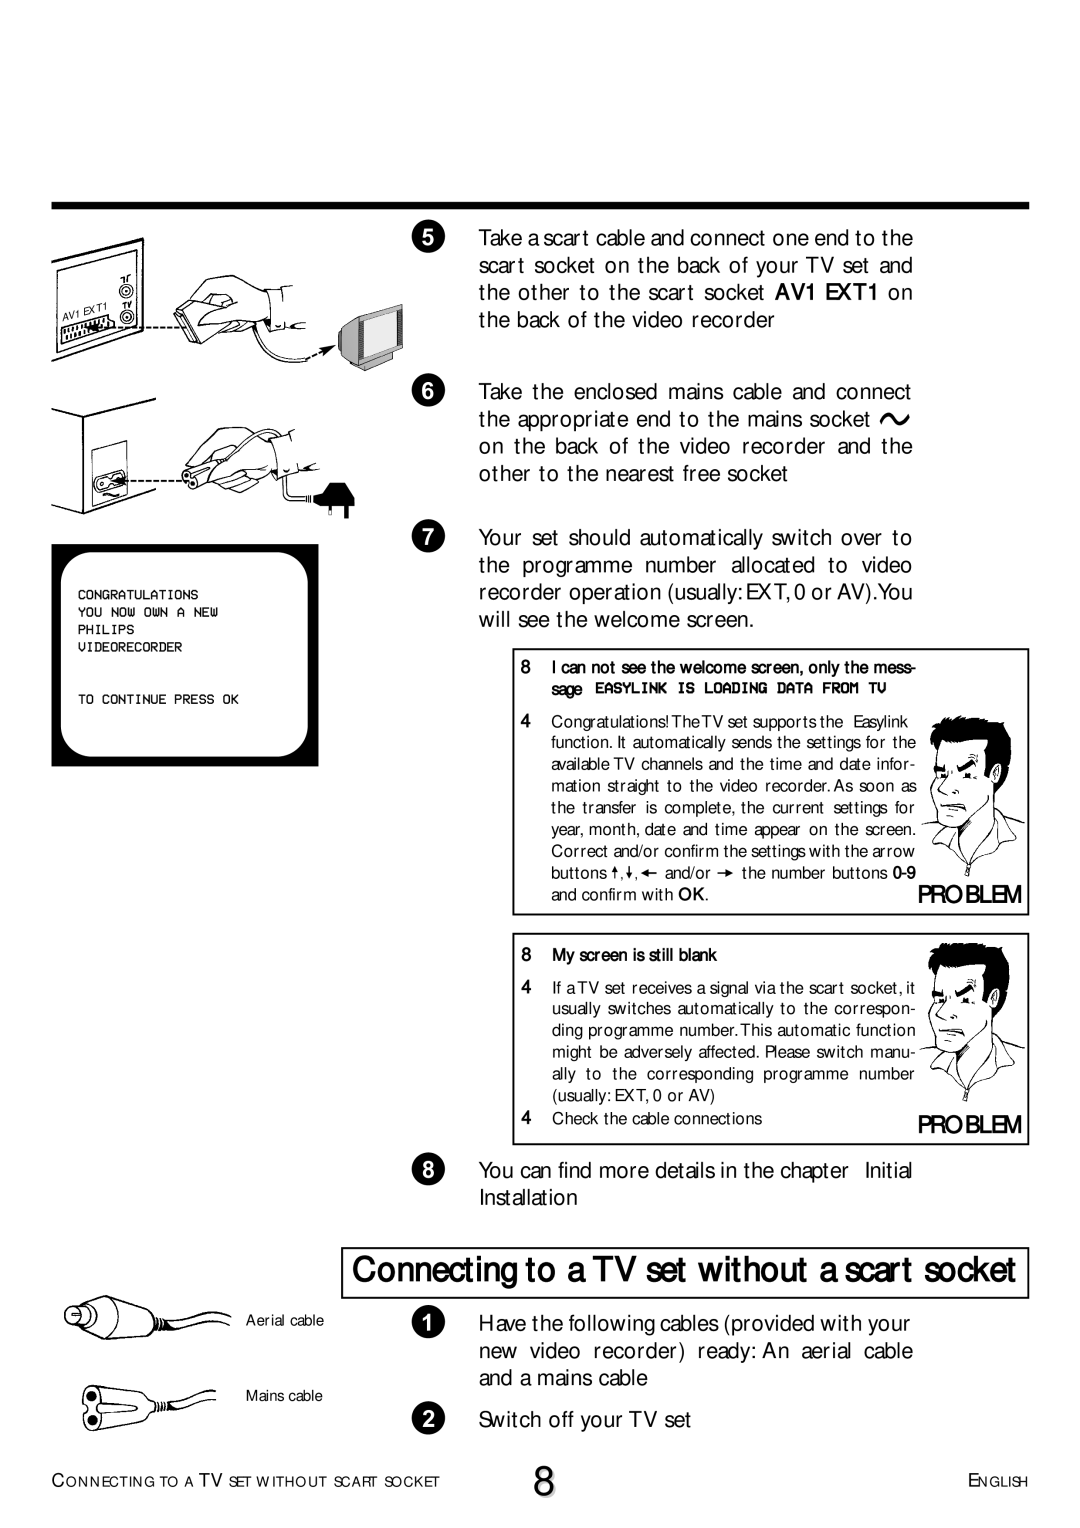
5Take a scart cable and connect one end to the
scart socket on the back of your TV set and the other to the scart socket AV1 EXT1 on the back of the video recorder
6Take the enclosed mains cable and connect the appropriate end to the mains socket 4 on the back of the video recorder and the other to the nearest free socket
7Your set should automatically switch over to the programme number allocated to video recorder operation (usually: EXT, 0 or AV).You will see the welcome screen.
8I can not see the welcome screen, only the mess- sage “EASYLINK IS LOADING DATA FROM TV”
4Congratulations! The TV set supports the “Easylink” function. It automatically sends the settings for the available TV channels and the time and date infor- mation straight to the video recorder. As soon as the transfer is complete, the current settings for year, month, date and time appear on the screen. Correct and/or confirm the settings with the arrow buttons ;, =, Q and/or P the number buttons
and confirm with OK. | PROBLEM |
8My screen is still blank
4If a TV set receives a signal via the scart socket, it usually switches automatically to the correspon- ding programme number. This automatic function might be adversely affected. Please switch manu- ally to the corresponding programme number (usually: EXT, 0 or AV)
4 Check the cable connections | PROBLEM |
|
8You can find more details in the chapter “Initial Installation”
Aerial cable
Mains cable
Connecting to a TV set without a scart socket
1Have the following cables (provided with your new video recorder) ready: An aerial cable and a mains cable
2 Switch off your TV set
CONNECTING TO A TV SET WITHOUT SCART SOCKET | 8 | ENGLISH |
|
