46 Setting the Controller to Operate a DSS Receiver (cont’d)
6
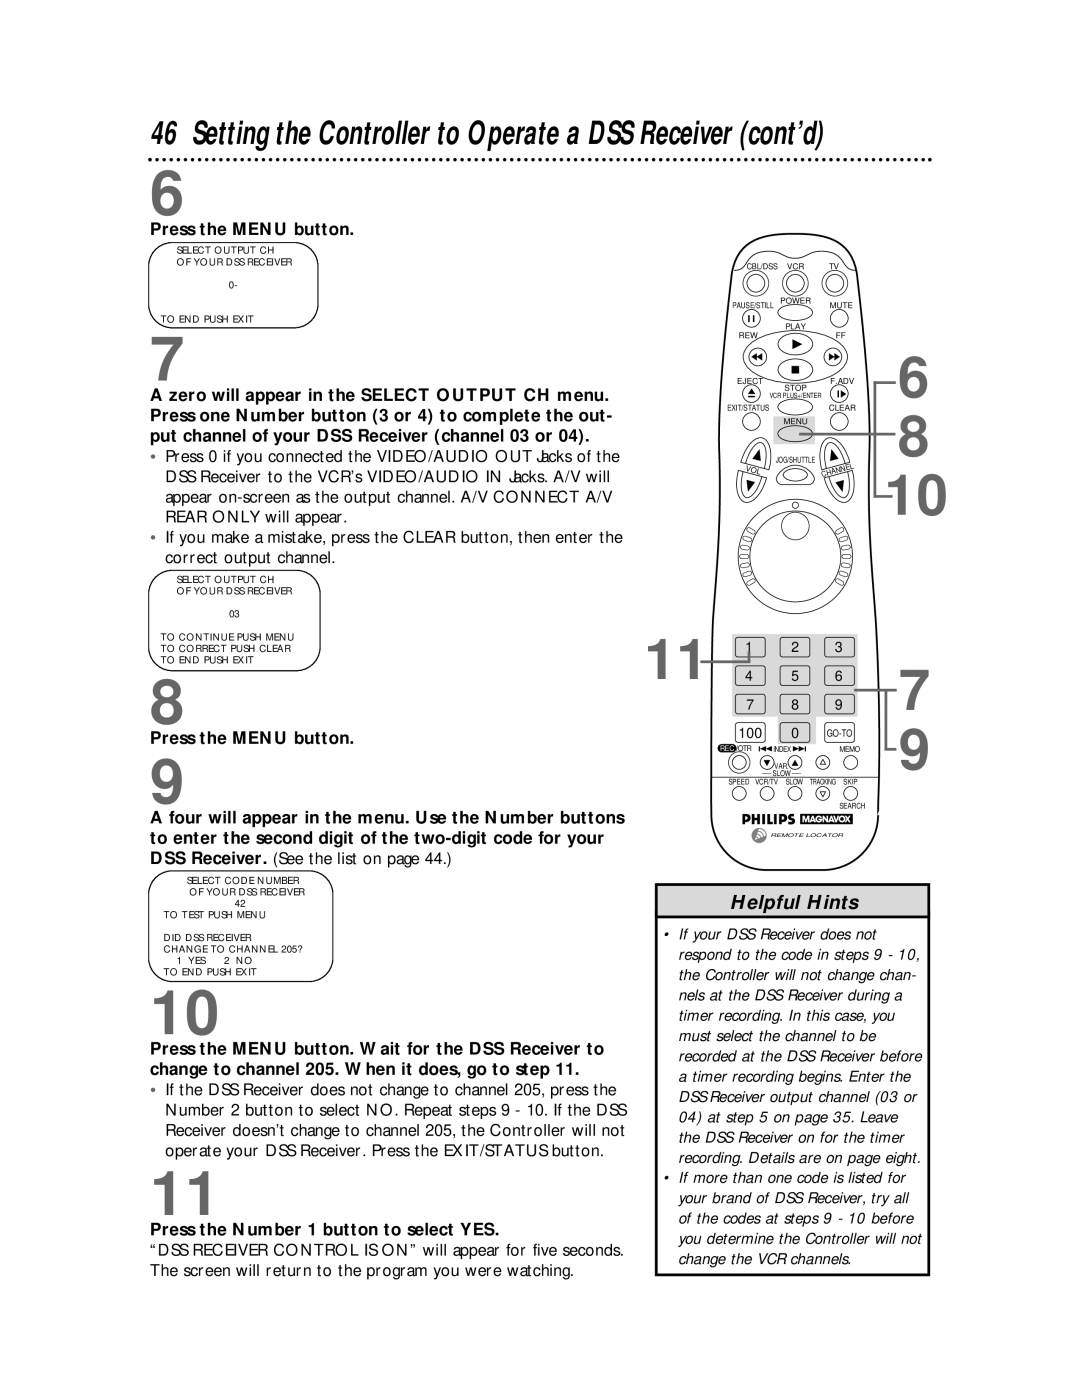
Press the MENU button.
SELECT OUTPUT CH |
|
|
| |
OF YOUR DSS RECEIVER | CBL/DSS | VCR | TV | |
| ||||
0- |
|
|
| |
| PAUSE/STILL | POWER | MUTE | |
TO END PUSH EXIT |
| PLAY |
| |
7 | REW | FF | ||
| ||||
EJECT |
| F.ADV |
6
A zero will appear in the SELECT OUTPUT CH menu. Press one Number button (3 or 4) to complete the out- put channel of your DSS Receiver (channel 03 or 04).
•Press 0 if you connected the VIDEO/AUDIO OUT Jacks of the DSS Receiver to the VCR’s VIDEO/AUDIO IN Jacks. A/V will appear
•If you make a mistake, press the CLEAR button, then enter the correct output channel.
STOP
VCR PLUS+/ENTER
EXIT/STATUSCLEAR
| MENU | |
VOL | JOG/SHUTTLE | |
CHANNEL | ||
|
8
10
SELECT OUTPUT CH
OF YOUR DSS RECEIVER
03
TO CONTINUE PUSH MENU
TO CORRECT PUSH CLEAR
TO END PUSH EXIT
8
Press the MENU button.
9
11 | 4 | 5 | 6 |
| 1 | 2 | 3 |
| 7 | 8 | 9 |
| 100 | 0 |
REC /OTR | INDEX | MEMO |
| VAR. |
|
| SLOW |
|
SPEED | VCR/TV SLOW | TRACKING SKIP |
|
| SEARCH |
7
9
A four will appear in the menu. Use the Number buttons to enter the second digit of the
SELECT CODE NUMBER OF YOUR DSS RECEIVER
42
TO TEST PUSH MENU
DID DSS RECEIVER
CHANGE TO CHANNEL 205?
1 YES 2 NO
TO END PUSH EXIT
10
Press the MENU button. Wait for the DSS Receiver to change to channel 205. When it does, go to step 11.
•If the DSS Receiver does not change to channel 205, press the Number 2 button to select NO. Repeat steps 9 - 10. If the DSS Receiver doesn’t change to channel 205, the Controller will not operate your DSS Receiver. Press the EXIT/STATUS button.
11
Press the Number 1 button to select YES.
“DSS RECEIVER CONTROL IS ON” will appear for five seconds. The screen will return to the program you were watching.
REMOTE LOCATOR
Helpful Hints
•If your DSS Receiver does not respond to the code in steps 9 - 10, the Controller will not change chan- nels at the DSS Receiver during a timer recording. In this case, you must select the channel to be recorded at the DSS Receiver before a timer recording begins. Enter the DSS Receiver output channel (03 or
04)at step 5 on page 35. Leave the DSS Receiver on for the timer recording. Details are on page eight.
•If more than one code is listed for your brand of DSS Receiver, try all of the codes at steps 9 - 10 before you determine the Controller will not change the VCR channels.
