Connecting up
Easy connections
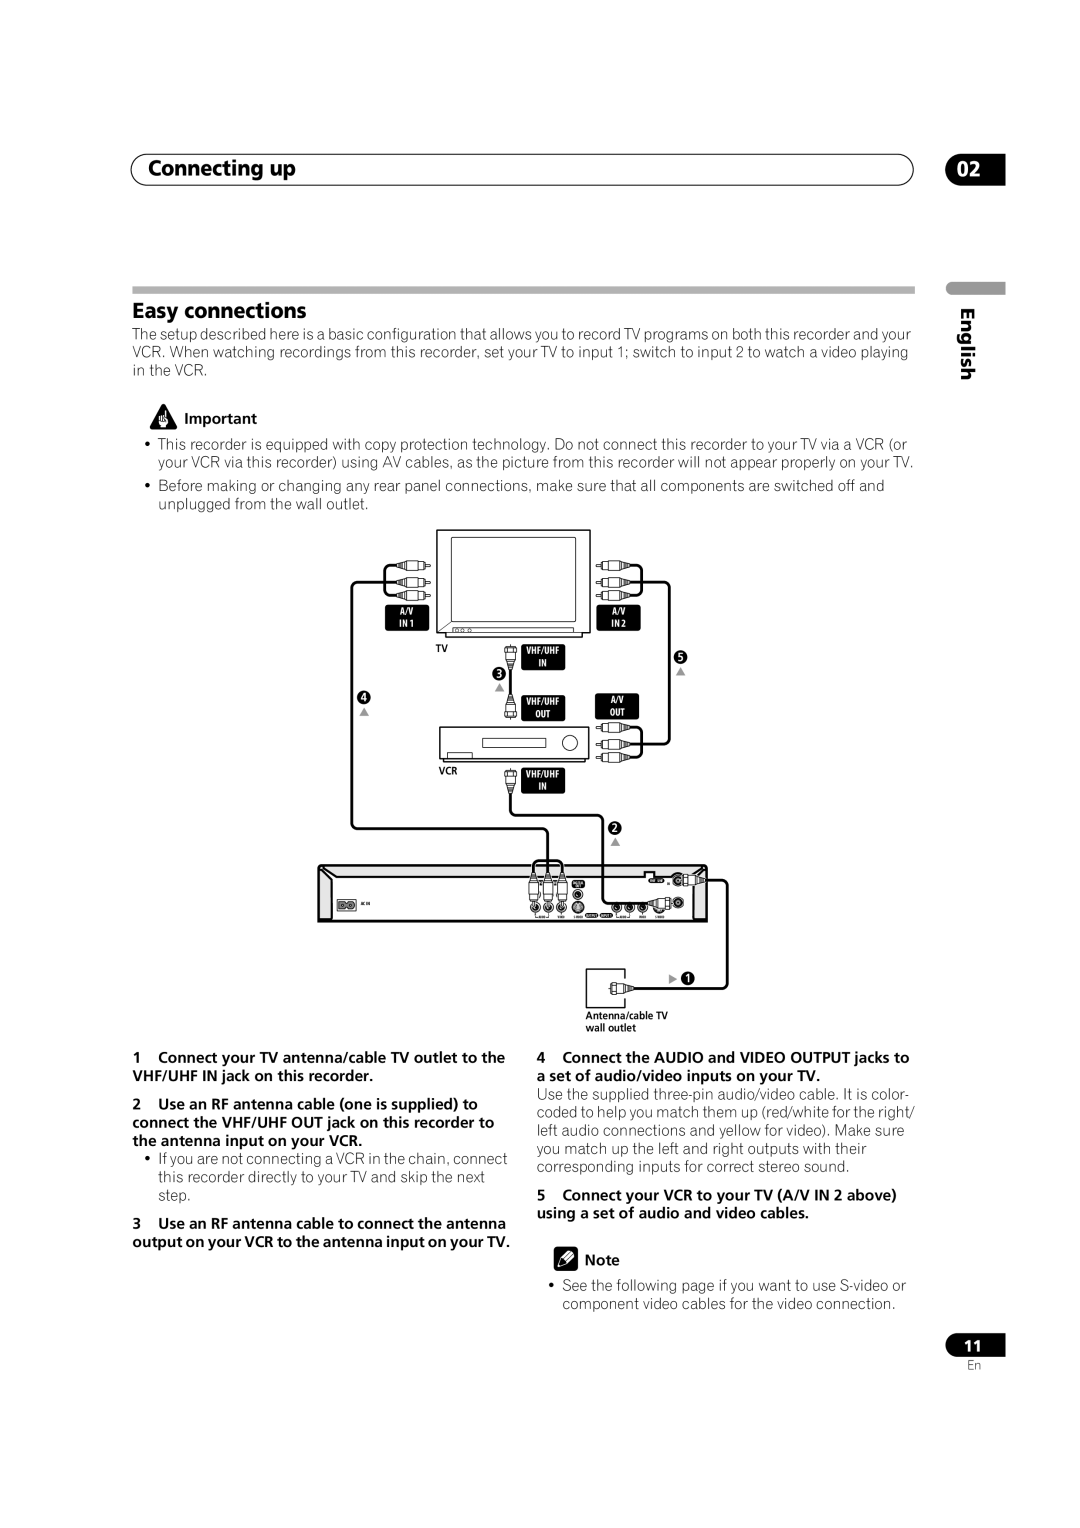
The setup described here is a basic configuration that allows you to record TV programs on both this recorder and your VCR. When watching recordings from this recorder, set your TV to input 1; switch to input 2 to watch a video playing in the VCR.
![]() Important
Important
•This recorder is equipped with copy protection technology. Do not connect this recorder to your TV via a VCR (or your VCR via this recorder) using AV cables, as the picture from this recorder will not appear properly on your TV.
•Before making or changing any rear panel connections, make sure that all components are switched off and unplugged from the wall outlet.
A/V |
|
|
|
| A/V |
IN 1 |
|
|
|
| IN 2 |
TV | VHF/UHF |
|
| 5 | |
|
| IN |
|
| |
| 3 |
|
|
| |
|
|
|
|
| |
4 | VHF/UHF |
|
| A/V | |
| OUT |
|
| OUT | |
VCR | VHF/UHF |
|
|
| |
|
|
|
| ||
|
| IN |
|
|
|
|
|
|
|
| 2 |
| COMPONENT VIDEO OUT | DIGITAL | VHF UHF | ||
| IN | ||||
| Y | PB | PR | OUT |
|
|
|
|
|
| OUT |
AC IN |
|
|
|
|
|
R AUDIO L | VIDEO | VIDEO |
02
English
1Connect your TV antenna/cable TV outlet to the VHF/UHF IN jack on this recorder.
2Use an RF antenna cable (one is supplied) to connect the VHF/UHF OUT jack on this recorder to the antenna input on your VCR.
•If you are not connecting a VCR in the chain, connect this recorder directly to your TV and skip the next step.
3Use an RF antenna cable to connect the antenna output on your VCR to the antenna input on your TV.
![]() 1
1
Antenna/cable TV wall outlet
4Connect the AUDIO and VIDEO OUTPUT jacks to a set of audio/video inputs on your TV.
Use the supplied
5Connect your VCR to your TV (A/V IN 2 above) using a set of audio and video cables.
![]() Note
Note
•See the following page if you want to use
11
En