Audio Adjustments
3.Turn the ignition switch to ON or ACC.
If the car’s air conditioner or heater is turned on, turn it off. Noise from the fan in the air conditioner or heater may prevent correct
•Press (up or down) SOURCE to turn the source on if this product is turned off.
4.Select the position for the seat on which the microphone is placed.
Refer to “Using position selector” on page 34.
•If no position is selected before you start
5.Press (up or down) SOURCE to turn the source off.
6.Press and hold ![]()
![]() 2 to enter the auto- equalizer measurement mode.
2 to enter the auto- equalizer measurement mode.
The front panel opens automatically.
•When the source is off, you can check the location of “![]() 2” by turnig on the feature demo.
2” by turnig on the feature demo.
•You can also enter the
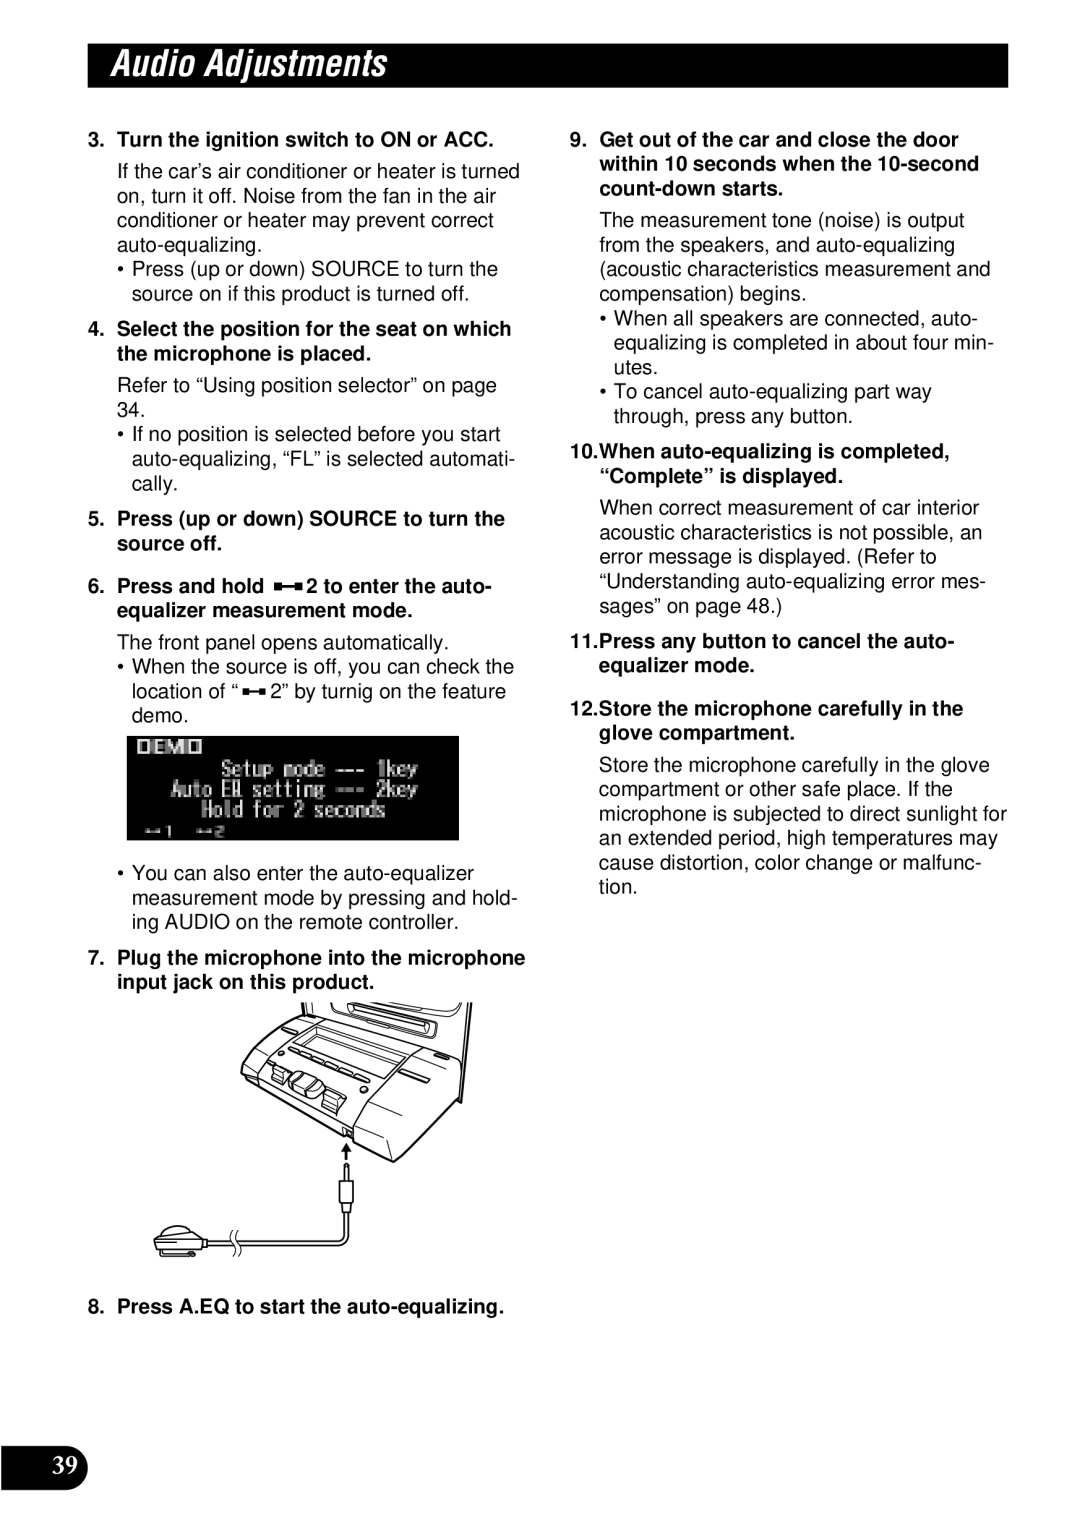
7.Plug the microphone into the microphone input jack on this product.
8. Press A.EQ to start the
9.Get out of the car and close the door within 10 seconds when the
The measurement tone (noise) is output from the speakers, and
•When all speakers are connected, auto- equalizing is completed in about four min- utes.
•To cancel
10.When
When correct measurement of car interior acoustic characteristics is not possible, an error message is displayed. (Refer to “Understanding
11.Press any button to cancel the auto- equalizer mode.
12.Store the microphone carefully in the glove compartment.
Store the microphone carefully in the glove compartment or other safe place. If the microphone is subjected to direct sunlight for an extended period, high temperatures may cause distortion, color change or malfunc- tion.
39