Setting Up the System
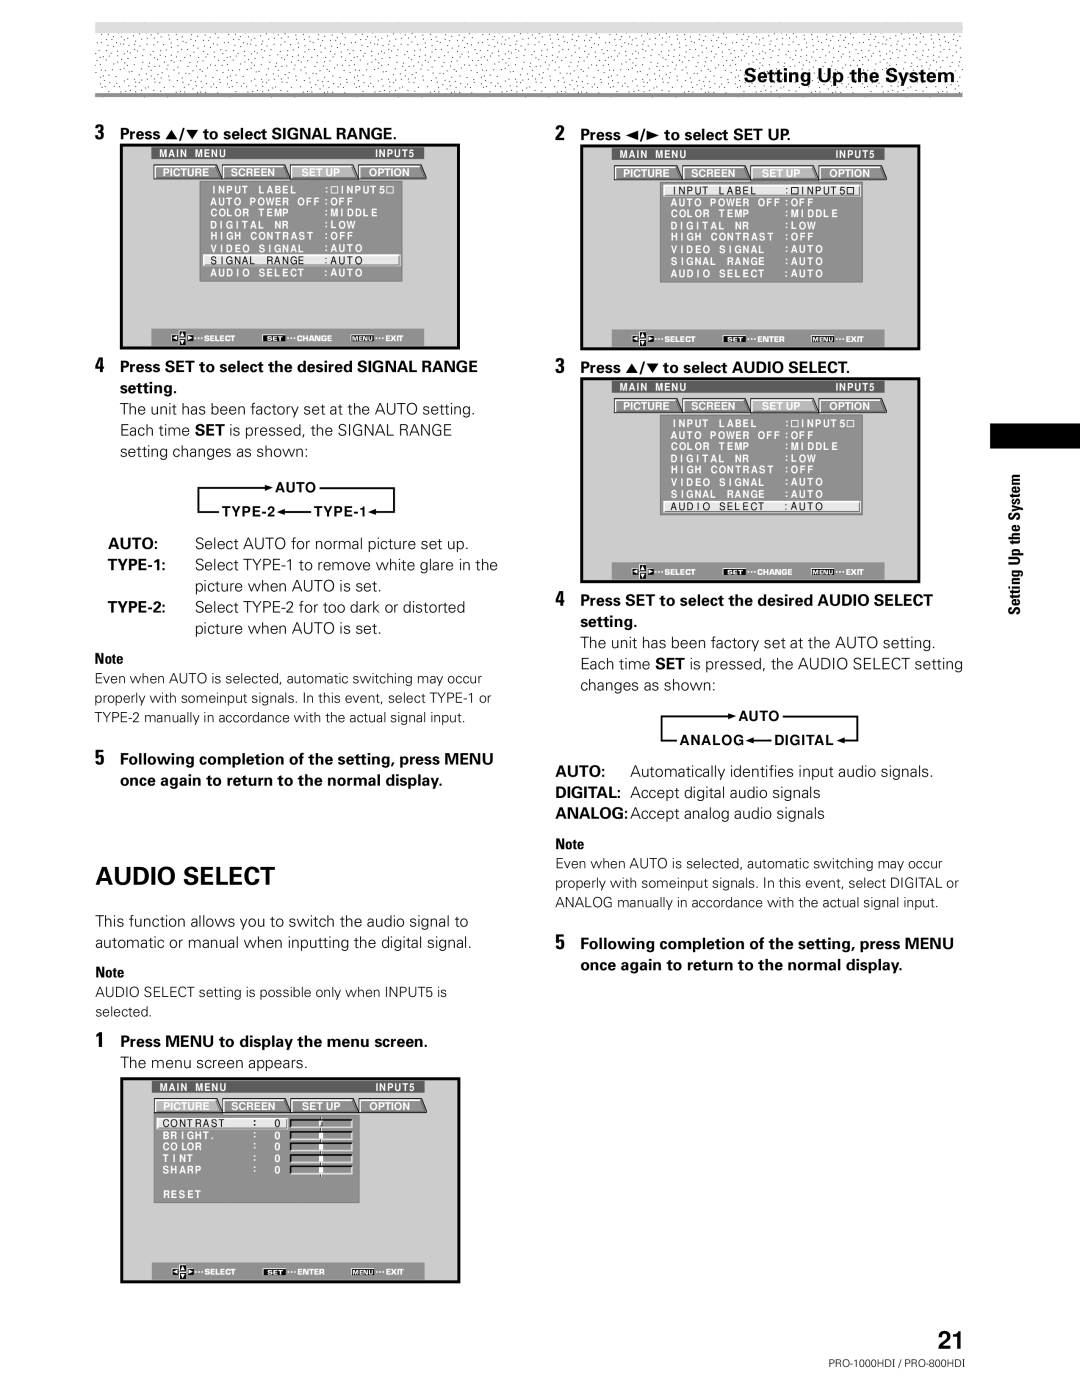
3Press 5/∞ to select SIGNAL RANGE.
MAIN | MENU |
|
|
| INPUT5 | ||
PICTURE | SCREEN | SET UP | OPTION | ||||
|
| I N P UT L AB E L |
| : I NP UT 5 |
| ||
|
| A U T O | P OWE R | OF F : OF F |
| ||
|
| C OL OR T E MP |
| : M I D D L E |
| ||
|
| D I G I T A L NR |
| : L OW |
| ||
|
| H I GH C ON T R A S T : O F F |
| ||||
|
| V I D E O | S I GNAL | : A U T O |
| ||
|
| S I GNA L RA NGE | : A U T O |
| |||
|
| AUD I O | S E L E CT | : A U T O |
| ||
| SELECT | SET | CHANGE | MENU | EXIT | ||
2Press 2/3 to select SET UP.
MAIN | MENU |
|
|
| INPUT5 | ||
PICTURE | SCREEN | SET UP | OPTION | ||||
|
| I N P UT L A B E L |
| : I N P UT 5 |
| ||
|
| A UT O P OWER | OF F : OF F |
|
| ||
|
| C OL OR | T E MP |
| : M I DDL E |
| |
|
| D I G I T A L NR |
| : L OW |
|
| |
|
| H I GH C ON T R A S T : O F F |
|
| |||
|
| V I D E O | S I GNAL | : A U T O |
|
| |
|
| S I GNAL | RA NGE | : A U T O |
|
| |
|
| AUD I O | S E L E CT | : A U T O |
|
| |
| SELECT | SET | ENTER | MENU | EXIT | ||
4Press SET to select the desired SIGNAL RANGE setting.
The unit has been factory set at the AUTO setting. Each time SET is pressed, the SIGNAL RANGE setting changes as shown:
![]() AUTO
AUTO
![]()
![]()
AUTO: Select AUTO for normal picture set up.
picture when AUTO is set.
Note
Even when AUTO is selected, automatic switching may occur properly with someinput signals. In this event, select
3
4
Press 5/∞ to select AUDIO SELECT.
MAIN | MENU |
|
|
| INPUT5 | ||
PICTURE | SCREEN | SET UP | OPTION | ||||
|
| I NP UT L AB E L |
| : I NP UT 5 |
| ||
|
| A UT O P OWER | OF F : OF F |
| |||
|
| C OL OR | T E MP |
| : M I DDL E |
| |
|
| D I G I T A L NR |
| : L OW |
| ||
|
| H I GH C ON T R A S T : O F F |
| ||||
|
| V I D E O | S I GNAL | : A U T O |
| ||
|
| S I GNAL | RA NGE | : A U T O |
| ||
|
| A U D I O S E L E CT | : A U T O |
| |||
| SELECT | SET | CHANGE | MENU | EXIT | ||
Press SET to select the desired AUDIO SELECT setting.
The unit has been factory set at the AUTO setting. Each time SET is pressed, the AUDIO SELECT setting changes as shown:
![]() AUTO
AUTO
ANALOG![]() DIGITAL
DIGITAL ![]()
Setting Up the System
5Following completion of the setting, press MENU once again to return to the normal display.
AUDIO SELECT
AUTO: Automatically identifies input audio signals.
DIGITAL: Accept digital audio signals
ANALOG: Accept analog audio signals
Note
Even when AUTO is selected, automatic switching may occur properly with someinput signals. In this event, select DIGITAL or ANALOG manually in accordance with the actual signal input.
This function allows you to switch the audio signal to automatic or manual when inputting the digital signal.
Note
AUDIO SELECT setting is possible only when INPUT5 is selected.
1Press MENU to display the menu screen. The menu screen appears.
| MAIN MENU |
|
|
|
|
| INPUT5 |
|
| PICTURE | SCREEN | SET UP | OPTION |
| |||
| C O N T R A S T | : | 0 |
|
|
|
|
|
|
|
|
|
| ||||
| BR I GHT . | : | 0 |
|
|
|
|
|
|
|
|
|
| ||||
| CO LOR | : | 0 |
|
|
|
|
|
|
|
|
|
| ||||
| T I NT | : | 0 |
|
|
|
|
|
|
|
|
|
| ||||
| S H ARP | : | 0 |
|
|
|
|
|
|
|
|
|
| ||||
5Following completion of the setting, press MENU once again to return to the normal display.
RE S E T
SELECT | SET | ENTER | MENU | EXIT |
21
