|
|
| Before Proceeding |
|
|
|
|
|
|
| |
|
|
|
|
| |
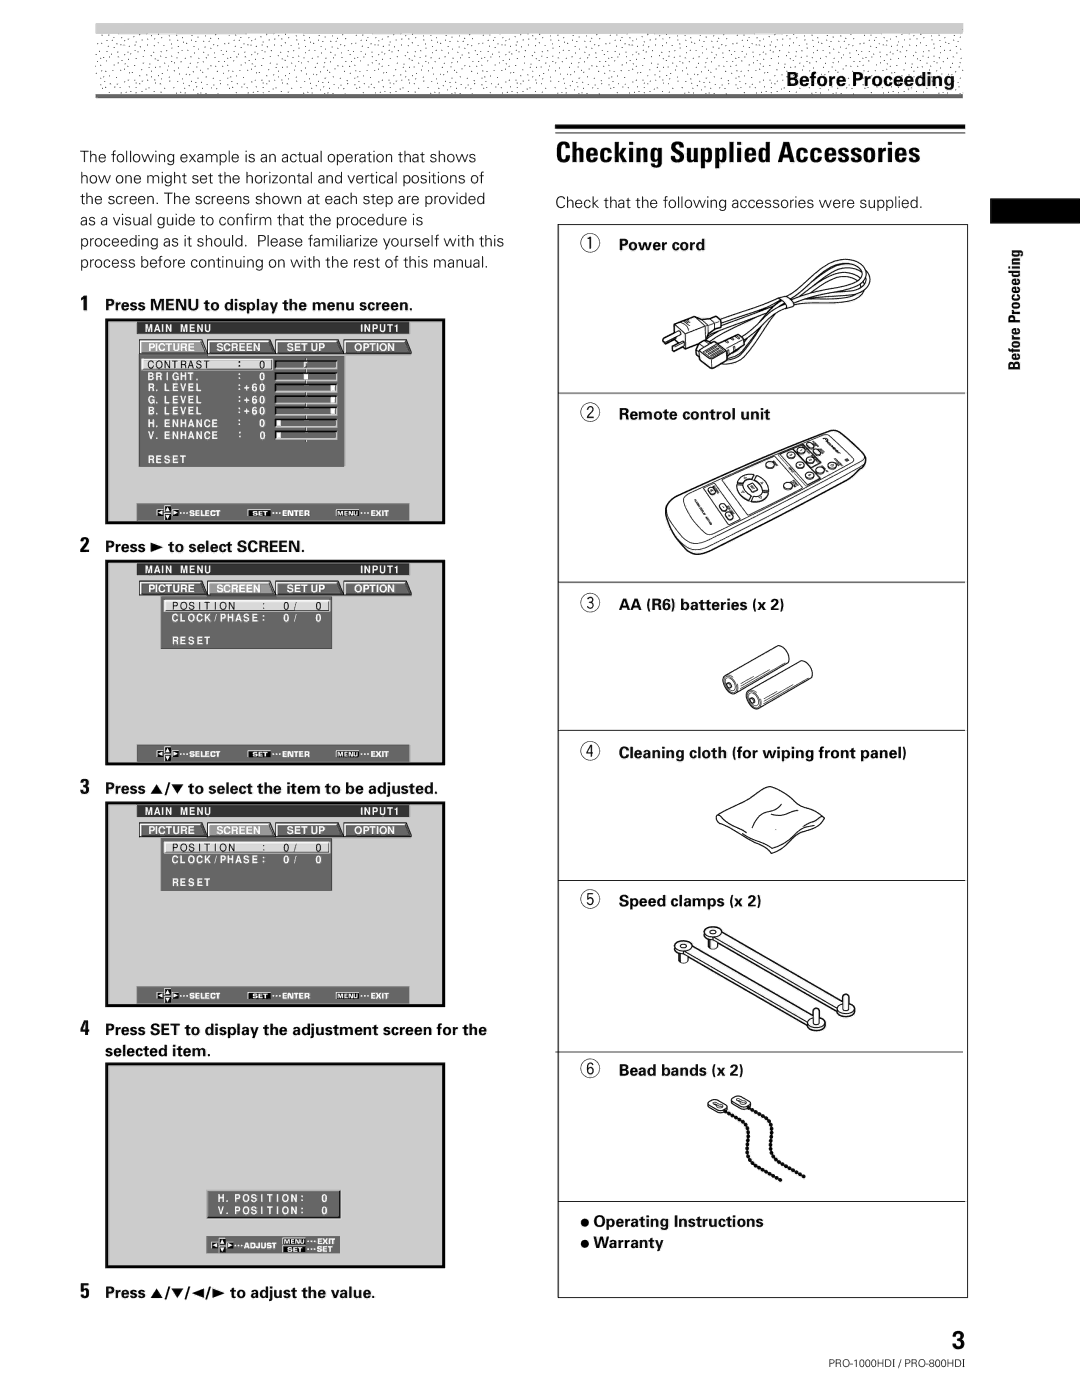
The following example is an actual operation that shows | Checking Supplied Accessories |
|
| ||
how one might set the horizontal and vertical positions of |
|
|
|
| |
the screen. The screens shown at each step are provided | Check that the following accessories were supplied. |
|
| ||
as a visual guide to confirm that the procedure is |
|
|
|
| |
|
|
|
| ||
proceeding as it should. Please familiarize yourself with this |
| 1 Power cord |
|
| |
process before continuing on with the rest of this manual. |
|
|
|
| |
1 Press MENU to display the menu screen.
MAIN MENU |
|
|
|
|
| INPUT1 |
PICTURE | SCREEN | SET UP | OPTION | |||
C O N T R A S T |
| : | 0 |
|
|
|
BR I GHT . |
| : | 0 |
|
|
|
R. L E V E L |
| : + 6 0 |
|
|
| |
G. L E V E L |
| : + 6 0 |
|
| 2 Remote control unit | |
B. L E V E L |
| : + 6 0 |
|
| ||
H. E NHAN CE | : | 0 |
|
|
| |
V . E NHAN CE | : | 0 |
|
|
| |
RE S E T |
|
|
|
|
|
|
SELECT |
| SET | ENTER | MENU | EXIT | |
2Press 3 to select SCREEN.
MAIN | MENU |
|
|
|
|
| INPUT1 |
|
|
PICTURE | SCREEN | SET UP | OPTION | 3 |
| ||||
| P O S I T I O N | : | 0 / | 0 |
|
| AA (R6) batteries (x 2) | ||
CL OC K / P HA S E : | 0 / | 0 |
|
|
|
| |||
| RE S E T |
|
|
|
|
|
|
|
|
| SELECT | SET | ENTER |
| MENU | EXIT | 4 | Cleaning cloth (for wiping front panel) | |
3Press 5/∞ to select the item to be adjusted.
MAIN | MENU |
|
|
|
|
| INPUT1 |
PICTURE | SCREEN | SET UP | OPTION | ||||
| P O S I T I O N | : | 0 / | 0 |
|
| |
CL OC K / P HA S E : | 0 / | 0 |
|
| |||
| RE S E T |
|
|
|
|
|
|
|
|
|
|
|
|
| 5 Speed clamps (x 2) |
| SELECT | SET | ENTER |
| MENU | EXIT | |
4 Press SET to display the adjustment screen for the selected item.
6 Bead bands (x 2)
H . P O S I T I O N : | 0 |
|
| |
V . P O S I T I O N : | 0 |
| ÷ Operating Instructions | |
|
|
|
| |
|
|
|
| ÷ Warranty |
ADJUST SET | SET |
| ||
| MENU | EXIT |
|
|
|
|
|
|
|
5Press 5/∞/2/3 to adjust the value.
3
Before Proceeding
