Adjustments and Settings | 10 |
Picture adjustments
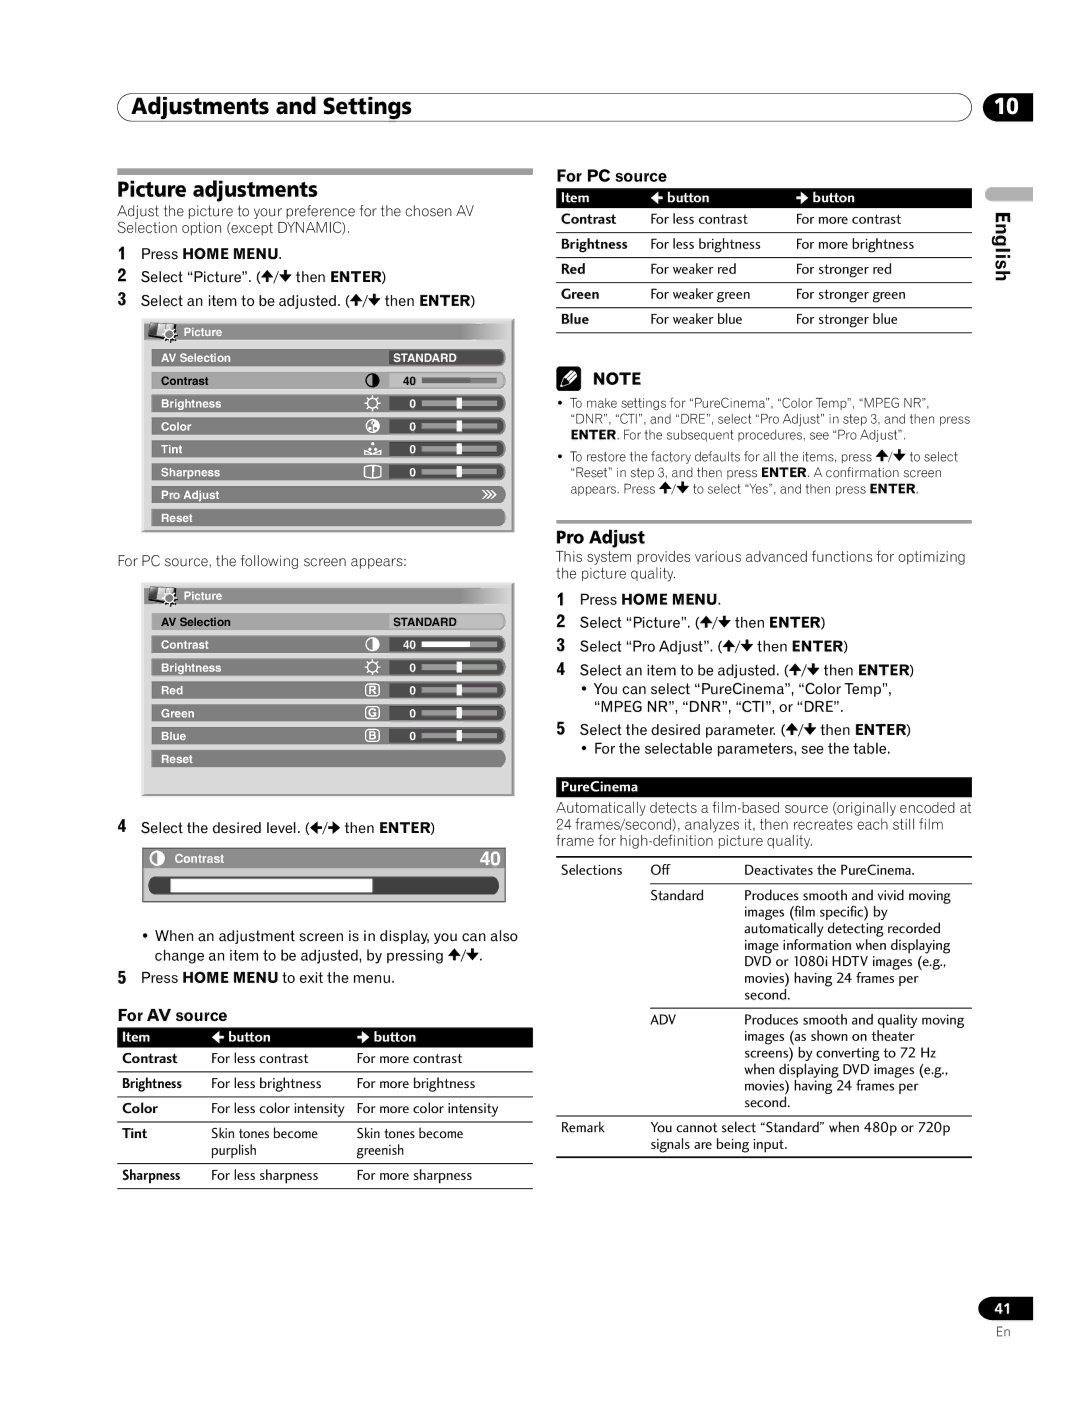
Adjust the picture to your preference for the chosen AV Selection option (except DYNAMIC).
1Press HOME MENU.
2 | Select “Picture”. ( / then ENTER) | |||||||
3 | Select an item to be adjusted. ( / | then ENTER) | ||||||
|
|
| Picture |
|
|
|
|
|
|
|
|
|
|
|
|
| |
|
| AV Selection | STANDARD | |||||
|
| Contrast | 40 |
|
|
|
| |
|
|
|
|
|
| |||
|
|
|
|
|
| |||
|
| Brightness | 0 |
|
|
|
| |
|
|
|
|
|
| |||
|
|
|
|
|
| |||
|
| Color | 0 |
|
|
|
| |
|
|
|
|
|
| |||
|
|
|
|
|
| |||
|
| Tint | 0 |
|
|
|
| |
|
|
|
|
|
| |||
|
|
|
|
|
| |||
|
| Sharpness | 0 |
|
|
|
| |
|
|
|
|
|
| |||
|
|
|
|
|
| |||
Pro Adjust
Reset
For PC source, the following screen appears:
Picture |
|
AV Selection | STANDARD |
Contrast | 40 |
Brightness | 0 |
Red | 0 |
Green | 0 |
Blue | 0 |
Reset |
|
4Select the desired level. ( /
/ then ENTER)
Contrast | 40 |
•When an adjustment screen is in display, you can also change an item to be adjusted, by pressing ![]() /
/![]() .
.
5Press HOME MENU to exit the menu.
For AV source
Item | button | button |
Contrast | For less contrast | For more contrast |
|
|
|
Brightness | For less brightness | For more brightness |
|
|
|
Color | For less color intensity | For more color intensity |
|
|
|
Tint | Skin tones become | Skin tones become |
| purplish | greenish |
|
|
|
Sharpness | For less sharpness | For more sharpness |
|
|
|
For PC source
Itembuttonbutton
Contrast | For less contrast | For more contrast | English |
| |||
|
|
|
|
Brightness | For less brightness | For more brightness |
|
|
|
|
|
Red | For weaker red | For stronger red |
|
|
|
|
|
Green | For weaker green | For stronger green |
|
|
|
|
|
Blue | For weaker blue | For stronger blue |
|
|
|
|
|
•To make settings for “PureCinema”, “Color Temp”, “MPEG NR”, “DNR”, “CTI”, and “DRE”, select “Pro Adjust” in step 3, and then press ENTER. For the subsequent procedures, see “Pro Adjust”.
• To restore the factory defaults for all the items, press ![]() /
/![]() to select “Reset” in step 3, and then press ENTER. A confirmation screen appears. Press
to select “Reset” in step 3, and then press ENTER. A confirmation screen appears. Press ![]() /
/![]() to select “Yes”, and then press ENTER.
to select “Yes”, and then press ENTER.
Pro Adjust
This system provides various advanced functions for optimizing the picture quality.
1Press HOME MENU.
2 | Select “Picture”. ( / | then ENTER) | |
3 | Select “Pro Adjust”. ( | / then ENTER) | |
4 | Select an item to be adjusted. ( / | then ENTER) | |
| • You can select “PureCinema”, “Color Temp”, | ||
| “MPEG NR”, “DNR”, “CTI”, or “DRE”. | ||
5 | Select the desired parameter. ( / | then ENTER) | |
• For the selectable parameters, see the table.
PureCinema
Automatically detects a
Selections | Off | Deactivates the PureCinema. |
|
|
|
| Standard | Produces smooth and vivid moving |
|
| images (film specific) by |
|
| automatically detecting recorded |
|
| image information when displaying |
|
| DVD or 1080i HDTV images (e.g., |
|
| movies) having 24 frames per |
|
| second. |
|
|
|
| ADV | Produces smooth and quality moving |
|
| images (as shown on theater |
|
| screens) by converting to 72 Hz |
|
| when displaying DVD images (e.g., |
|
| movies) having 24 frames per |
|
| second. |
|
| |
Remark | You cannot select “Standard” when 480p or 720p | |
| signals are being input. | |
|
|
|
41
En