Connecting up | 02 |
•These speaker terminals can be under HAZARDOUS VOLTAGE. When you connect or disconnect the speaker cables, to prevent the risk of electric shock, do not touch uninsulated parts before disconnecting the power cord.
•Do not connect any of the supplied speakers to any other amplifier. This may result in malfunction or fire.
This system has been designed for best performance when connected to the supplied speakers. We do not, therefore, recommend that you connect and use other speakers with this system.
1 | Twist and pull off the protective shields |
on each wire. | |
2 | Connect to the speaker terminals on the |
rear of the system unit. | |
Match the colored wire with the | |
3Connect to the speaker terminals on the rear of the speakers in the same way.
•Remove the supplied
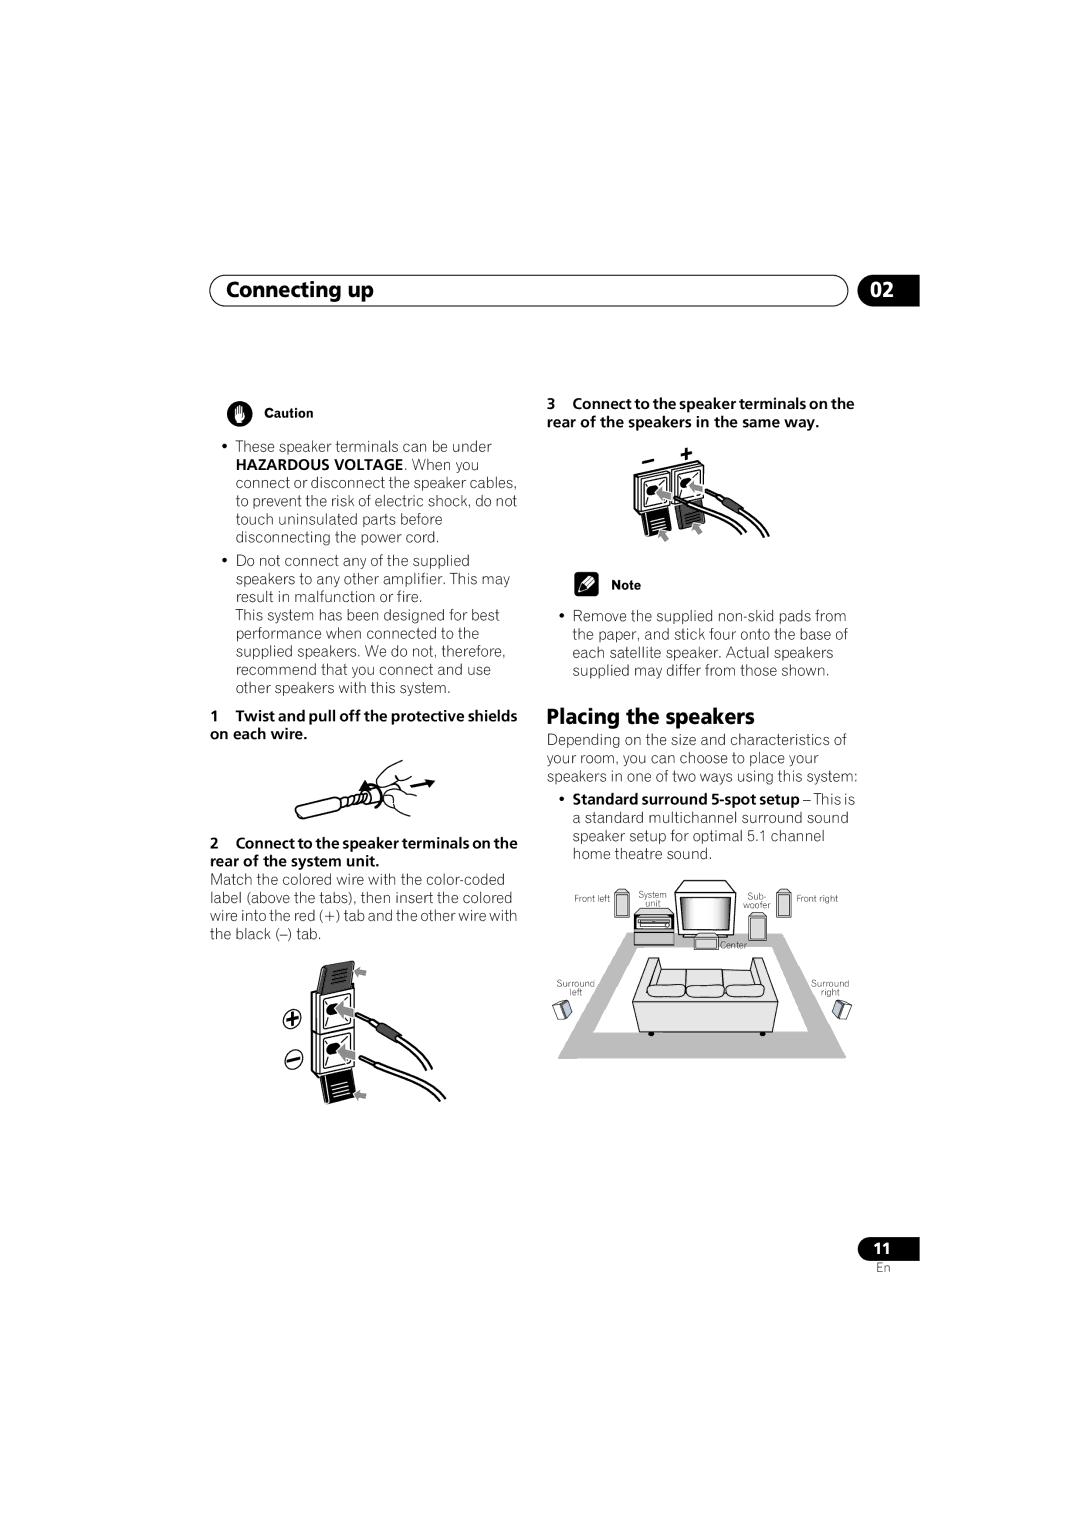
Placing the speakers
Depending on the size and characteristics of your room, you can choose to place your speakers in one of two ways using this system:
•Standard surround
label (above the tabs), then insert the colored |
wire into the red (+) tab and the other wire with |
the black |
Front left
Surround
left
System
unit
Sub-
woofer
![]()
![]()
![]() Center
Center
Front right
Surround
right
11
En