07The Surround Setup menu

Setting the Acoustic Calibration EQ manually

Before manually adjusting the Acoustic Calibration EQ, we recommend copying the ALL CH ADJ or the FRONT CH ALIGN settings from the Auto setup above (or from Introduction to home theater on page 39) to one of the custom settings. Instead of just a flat EQ curve, this will give you a reference point from which to start (see Copying your Acoustic Calibration EQ settings below for how to do this).

1 Select ‘Acoustic Cal EQ’ then press ENTER.

2.Surround Setup

[ Check ]

[ 1.Speaker Systems ] [ 2.Channel Level ]

[ 3.Speaker Distance ] [ 4.Acoustic Cal EQ ]

[ 5.X-Curve ]

[Return]

2Select ‘Manual’ then press ENTER.

2.4. Acoustic Cal EQ

[Data Copy] [Manual]

CUSTOM1 , CUSTOM2 [Auto]

ALL ADJ & FRONT ALIGN

[Professional]

[Return]

3Select CUSTOM1 or CUSTOM2 then press ENTER.

2.4.Acoustic Cal EQ

Manual

[ CUSTOM1 ]

A[ CUSTOM2 ]

[Return]

4Select the channel you want, adjust the frequency curve to your liking, then move to the next speaker.

2.4.Acoustic Cal EQ


Manual


Target Curve : CUSTOM1


Channel


[L•SMALL]


63

125

250

500


1k

2k


4k

8k

16k


TRIM


[Return]


Use the

(cursor left/right) hard keys to select the

channel, then ENTER to select it.

Use the

(cursor left/right) hard keys to select the

frequency and

(cursor up/down) to boost or cut the

EQ. When you’re finished, press ENTER to move to the next channel.

62

Tip

• Changing the frequency curve of one channel too

drastically will affect the overall balance. If the

speaker balance seems uneven, you can raise or

lower channel levels using test tones with the TRIM

feature. Use

(cursor right) to move to the far right

side of the OSD, then use

(cursor up/down) to

raise or lower the channel level for the current

speaker.


5 When you’re done, press

(cursor down) to

select ‘Return’ then press ENTER to finish.

Note

If the message OVER !! appears on-screen, it means the frequency curve may result in distortion from the speaker. Adjust the frequency curve accordingly.

Copying your Acoustic Calibration EQ settings

If you want to manually adjust the Acoustic Calibration EQ (see Setting the Acoustic Calibration EQ manually above), we recommend copying the ALL CH ADJ or the FRONT CH ALIGN settings from the Auto setup above (or from Introduction to home theater on page 39) to one of the custom settings. Instead of just a flat EQ curve, this will give you a reference point from which to start.

1 Select ‘Acoustic Cal EQ’ then press ENTER.

2.Surround Setup

[ Check ]

[ 1.Speaker Systems ] [ 2.Channel Level ]

[ 3.Speaker Distance ] [ 4.Acoustic Cal EQ ]

[ 5.X-Curve ]

[Return]

2 Select ‘Data Copy’ then press ENTER.

2. 4. Acoustic Cal EQ

[Data Copy] [Manual]

CUSTOM1 , CUSTOM2 [Auto]

ALL ADJ & FRONT ALIGN

[Professional]

[Return]

En

Page 62
Image 62
Pioneer VSX-59TXi Setting the Acoustic Calibration EQ manually, Copying your Acoustic Calibration EQ settings

VSX-59TXi specifications

The Pioneer VSX-59TXi is a powerhouse in the world of home theater receivers, offering a robust combination of features and advanced technologies that cater to both audiophiles and casual listeners alike. Released as part of Pioneer's Elite line, this receiver has been highly regarded for its outstanding performance and versatility.

One of the standout characteristics of the VSX-59TXi is its ability to handle a wide array of audio formats. Supporting Dolby Digital, Dolby Digital EX, DTS, DTS-ES, and more, this receiver ensures that users experience movies and music in high-quality sound. The 7.1-channel surround sound capability allows for an immersive audio experience, making it ideal for movie enthusiasts and gamers.

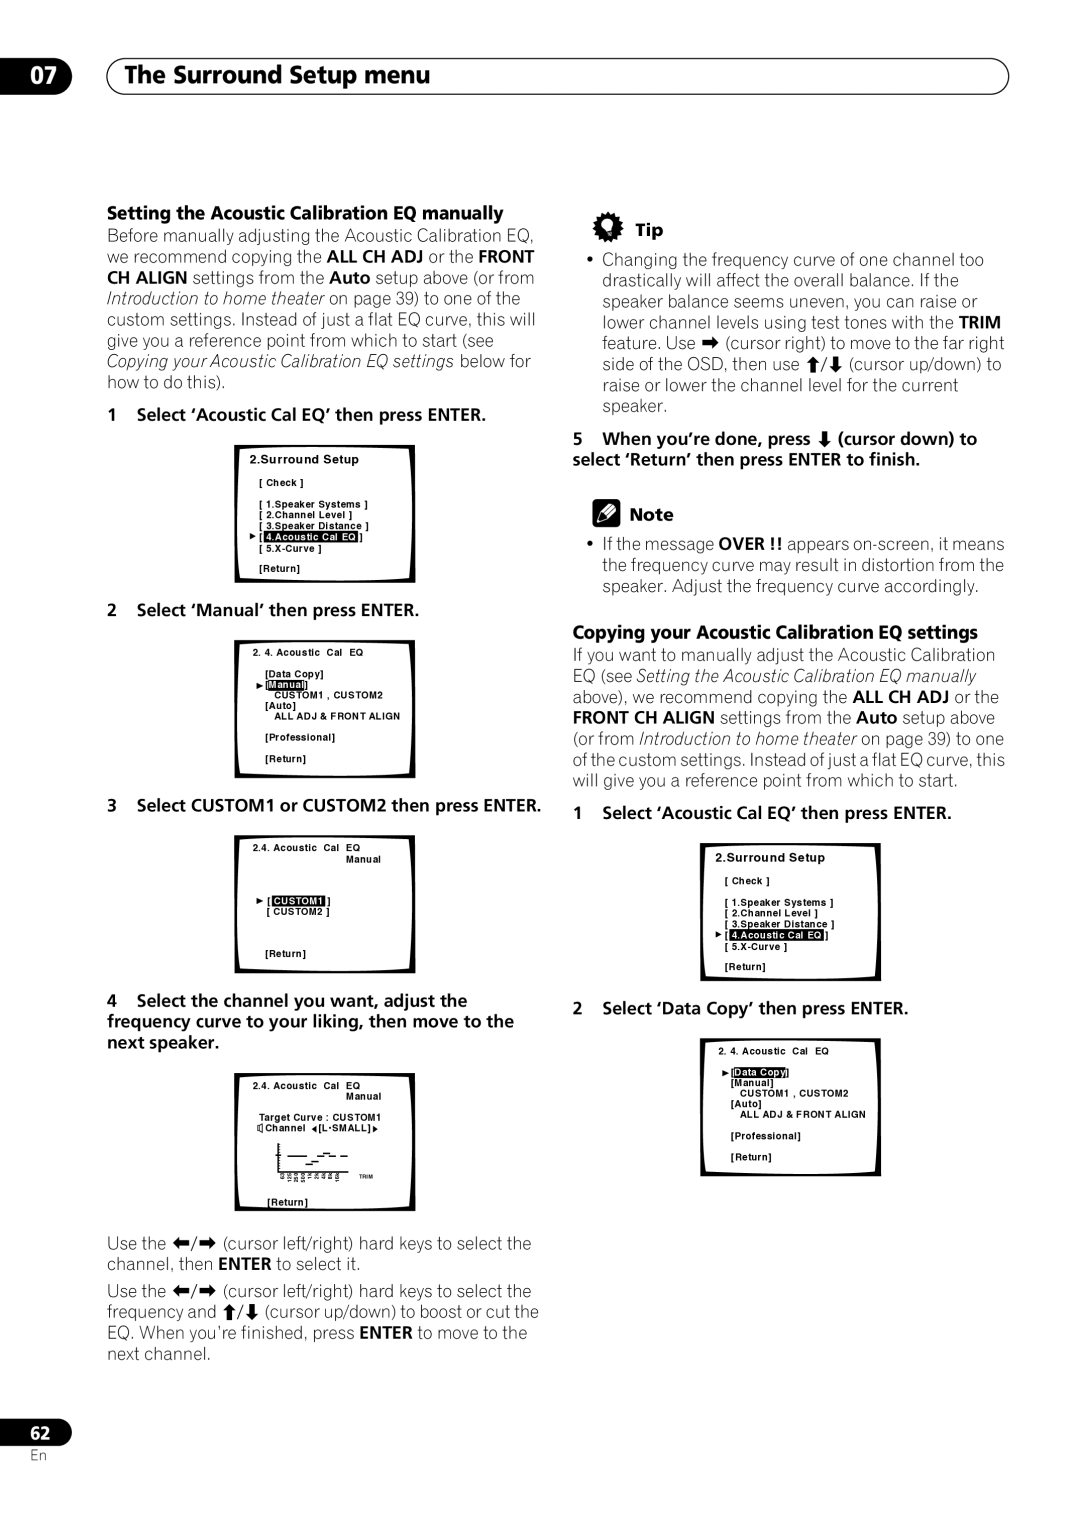
At the core of the VSX-59TXi is Pioneer's proprietary technology known as "MCACC" – Multi-Channel Acoustic Calibration System. This sophisticated system automatically calibrates the receiver to the unique acoustics of your room, optimizing speaker placement and sound delivery for the ultimate listening experience. This technology saves users the hassle of manual adjustments, making it accessible for everyone.

The VSX-59TXi is also equipped with advanced video processing capabilities. It features Faroudja DCDi circuitry, which improves video quality for sources such as DVDs and standard-definition video, ensuring that your picture quality rivals that of high-definition formats. With multiple HDMI inputs, component video, and composite video connections, this receiver is versatile enough to accommodate a variety of source devices, including Blu-ray players, gaming consoles, and streaming devices.

Another important aspect of the VSX-59TXi is its robust build quality. Pioneer's Elite line is known for its high-end construction, and this receiver is no exception. The heavy chassis minimizes vibrations, ensuring that sound quality remains pristine, while high-quality components enhance overall performance.

For connectivity, the VSX-59TXi boasts an array of options including multiple optical and coaxial digital inputs, as well as legacy connections for older devices. Its user-friendly interface and remote control allow users to navigate through settings easily, making adjustments simple even for novice users.

Overall, the Pioneer VSX-59TXi remains a compelling choice for anyone looking to invest in a high-performance home theater receiver. With its combination of advanced audio technologies, superior video processing, and a focus on user experience, it continues to impress both in sound quality and functionality. In an era where home entertainment is prioritized, the VSX-59TXi stands out as a capable and reliable choice for elevating audio-visual experiences.