4. How to use Remote Controller
5. Configuration
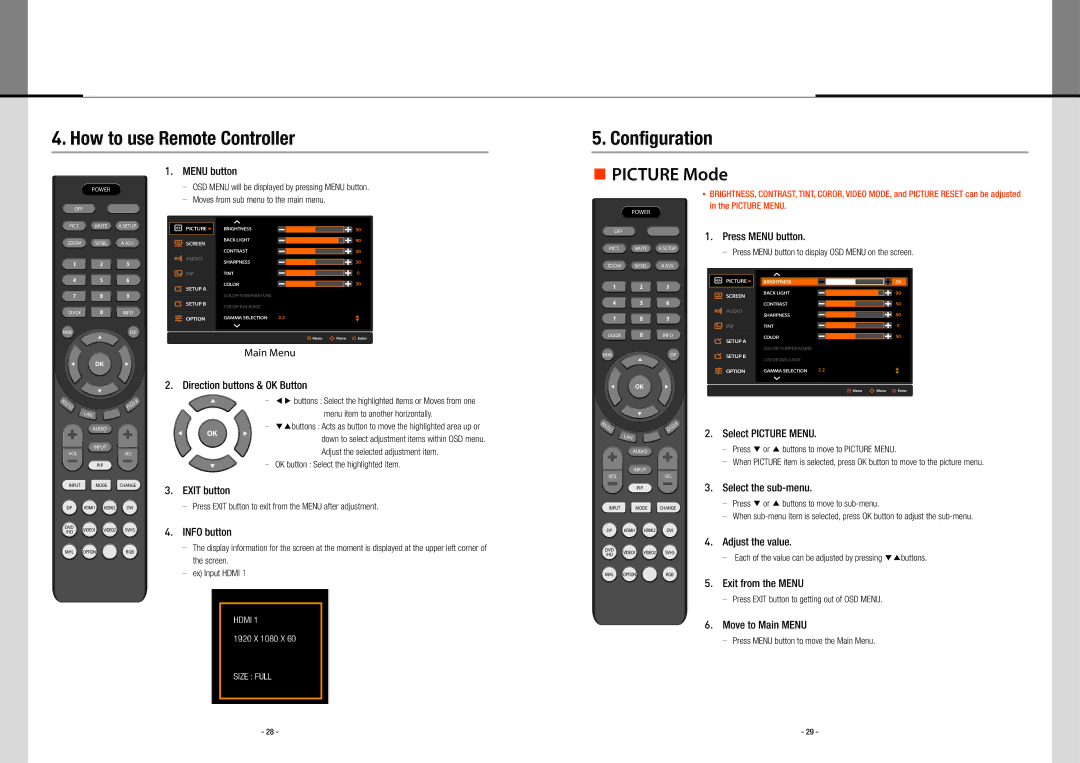
1. MENU button
PICTURE Mode
POWER
OFF
OSD MENU will be displayed by pressing MENU button.
Moves from sub menu to the main menu.
POWER
BRIGHTNESS, CONTRAST, TINT, COROR, VIDEO MODE, and PICTURE RESET can be adjusted in the PICTURE MENU.
PICT. MUTE A.SETUP
ZOOM SP.SEL A.ADJ
1 2 3
PICTURE u
SCREEN
AUDIO
PIP
BRIGHTNESS |
|
|
|
| 50 |
|
|
|
| ||
BACK LIGHT |
|
| |||
|
|
|
| 90 | |
CONTRAST |
| ||||
|
|
|
| 50 | |
SHARPNESS |
| ||||
|
|
|
| 50 | |
TINT |
| ||||
|
|
|
| 0 | |
OFF
PICT. MUTE A.SETUP
ZOOM SP.SEL A.ADJ
1. Press MENU button.
Press MENU button to display OSD MENU on the screen.
4 5 6
7 8 9
GUIDE 0 INFO
SETUP A
SETUP B
OPTION
COLOR |
|
|
| 50 |
COLOR TEMPERATURE |
| |||
COLOR BALANCE |
| |||
GAMMA SELECTION 2.2 | p | |||
|
|
|
| q |
1 2 3
4 5 6
7 8 9
PICTURE u
SCREEN
AUDIO
PIP
BRIGHTNESS |
|
|
|
| 50 |
|
|
|
| ||
BACK LIGHT |
|
| |||
|
|
|
| 90 | |
CONTRAST |
| ||||
|
|
|
| 50 | |
SHARPNESS |
| ||||
|
|
|
| 50 | |
TINT |
| ||||
|
|
|
| 0 | |
MENU | ▲ | EXIT |
|
| |
▲ | OK | ▲ |
Menu Move Enter |
Main Menu |
2. Direction buttons & OK Button |
GUIDE 0 INFO
MENU | ▲ | EXIT |
|
| |
▲ | OK | ▲ |
SETUP A
SETUP B
OPTION
COLOR |
|
|
| 50 |
COLOR TEMPERATURE |
|
|
|
|
COLOR BALANCE |
|
|
|
|
GAMMA SELECTION | 2.2 |
|
| p |
|
| q | ||
|
|
|
|
| ▲ |
RS232 | .R |
OSD | |
| LAN |
| AUDIO |
INPUT
VOLSEL
PIP
INPUT MODE CHANGE
DP HDMI1 HDMI2 DVI
| ▲ |
| ◀▶ buttons : Select the highlighted items or Moves from one | |
|
|
| menu item to another horizontally. | |
▲ | OK | ▲ | ▼▲buttons : Acts as button to move the highlighted area up or | |
down to select adjustment items within OSD menu. | ||||
|
|
| ||
|
|
| Adjust the selected adjustment item. | |
| ▲ |
| OK button : Select the highlighted item. |
3. EXIT button
Press EXIT button to exit from the MENU after adjustment.
| ▲ |
RS232 | .R |
OSD | |
| LAN |
| AUDIO |
INPUT
VOLSEL
PIP
INPUT MODE CHANGE
![]()
![]() Menu
Menu ![]()
![]() Move
Move ![]() Enter
Enter
2. Select PICTURE MENU.
Press ▼ or ▲ buttons to move to PICTURE MENU.
When PICTURE item is selected, press OK button to move to the picture menu.
3. Select the sub-menu.
Press ▼ or ▲ buttons to move to
When
DVD | VIDEO1 VIDEO2 | SVHS | |
/HD | |||
|
| ||
MHL | OPTION | RGB |
4. INFO button
The display information for the screen at the moment is displayed at the upper left corner of the screen.
ex) Input HDMI 1
DP | HDMI1 | HDMI2 | DVI |
| |
DVD |
|
| 4. | Adjust the value. | |
VIDEO1 | VIDEO2 | SVHS |
| ||
/HD | Each of the value can be adjusted by pressing ▼▲buttons. | ||||
|
|
| |||
|
|
|
| ||
MHL | OPTION |
| RGB |
| |
|
|
| 5. | Exit from the MENU |
Press EXIT button to getting out of OSD MENU.
6. Move to Main MENU
Press MENU button to move the Main Menu.
- 28 - | - 29 - |
