Polaview
Specifications are subject to change without notice
Radiate radio frequency energy and, if not installed
Protection against such interference when operated in a
Regarding safety, public health, environment
Table of contents
Appendix a Parts Appendix B Standards
Storage, cleaning and care Replacing the lamp
Introduction
Items included with the projector
What’s in the box?
Computer/video compatibility
Quick start
Connector panel
Introduction
Introduction
Detailed setup
Polaroid Polaview Model 220 Projector and remote control
Your Polaview Model 220 Projector
Polaroid Polaview Model 220 Projector rear view
Getting started
Computer Inputs Outputs Stereo L R Redrive RS
Connector panel
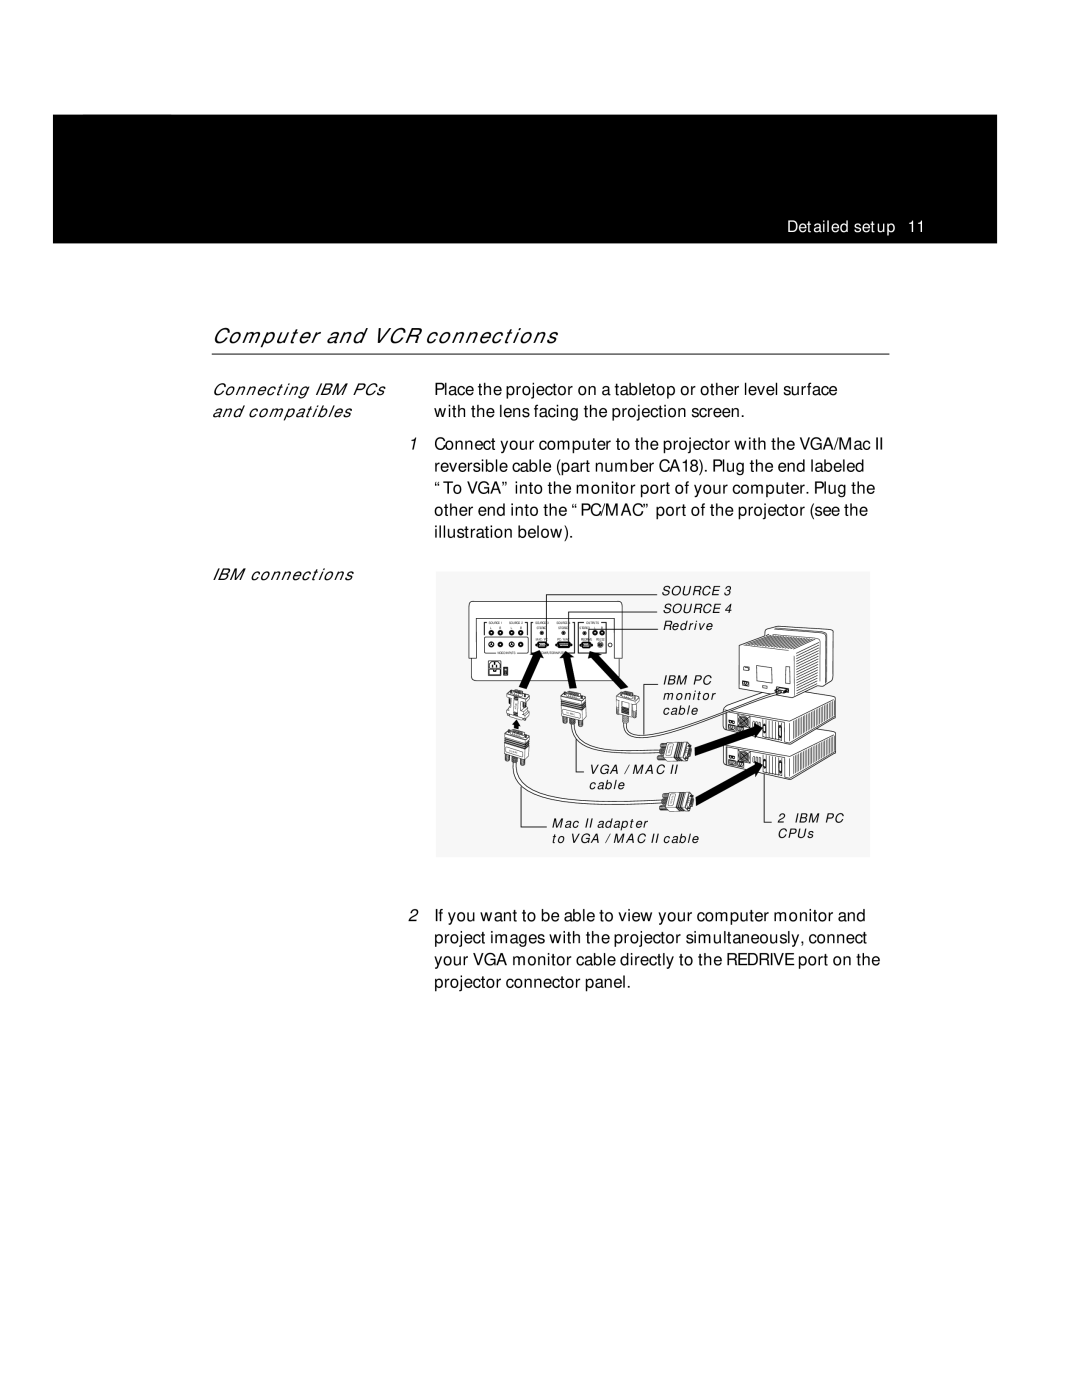
Computer and VCR connections
Labeled To VGA into the projector MAC/PC port see
To Mac into the computer monitor port. Plug the end
Panel see the illustration below
Input composite jacks yellow on the projector connector
Connect one of the yellow RCA composite video cable
Video source. Connect the yellow plug at the other end
Use Sources 1 and 2 to connect
Power receptacle and AC power switch
Supplying power to the projector
Turning on the projector
Using the projector
Focus the projected image with the Focus control either
On the control panel or remote control. Adjust the image
Size by using the Zoom control on the control panel or
Want to adjust the rear feet of the projector to position
Control-panel keys
Adjusts the brightness and contrast
Image, when used with the cursor
Decreases or increases the volume
Adjusts the focus of the image
Using the remote control
Bass of the source connected to
Controls the volume, balance, treble
Brightness, contrast, tint, phase
Laser pointer Serves as a pointing device
Zoom + Zooms in and out. Press + to make
Focus + Adjusts the focus of the image
Menu selections
Resets all adjustments to
Select the Setup menu to make adjustments to
Following settings
Or rear projection mode
Image optimization
Examine the projected image for horizontal noise bars or
From the projector control panel or remote control, press
Using the cursor pad, scroll through the menu selections
Adjust brightness and contrast. The correct combination
Control panel or remote control commands, you can
Use the Tint option to make the adjustments
Adjust the color balance of the projected image
Changes from the default setting are stored in memory for
Storage, cleaning and care
Maintenance
Replacing the lamp assembly
Align the lamp-assembly slide rails with the slide-rail
Unlock the lamp assembly by rotating the locking key on
Half revolution. Grasp the wire handle and gently pull
Lamp assembly straight out of the unit
Troubleshooting
Troubleshooting guide
Symptom Cause Solution
Where to get help
Your computer dealer
If at any time you need help
Brasil
Polaroid Offices and Service Centers
New Zealand
One Year Warranty
Maintenance
OG45
Replacement product
Optional accessory
Appendix a Parts
Appendix a
Appendix B Standards