Polycom RMX 4000 Hardware Guide
Using the Modified PMC Compatible Ejector Lever
On the RMX 4000 most components are fitted with identical ejector levers that are used to release or fasten the component’s to their slot.
This ejector lever can be moved to 3 positions:
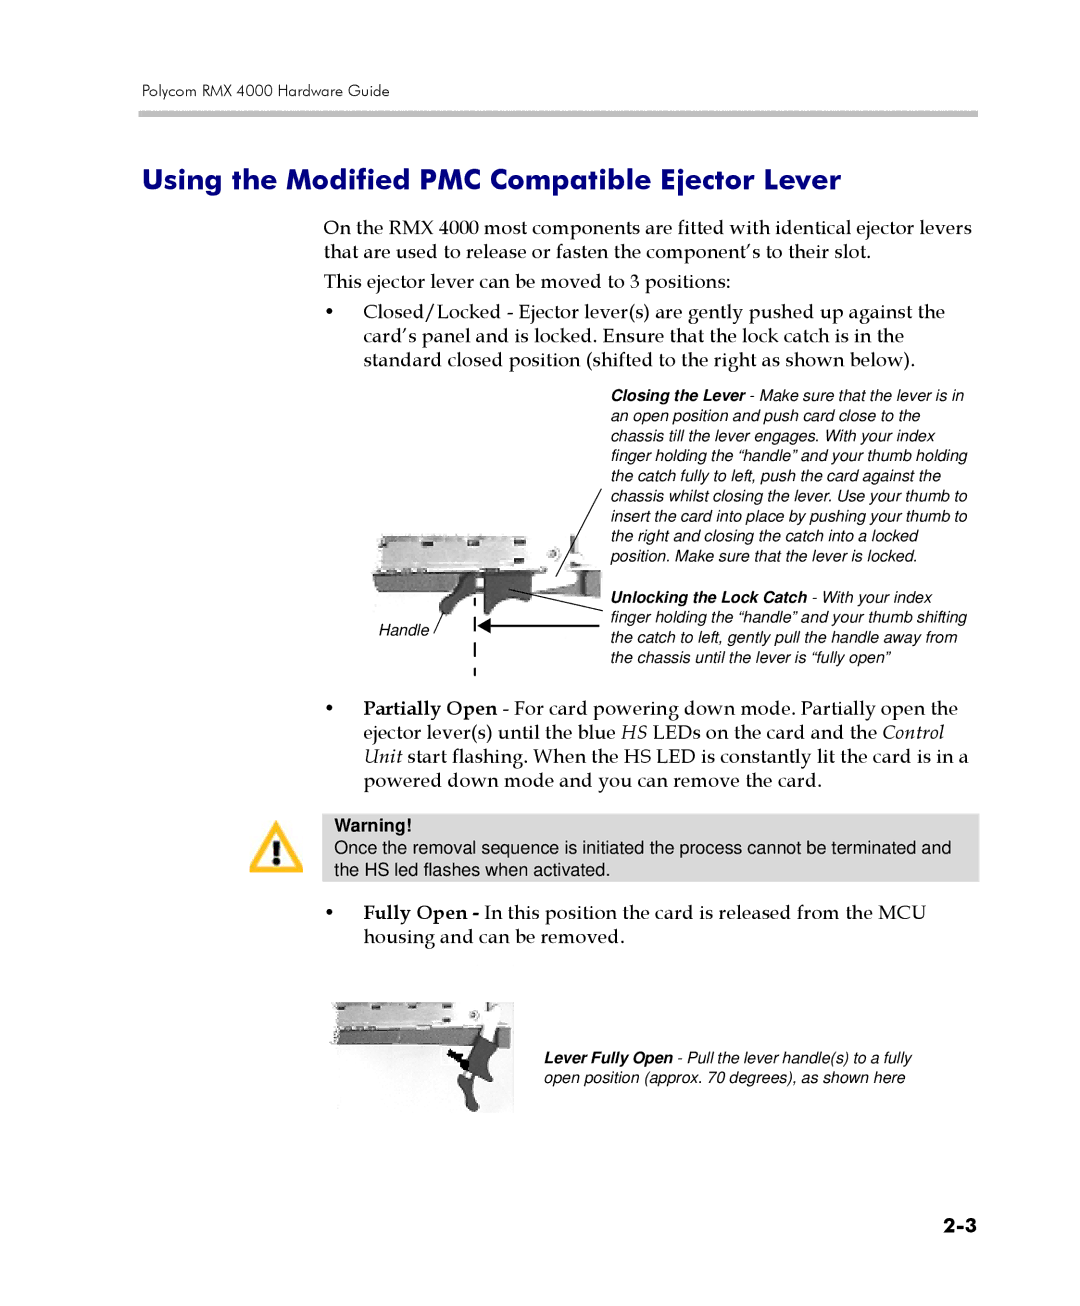
•Closed/Locked - Ejector lever(s) are gently pushed up against the card’s panel and is locked. Ensure that the lock catch is in the standard closed position (shifted to the right as shown below).
Handle 
Closing the Lever - Make sure that the lever is in an open position and push card close to the chassis till the lever engages. With your index finger holding the “handle” and your thumb holding the catch fully to left, push the card against the chassis whilst closing the lever. Use your thumb to insert the card into place by pushing your thumb to the right and closing the catch into a locked position. Make sure that the lever is locked.
Unlocking the Lock Catch - With your index finger holding the “handle” and your thumb shifting the catch to left, gently pull the handle away from the chassis until the lever is “fully open”
•Partially Open - For card powering down mode. Partially open the ejector lever(s) until the blue HS LEDs on the card and the Control Unit start flashing. When the HS LED is constantly lit the card is in a powered down mode and you can remove the card.
Warning!
Once the removal sequence is initiated the process cannot be terminated and the HS led flashes when activated.
•Fully Open - In this position the card is released from the MCU housing and can be removed.
Lever Fully Open - Pull the lever handle(s) to a fully open position (approx. 70 degrees), as shown here