Polycom RMX 4000 Hardware Guide
•Always keep the rack’s trays and card’s slots closed when not servicing, to maintain proper cooling.
Installing the RMX 4000
The following procedures have to be performed to install the RMX 4000 in your site:
•Unpacking the RMX 4000
•Installing the RMX in a rack or as a standalone
•Connecting the RMX 4000 to the power source
•Connecting the network (LAN, IP and ISDN) cables to the RMX
Unpacking the RMX 4000
To unpack and lift the RMX 4000:
1When you receive the RMX 4000 packing case, inspect the equipment for damage and verify that the components match the packing slip.
2The RMX 4000 is shipped in a packing case with Stratocell® packaging, and the top cover must be unlocked and lifted where the RMX is placed on the inside of an
3Open the top cover of the packing case.
Two boxes are placed on the top Stratocell®, labelled:
—Installation Accessories. This kit contains the power cables and a USB Key.
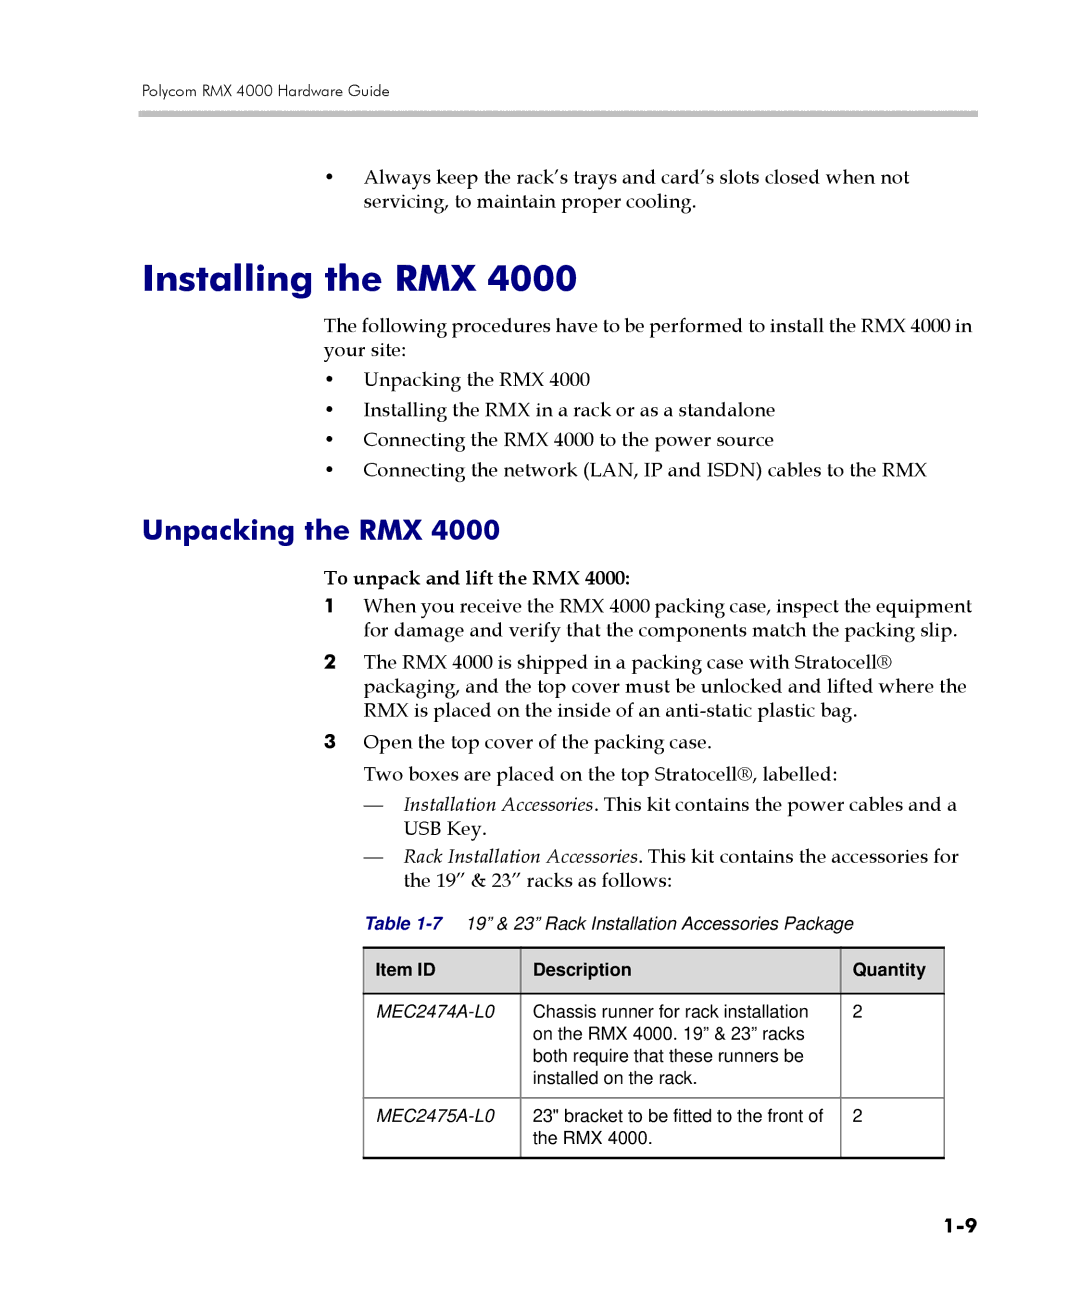
—Rack Installation Accessories. This kit contains the accessories for the 19” & 23” racks as follows:
Table
Item ID | Description | Quantity |
|
|
|
Chassis runner for rack installation | 2 | |
| on the RMX 4000. 19” & 23” racks |
|
| both require that these runners be |
|
| installed on the rack. |
|
|
|
|
23" bracket to be fitted to the front of | 2 | |
| the RMX 4000. |
|
|
|
|