Assembling the Treadmill | 27 |
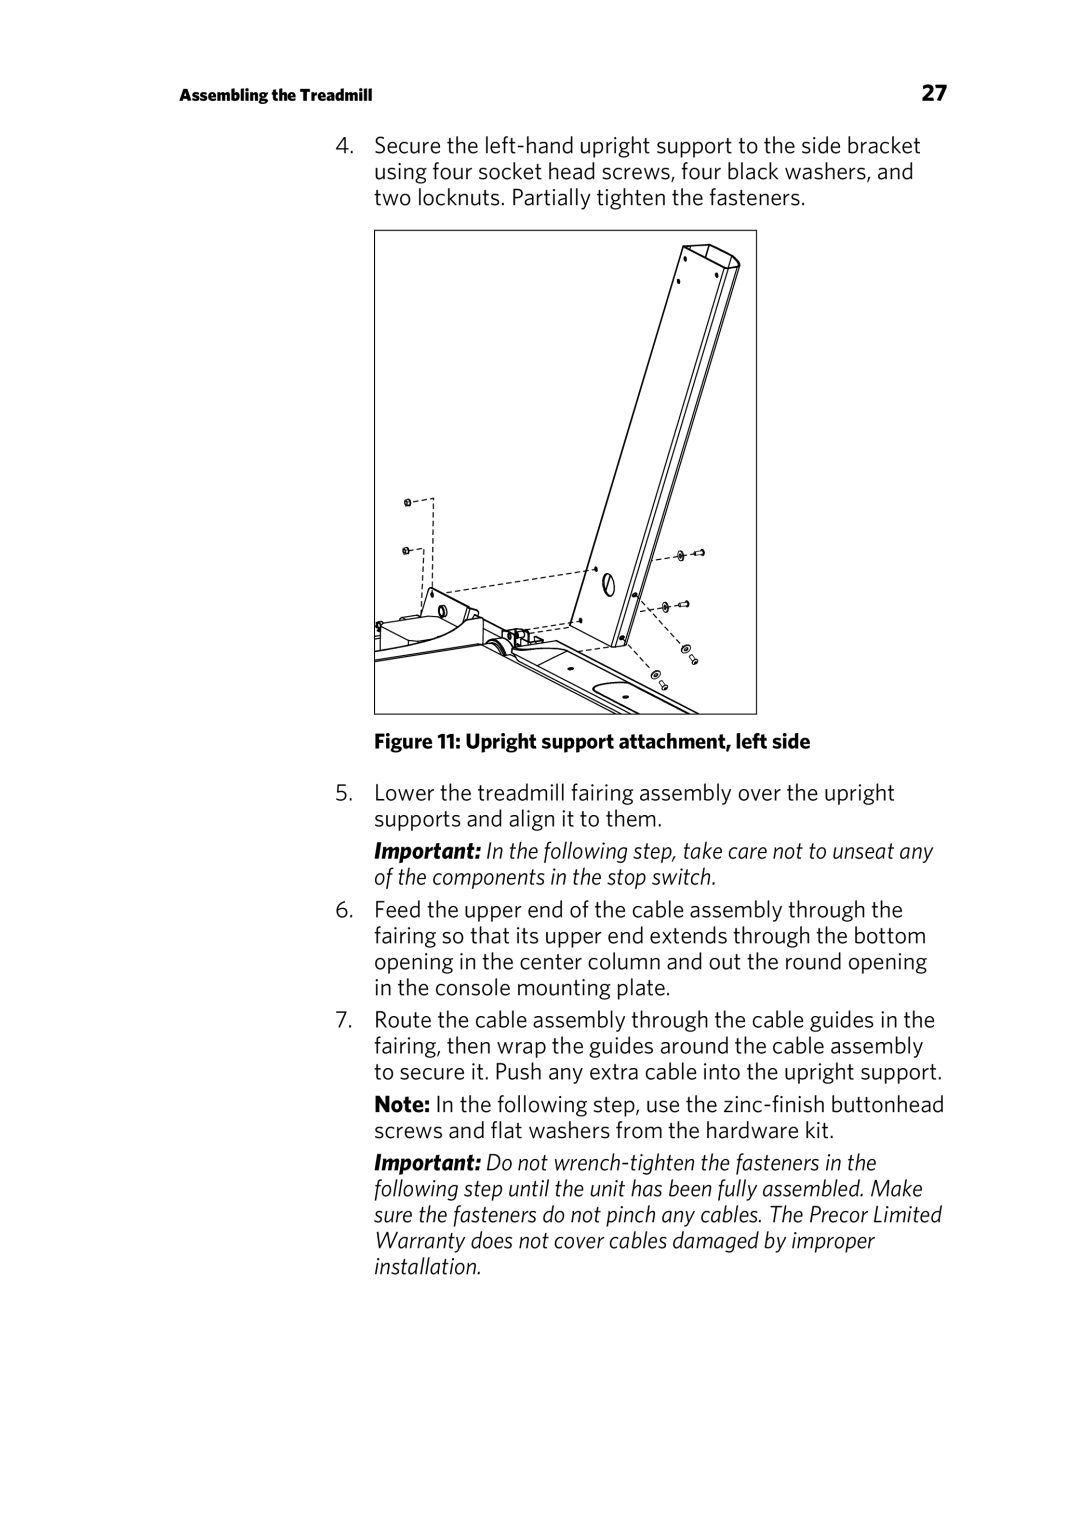
4.Secure the
Figure 11: Upright support attachment, left side
5.Lower the treadmill fairing assembly over the upright supports and align it to them.
Important: In the following step, take care not to unseat any of the components in the stop switch.
6.Feed the upper end of the cable assembly through the fairing so that its upper end extends through the bottom opening in the center column and out the round opening in the console mounting plate.
7.Route the cable assembly through the cable guides in the fairing, then wrap the guides around the cable assembly to secure it. Push any extra cable into the upright support.
Note: In the following step, use the
Important: Do not
