Installing the Console | 47 |
4.Line up the two small tabs at the bottom of the console’s back cover with the slots at the bottom of the console case. Insert the tabs into the slots.
5.Insert the two
Important: Use caution not to pinch the cables between the back cover and PVS mounting screw heads.
6.Fully tighten the four mounting screws (partially tightened in step 3) using a
Reassembling the Treadmill Fairing
After the console is in place, reattach the two cover panels of the treadmill fairing.
Important: In the following procedure, do not allow the fasteners to break or pinch any cables.
To reassemble the fairing:
1.Verify that the cable assembly is secure inside the cable clips and that the ferrite bead on the base unit data cable is tied securely into place in the left arm of the treadmill.
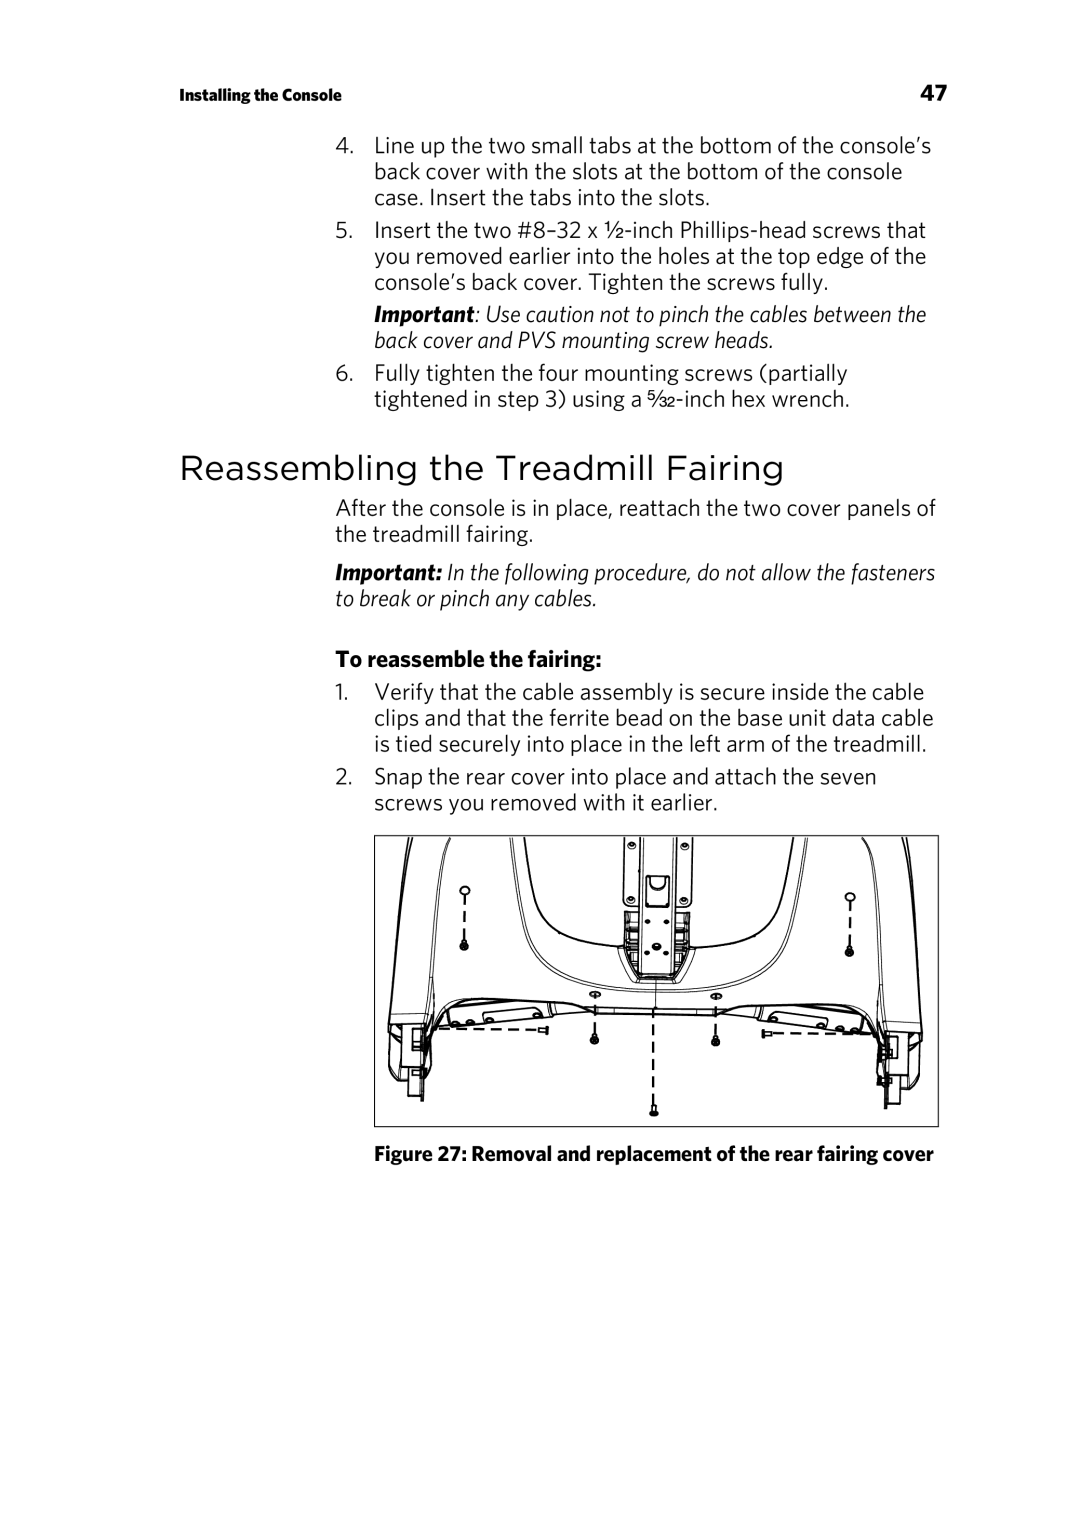
2.Snap the rear cover into place and attach the seven screws you removed with it earlier.
