Date and Time Display (continued)
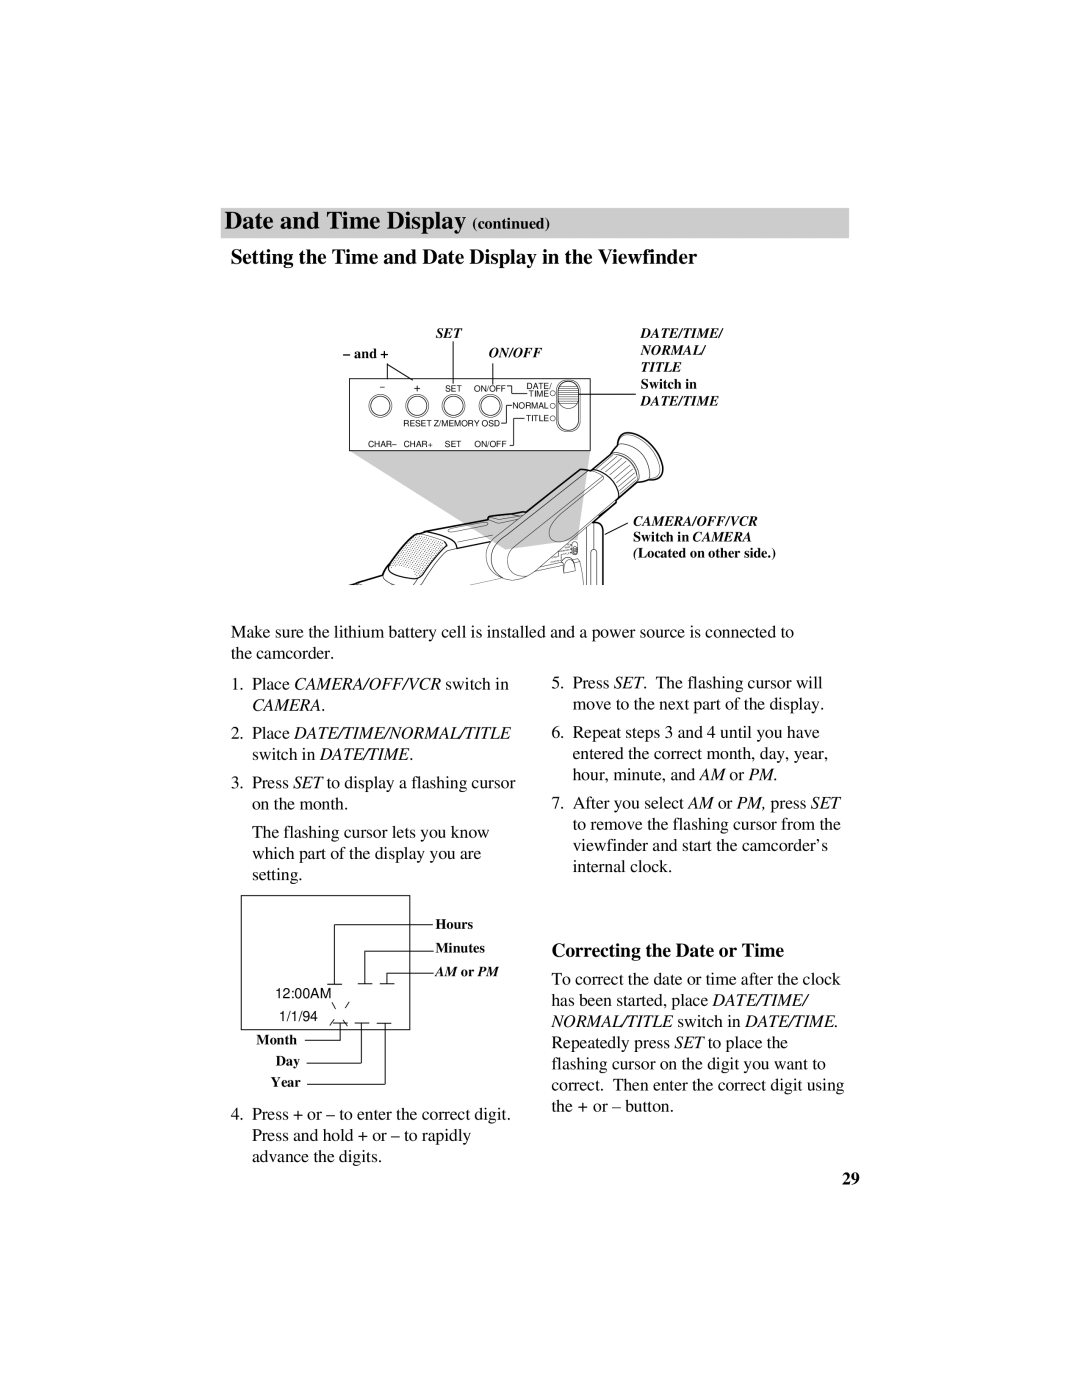
Setting the Time and Date Display in the Viewfinder
| SET |
|
– and + | ON/OFF | |
– | SET ON/OFF | DATE/ |
|
| TIME |
|
| NORMAL |
| RESET Z/MEMORY OSD | TITLE |
|
| |
DATE/TIME/
NORMAL/ TITLE Switch in
DATE/TIME
CHAR– CHAR+ SET ON/OFF
TE/
TIME
NORMAL
TITLE
OSD
ON/OFF
CAMERA/OFF/VCR Switch in CAMERA (Located on other side.)
Make sure the lithium battery cell is installed and a power source is connected to the camcorder.
1.Place CAMERA/OFF/VCR switch in
CAMERA.
2.Place DATE/TIME/NORMAL/TITLE switch in DATE/TIME.
3.Press SET to display a flashing cursor on the month.
The flashing cursor lets you know which part of the display you are setting.
Hours
Minutes
AM or PM
12:00AM
1/1/94
Month
Day
Year
4.Press + or – to enter the correct digit. Press and hold + or – to rapidly advance the digits.
5.Press SET. The flashing cursor will move to the next part of the display.
6.Repeat steps 3 and 4 until you have entered the correct month, day, year, hour, minute, and AM or PM.
7.After you select AM or PM, press SET to remove the flashing cursor from the viewfinder and start the camcorder’s internal clock.
Correcting the Date or Time
To correct the date or time after the clock has been started, place DATE/TIME/ NORMAL/TITLE switch in DATE/TIME. Repeatedly press SET to place the flashing cursor on the digit you want to correct. Then enter the correct digit using the + or – button.
29