First-Time Operation
2. Attach the adapter/charger.
T
W | INST. |
ZOOM |
FADE | EIS |
FOCUS | 16X9 |
F | |
N |
|
DATE/TITLE | DCIN |
| 6V |
| PLAY |
|
REW |
| DISPLAY |
EDIT |
| |
| SEARCH | F.F. |
| STOP |
|
DC IN 6V Jack on Side of Camcorder
Adapter/Charger’s |
|
DC Cable | Adapter/Charger |
![]() OPEN
OPEN
DC OUTPUT | POWER | REFRESH |
| ||
|
| CHARGE |
Jack |
|
|
POWER Indicator |
| To AC |
|
| 50/60 Hz. |
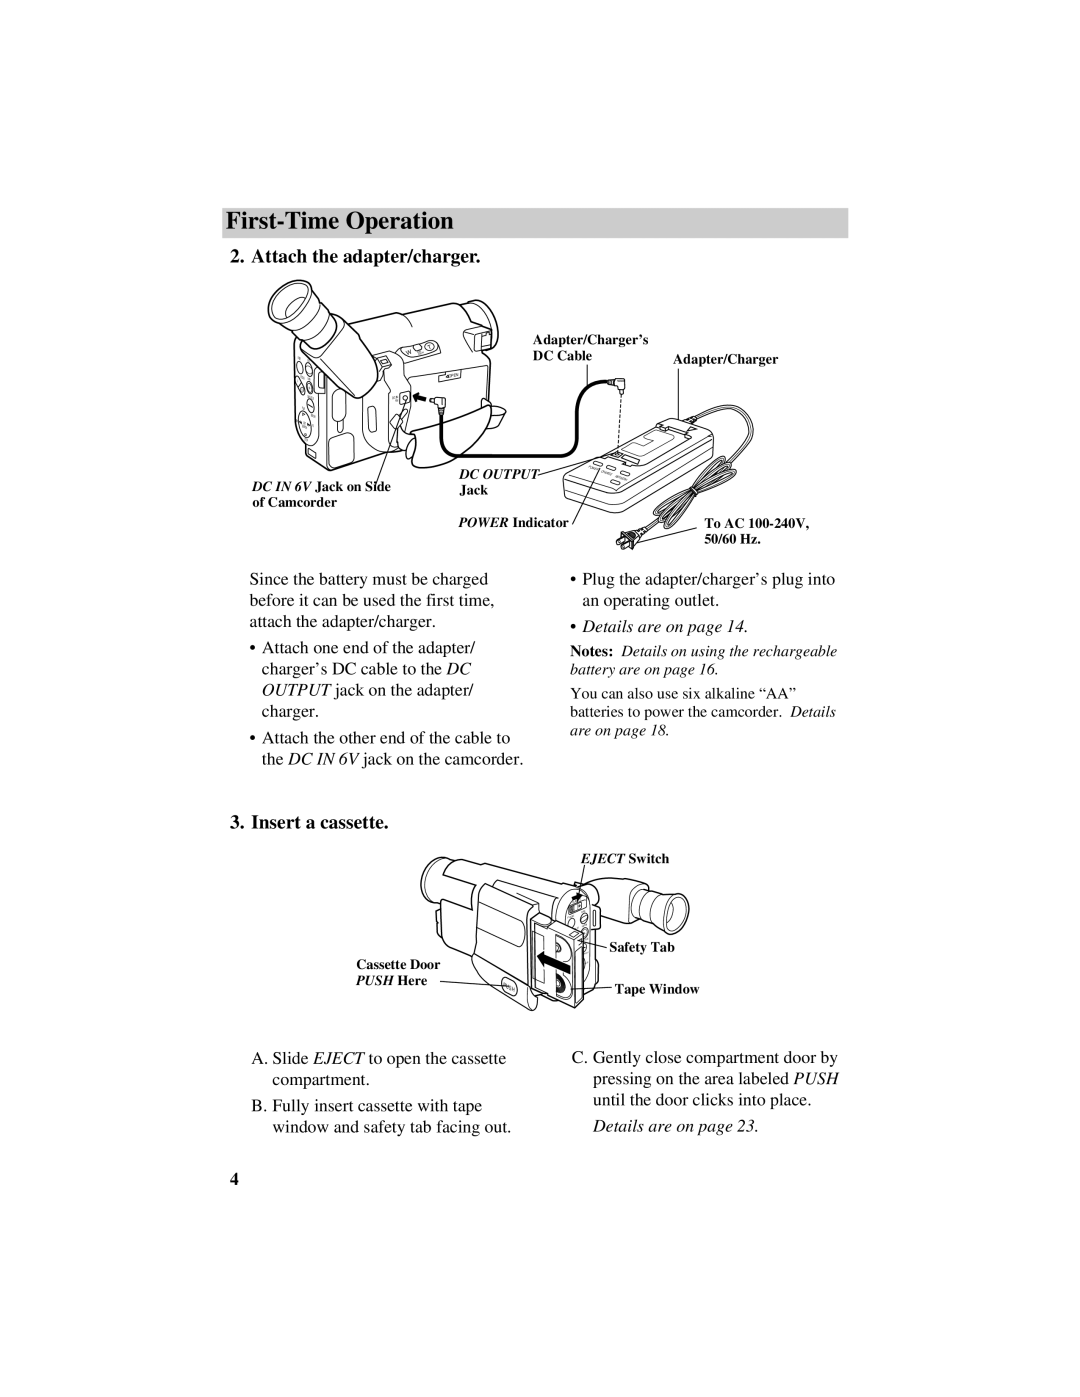
Since the battery must be charged before it can be used the first time, attach the adapter/charger.
•Attach one end of the adapter/ charger’s DC cable to the DC OUTPUT jack on the adapter/ charger.
•Attach the other end of the cable to the DC IN 6V jack on the camcorder.
•Plug the adapter/charger’s plug into an operating outlet.
•Details are on page 14.
Notes: Details on using the rechargeable battery are on page 16.
You can also use six alkaline “AA” batteries to power the camcorder. Details are on page 18.
3. Insert a cassette.
Cassette Door
PUSH Here
PUSH
EJECT Switch
EJECT |
|
|
| EIS |
|
FADE |
|
|
| 16X9 |
|
FOCUS |
|
|
F |
|
|
N DATE/TITLE | Safety Tab | |
PLAY | DISPLAY | |
| F.F. |
|
Tape Window
A. Slide EJECT to open the cassette compartment.
B. Fully insert cassette with tape window and safety tab facing out.
C. Gently close compartment door by pressing on the area labeled PUSH until the door clicks into place.
Details are on page 23.
4
