ADJUSTMENTS
TO REPLACE THE SAW BLADE
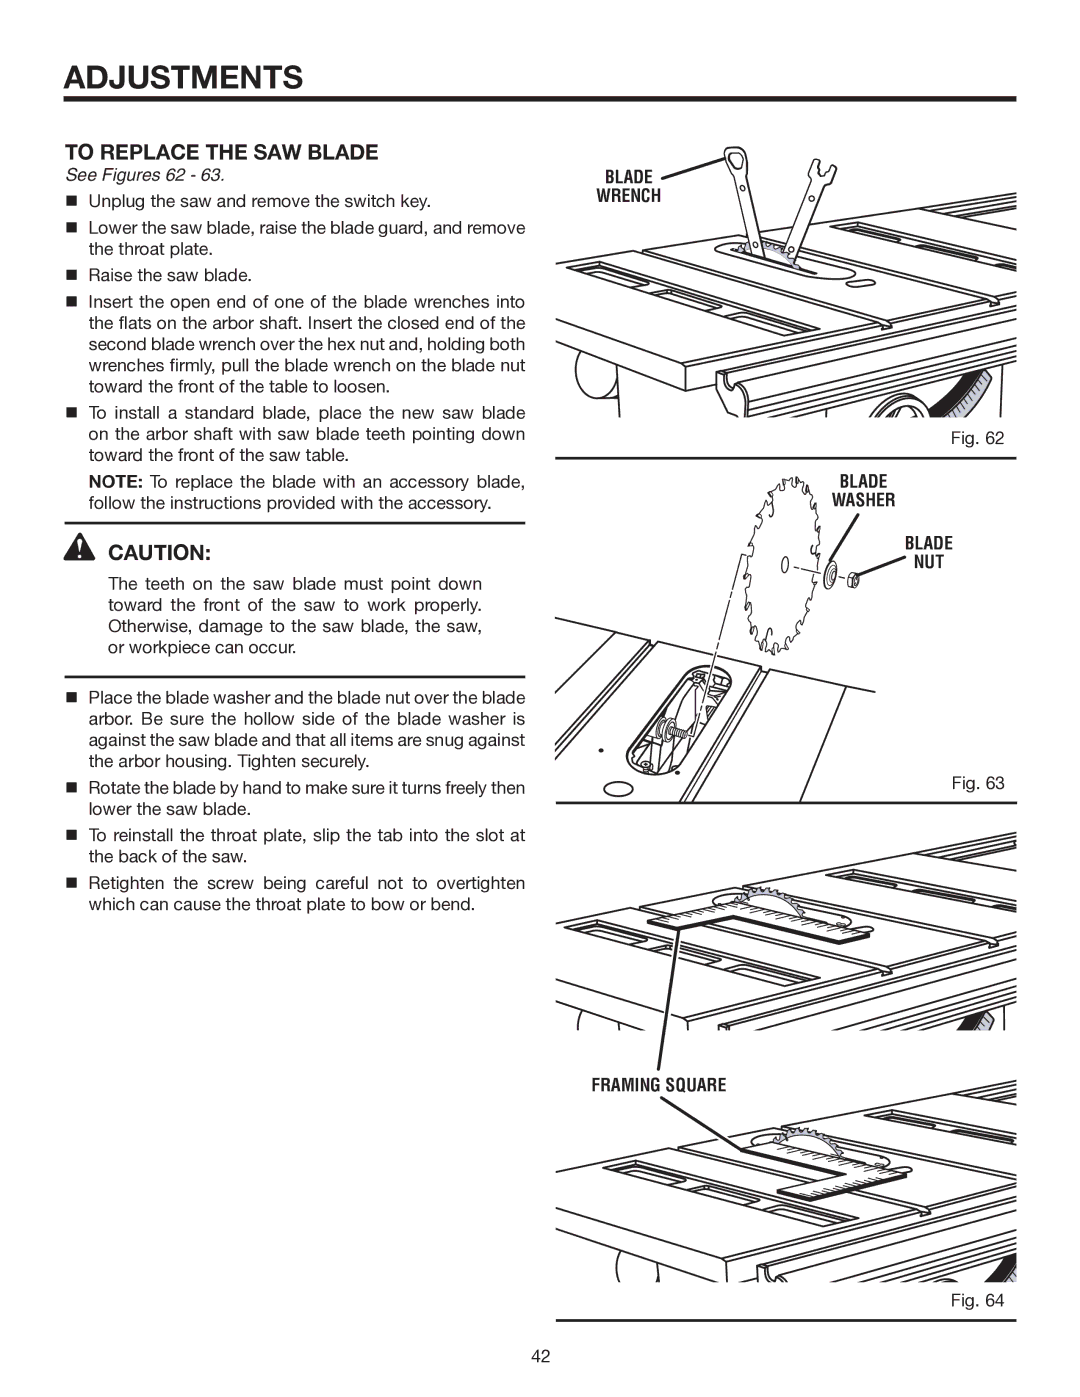
See Figures 62 - 63.
Unplug the saw and remove the switch key.
Lower the saw blade, raise the blade guard, and remove the throat plate.
Raise the saw blade.
Insert the open end of one of the blade wrenches into the flats on the arbor shaft. Insert the closed end of the second blade wrench over the hex nut and, holding both wrenches firmly, pull the blade wrench on the blade nut toward the front of the table to loosen.
To install a standard blade, place the new saw blade on the arbor shaft with saw blade teeth pointing down toward the front of the saw table.
NOTE: To replace the blade with an accessory blade, follow the instructions provided with the accessory.
CAUTION:
The teeth on the saw blade must point down toward the front of the saw to work properly. Otherwise, damage to the saw blade, the saw, or workpiece can occur.
Place the blade washer and the blade nut over the blade arbor. Be sure the hollow side of the blade washer is against the saw blade and that all items are snug against the arbor housing. Tighten securely.
Rotate the blade by hand to make sure it turns freely then lower the saw blade.
To reinstall the throat plate, slip the tab into the slot at the back of the saw.
Retighten the screw being careful not to overtighten which can cause the throat plate to bow or bend.
BLADE
WRENCH
Fig. 62
BLADE
WASHER
BLADE
 NUT
NUT
Fig. 63
FRAMING SQUARE
Fig. 64
42