ADJUSTMENTS
HEELING (PARALLELING) THE BLADE TO THE MITER GAUGE GROOVE
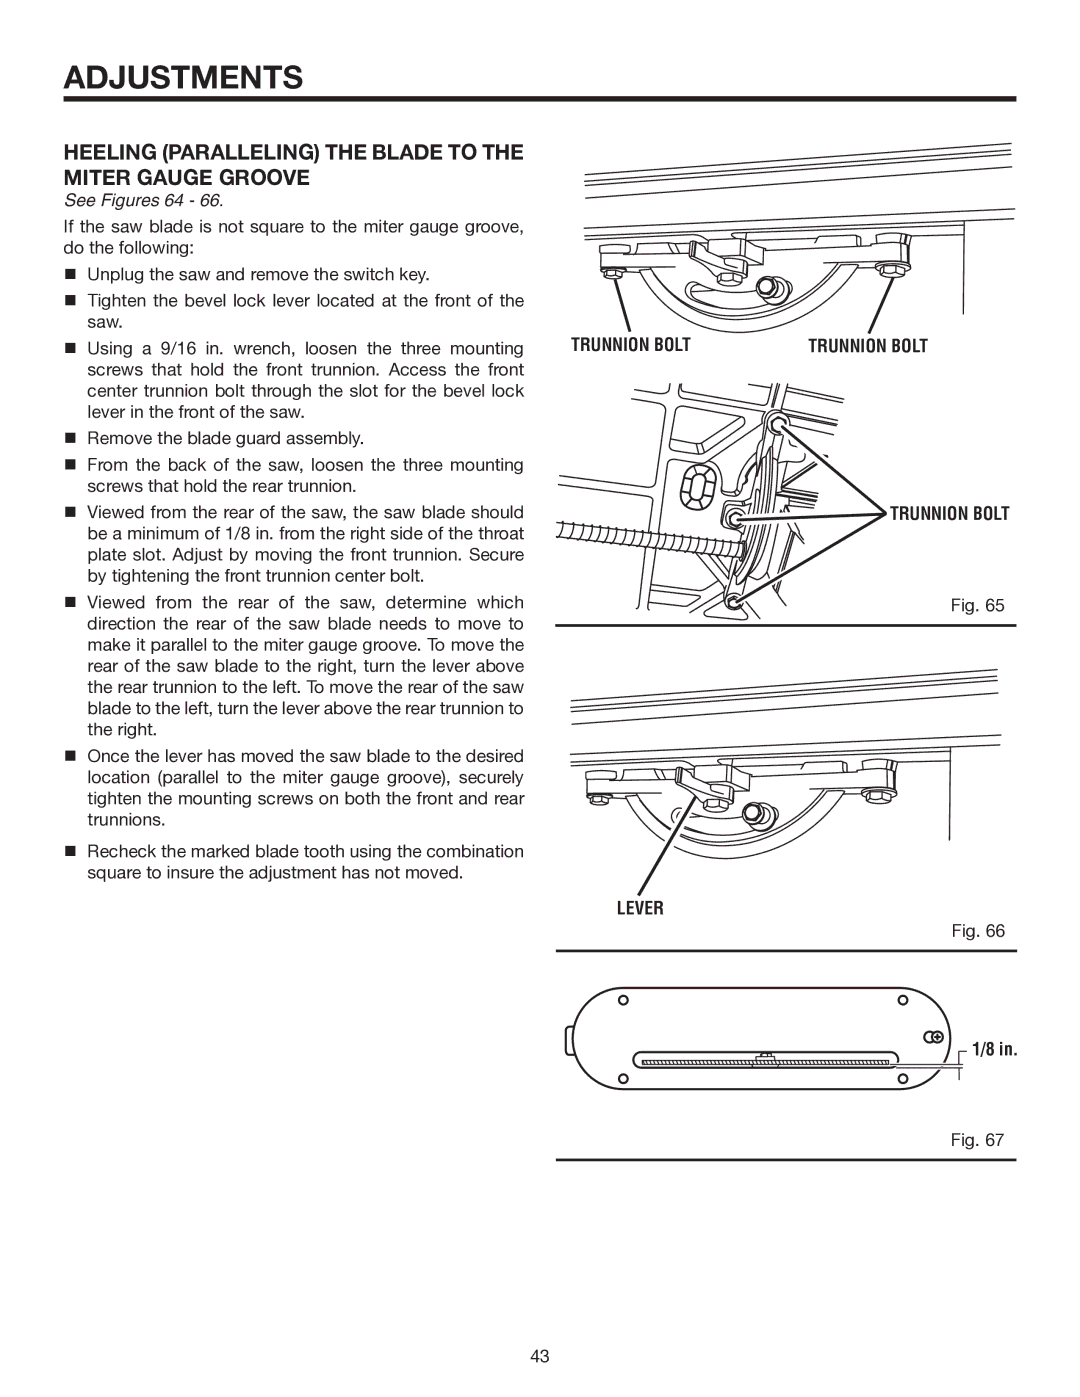
See Figures 64 - 66.
If the saw blade is not square to the miter gauge groove, do the following:
Unplug the saw and remove the switch key.
Tighten the bevel lock lever located at the front of the saw.
Using a 9/16 in. wrench, loosen the three mounting screws that hold the front trunnion. Access the front center trunnion bolt through the slot for the bevel lock lever in the front of the saw.
Remove the blade guard assembly.
From the back of the saw, loosen the three mounting screws that hold the rear trunnion.
Viewed from the rear of the saw, the saw blade should be a minimum of 1/8 in. from the right side of the throat plate slot. Adjust by moving the front trunnion. Secure by tightening the front trunnion center bolt.
Viewed from the rear of the saw, determine which direction the rear of the saw blade needs to move to make it parallel to the miter gauge groove. To move the rear of the saw blade to the right, turn the lever above the rear trunnion to the left. To move the rear of the saw blade to the left, turn the lever above the rear trunnion to the right.
Once the lever has moved the saw blade to the desired location (parallel to the miter gauge groove), securely tighten the mounting screws on both the front and rear trunnions.
Recheck the marked blade tooth using the combination square to insure the adjustment has not moved.
TRUNNION BOLT | TRUNNION BOLT |


 TRUNNION BOLT
Fig. 65
LEVER
Fig. 66
1/8 in.
Fig. 67
43