16.FUNCTION button
This button takes you to the settings screen for various parameters.
To raise the pitch of the keyboard tone in steps of one octave, hold down [SHIFT] and press [FUNCTION]. (p. 11)
17.KEYBOARD section
Use these buttons to switch the keyboard mode. (p. 9, p. 11)
18.MODE section
Use these buttons to switch between Tone, Style, Performance, and Song modes.
19.USB button
The
20.
Use these buttons to select tones by category. (p.
Panel Descriptions
21.FAVORITE button
Use this button to access favorite tones. (p. 11)
22.Bender/Modulation lever
You can raise or lower the pitch by moving this lever to the left or right. Push the lever away from yourself to apply modulation (normally vibrato) to the sound. (p. 17)
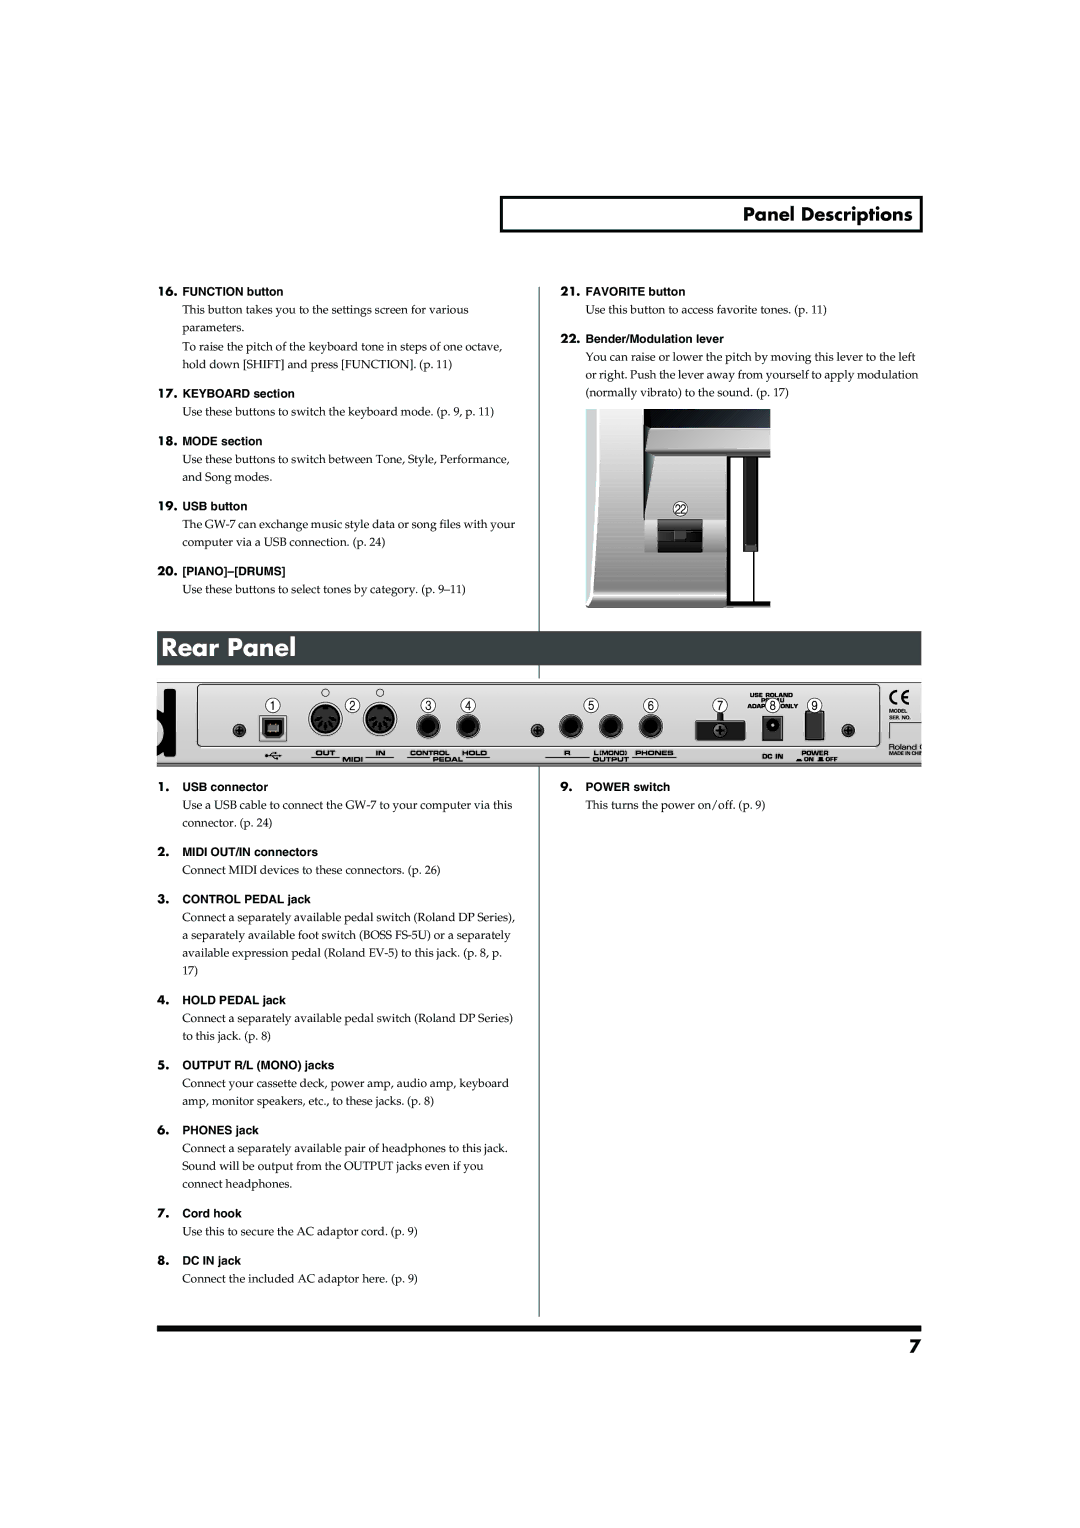
Rear Panel
1.USB connector
Use a USB cable to connect the
2.MIDI OUT/IN connectors
Connect MIDI devices to these connectors. (p. 26)
3.CONTROL PEDAL jack
Connect a separately available pedal switch (Roland DP Series), a separately available foot switch (BOSS
17)
4.HOLD PEDAL jack
Connect a separately available pedal switch (Roland DP Series) to this jack. (p. 8)
5.OUTPUT R/L (MONO) jacks
Connect your cassette deck, power amp, audio amp, keyboard amp, monitor speakers, etc., to these jacks. (p. 8)
6.PHONES jack
Connect a separately available pair of headphones to this jack. Sound will be output from the OUTPUT jacks even if you connect headphones.
7.Cord hook
Use this to secure the AC adaptor cord. (p. 9)
8.DC IN jack
Connect the included AC adaptor here. (p. 9)
9.POWER switch
This turns the power on/off. (p. 9)
7