Panel Descriptions
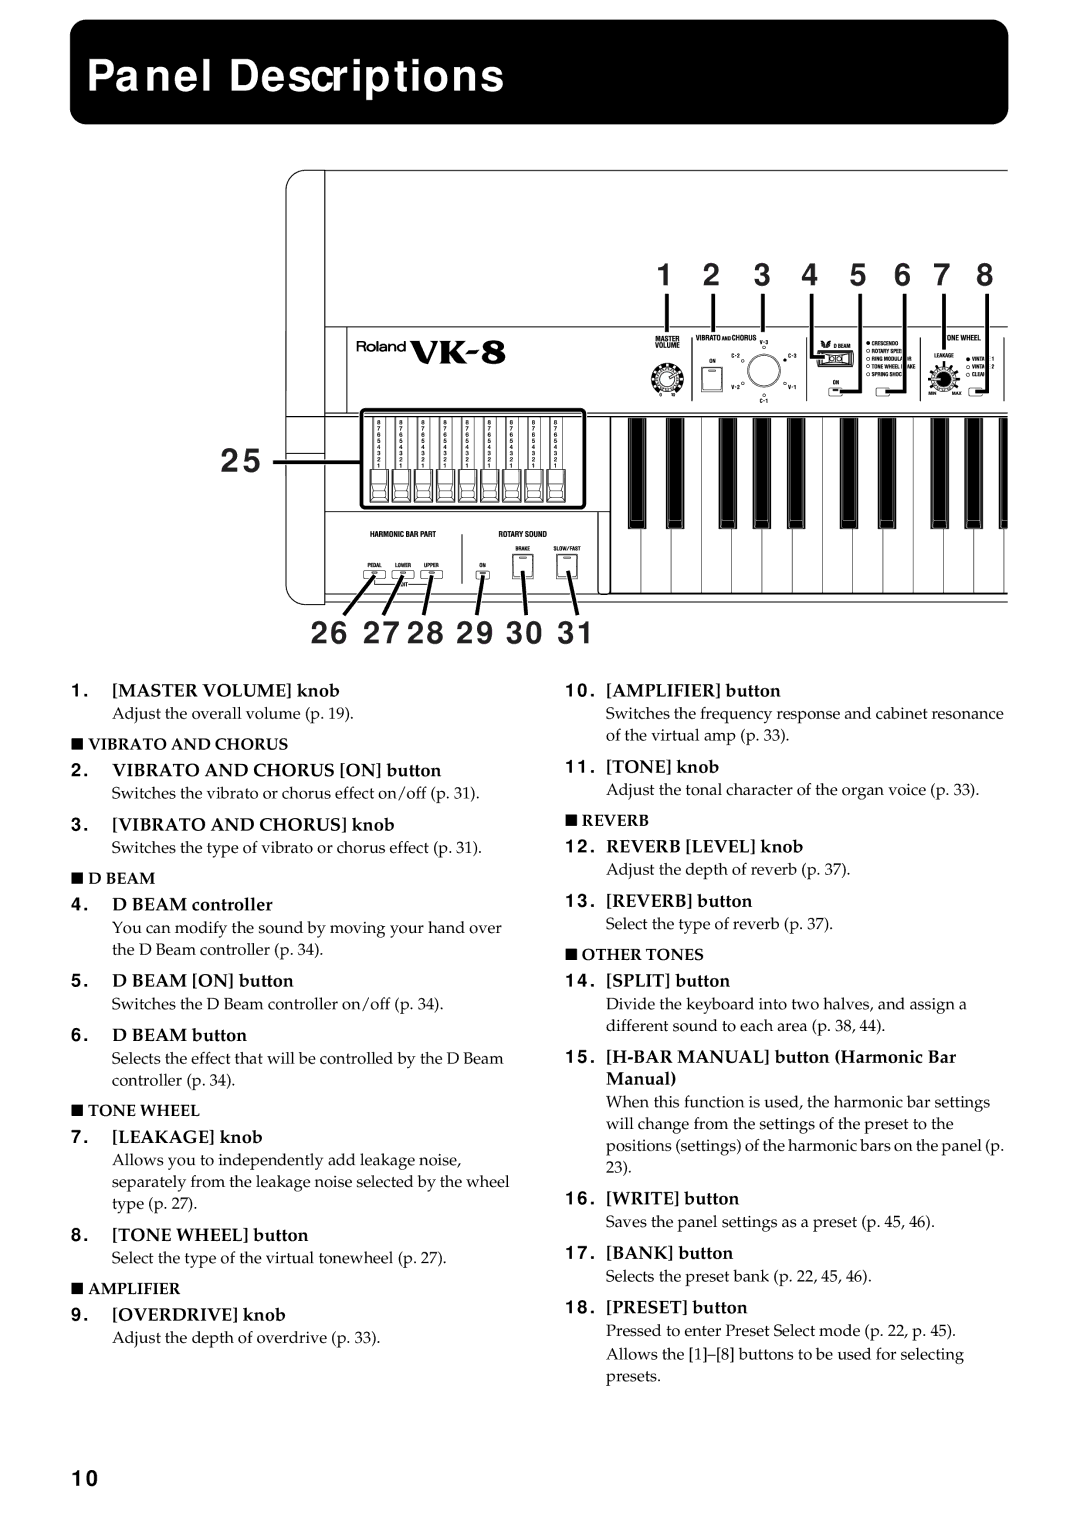
1 | 2 | 3 | 4 | 5 | 6 7 | 8 |
25 |
26 2728 29 30 31 |
1.[MASTER VOLUME] knob
Adjust the overall volume (p. 19).
■VIBRATO AND CHORUS
10.[AMPLIFIER] button
Switches the frequency response and cabinet resonance of the virtual amp (p. 33).
2. | VIBRATO AND CHORUS [ON] button | 11. | [TONE] knob |
| Switches the vibrato or chorus effect on/off (p. 31). |
| Adjust the tonal character of the organ voice (p. 33). |
3. | [VIBRATO AND CHORUS] knob | ■ REVERB | |
| Switches the type of vibrato or chorus effect (p. 31). | 12. | REVERB [LEVEL] knob |
■ D BEAM |
| Adjust the depth of reverb (p. 37). | |
|
| ||
4.D BEAM controller
You can modify the sound by moving your hand over the D Beam controller (p. 34).
13.[REVERB] button
Select the type of reverb (p. 37).
■OTHER TONES
5.D BEAM [ON] button
Switches the D Beam controller on/off (p. 34).
6.D BEAM button
Selects the effect that will be controlled by the D Beam controller (p. 34).
■TONE WHEEL
7.[LEAKAGE] knob
Allows you to independently add leakage noise, separately from the leakage noise selected by the wheel type (p. 27).
8.[TONE WHEEL] button
Select the type of the virtual tonewheel (p. 27).
■AMPLIFIER
9.[OVERDRIVE] knob
Adjust the depth of overdrive (p. 33).
14.[SPLIT] button
Divide the keyboard into two halves, and assign a different sound to each area (p. 38, 44).
15.[H-BAR MANUAL] button (Harmonic Bar Manual)
When this function is used, the harmonic bar settings will change from the settings of the preset to the positions (settings) of the harmonic bars on the panel (p. 23).
16.[WRITE] button
Saves the panel settings as a preset (p. 45, 46).
17.[BANK] button
Selects the preset bank (p. 22, 45, 46).
18.[PRESET] button
Pressed to enter Preset Select mode (p. 22, p. 45). Allows the
10