QUICK SETUP LIST – Parallel Units
Parallel Set-Up
1.Connect the Caretaker Plus port 0 to your printer with the correct cable. Connect your computers to ports
2.Connect the power adapter to the Caretaker Plus and turn the Caretaker Plus on. Verify that the power LED is on. The other LEDs light in various patterns as the power up tests are performed and then all go off. The ERROR LED will be lit for any errors.
3.For PCs you should install your software package(s) to use the parallel port when printing. Also put the following statement in your AUTOEXEC.Bat file:
MODE LPT1:,,P
This statement will set the parallel port for infinite retry.
4.Send data from your application or print program. Data will be routed to the shared device automatically.
5.To optimize your installation, you can later configure any of the programmable parameters such as initialization string, form feed, or the timeout value. See the section on "CONFIGURATION" for further information
Caretaker Plus Rear Panel – Parallel Model
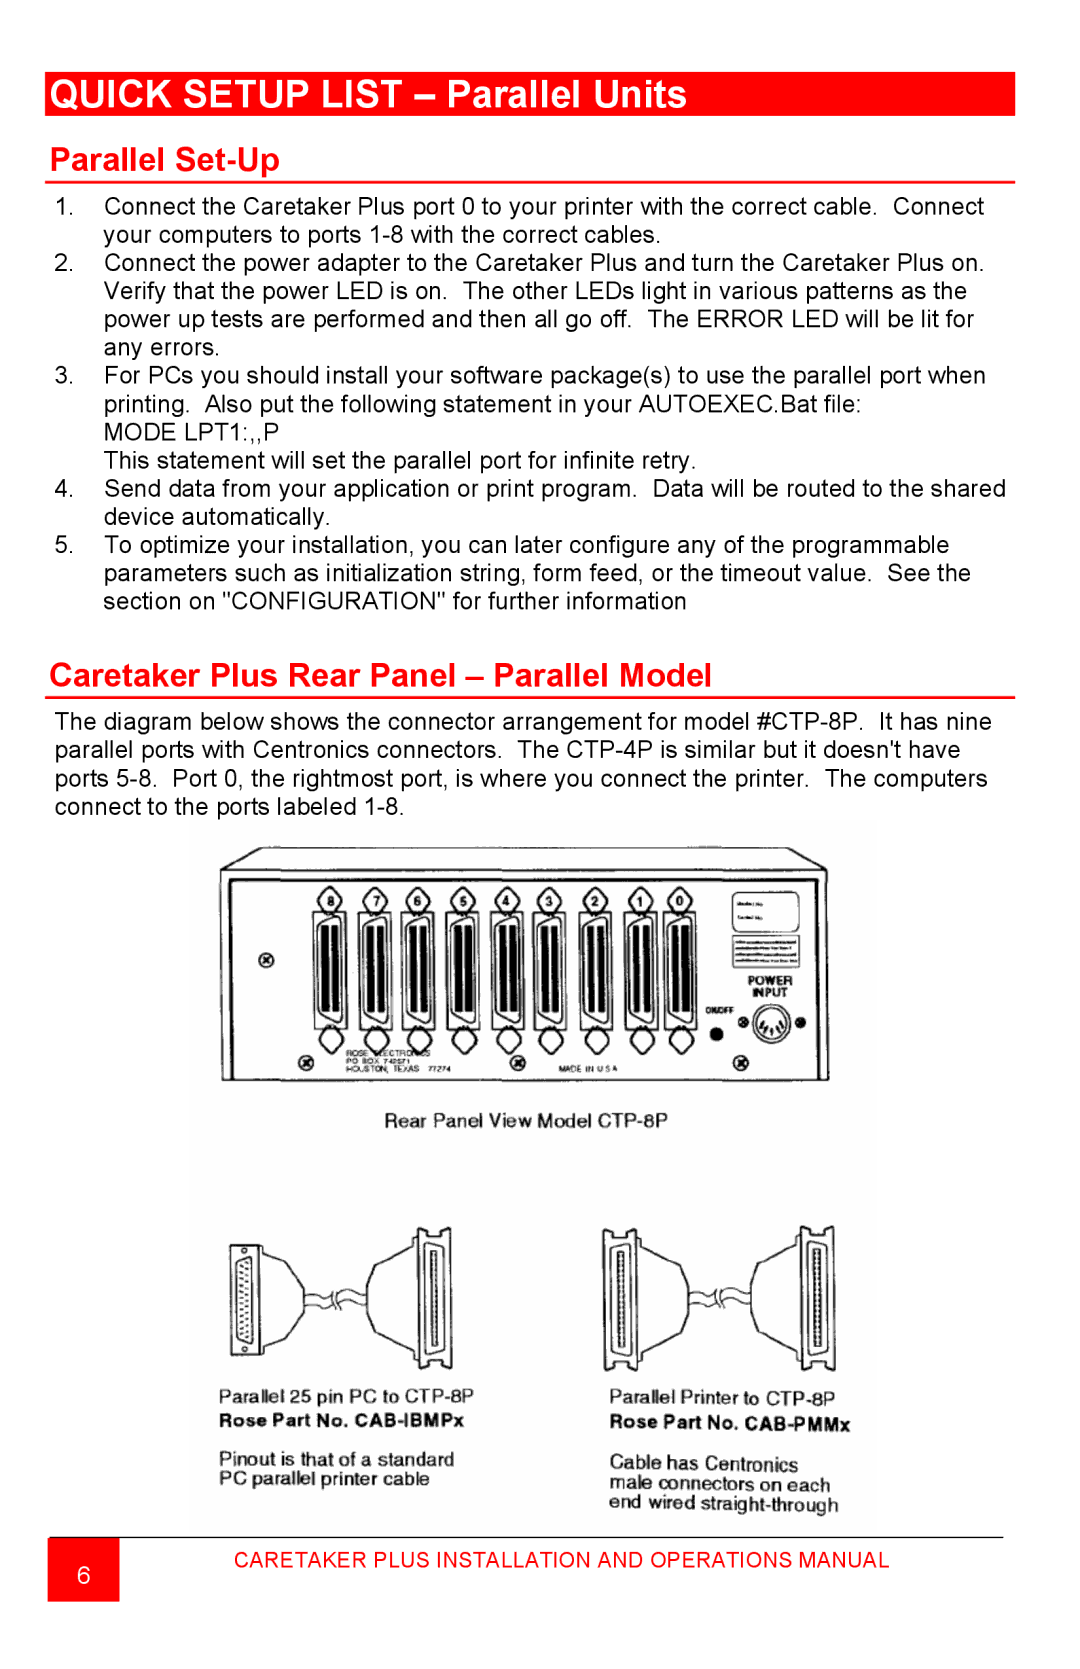
The diagram below shows the connector arrangement for model
6
CARETAKER PLUS INSTALLATION AND OPERATIONS MANUAL